


Makeblock was founded in 2012 in Shenzhen as the world’s first open-source robot and programing platform. With more than 400 mechanical components, electronic modules, and software tools, the company is determined to bring meaningful STEM education opportunities and the maker mindset to the mass consumer market to make a real difference in society’s future with robotics.
Makerblock has a variety of products and one great product is mBot, a robot better fit education and home use. It is simple to use and affordable, you can get mBot for $24 or with bluetooth for $99.
The mBot is designed especially for mBlock Scratch-based language to help teachers and kids to have hands-on experience about robots and explore STEM education.
mBot overview
Makeblock keeps delivering tutorials about its products and the recent one was a line follower mBot on Insructables.
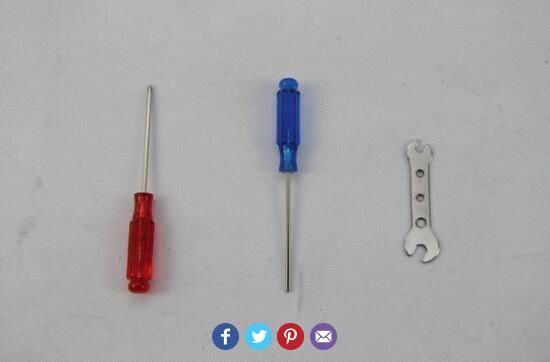
To do this project you need the following tools
Mechanical part list
- 1*Metal Base Plate
- 2*TT Gear Motor
- 2*Wheel
- 2*Tyre
- 1*Plastic Universal Wheel
- 1*Magic Tape 20*30mm
- 6*Brass Stud M4*25
- 14*Socket Cap Screw M4*8
- 6*Nut M4
- 4*Nut M3
- 4*Philip’s Head Screw M3*25
- 2*Tapping Screw M2.2*9.5
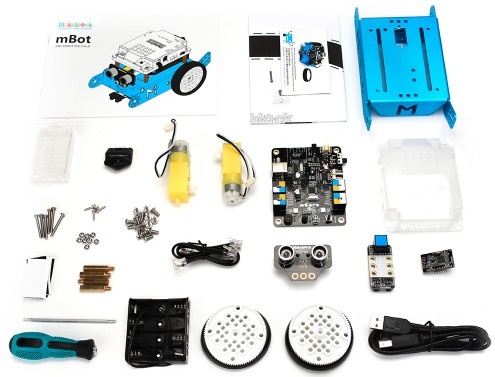
Electronic Modules List
- 1*Arduino Based Control Board
- 1*Me Ultrasonic Sensor V3.0
- 1*Me Line Follower V2.2
- 1*Me Infrared Controller
- 1*Bluetooth
- 1*Battery Holder for (4) AA
- 4*RJ25 Cable
- 1*USB A-Male to B-Male Cable
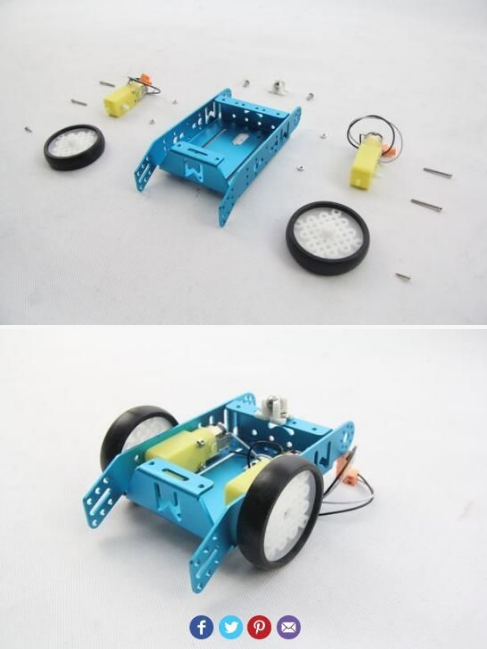
You only have to put each element in the right place and to tighten some screws. The image below shows how to assemble the pieces together.
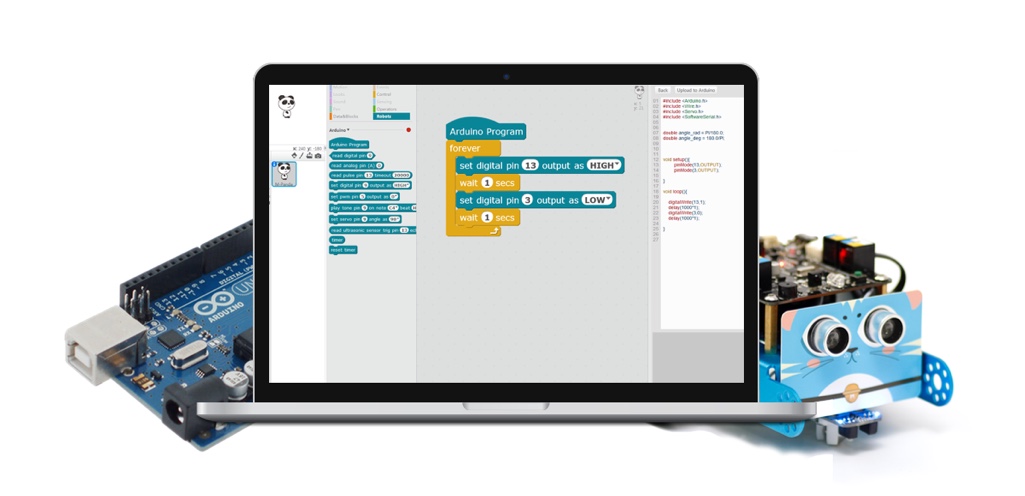
The mBlock is a customized version of scratch. It is easy to use mBlock to interact with electronic modules. To make the project works, you should first program the Control Board (Compatible with Arduino) using this code of mBlock.
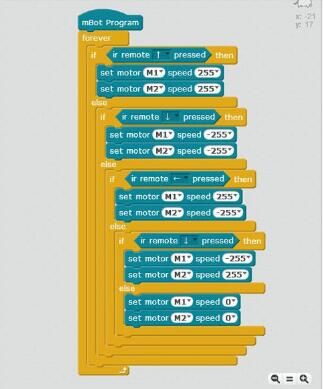
You can also program it using Arduino IDE since it makes it easy to write code, upload it to the I/O board, and interact with mBot. Line following is one simple code for controlling the mBot by Infrared Controller.
#include "mBot.h"
#include "MePort.h"
#include "MeIR.h"
#include "MeDCMotor.h"

MeBoard myBoard(mBot);
double angle_rad = PI/180.0;
double angle_deg = 180.0/PI;
MeIR ir;
MeDCMotor motor_9((MEPORT)9);
MeDCMotor motor_10((MEPORT)10);

void setup() {
 ir.begin();
}

void loop() {
 if(ir.keyPressed(64)){
  motor_9.run(255);
  motor_10.run(255);
 } else {
  if(ir.keyPressed(25)){
   motor_9.run(-255);
   motor_10.run(-255);
  } else {
   if(ir.keyPressed(7)){
    motor_9.run(255);
    motor_10.run(-255);
   } else {
    if(ir.keyPressed(25)){
     motor_9.run(-255);
     motor_10.run(255);
    } else {
     motor_9.run(0);
     motor_10.run(0);
    }
   }
  }
 }
 ir.loop();
}
You can learn more about using Arduino for mBot here.
This is what should mBot do!
You can build your own adventure, play some games or make some functions completed autonomously using mBot, such as playing football, ultrasonic obstacle-avoiding and following line. Makeblock is opening wide doors for innovation by making STEM and hands-on experience available for kids.
A new product from MakerBlock is now live on Kickstarter. AirBlock, the first modular drone that can be turned into a hovercraft, car, and more. You can order this drone from the project’s page for $99.
More details and updates can be reached at the official website. Also you can access codes and source files at Github.
RELATED POSTS
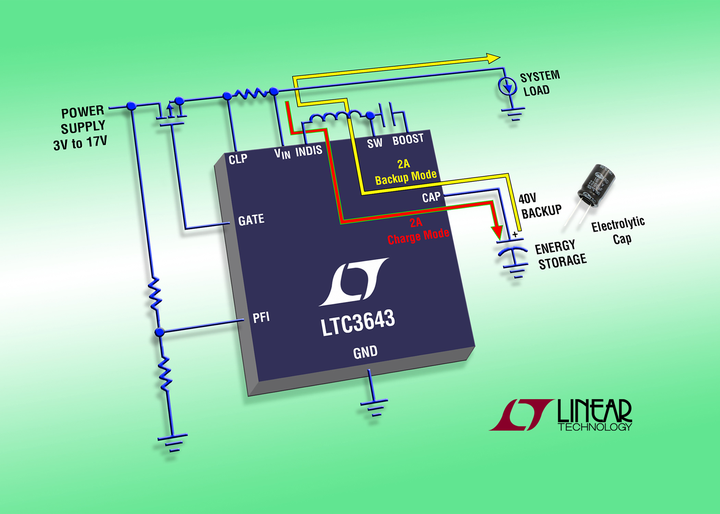 8 January, 2016 LTC3643 – 2A Bidirectional Power Backup Supply
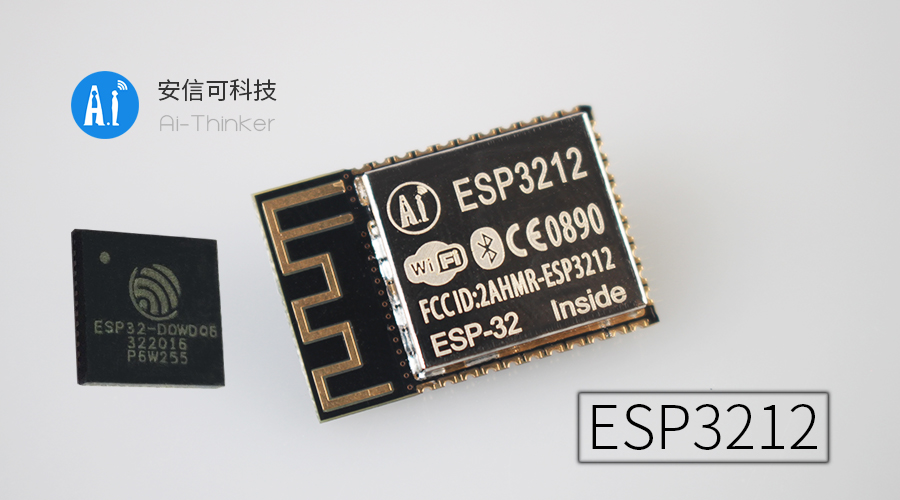 5 September, 2016 Public Release of ESP32 SoC The Big Brother Of ESP8266
 15 October, 2021 4K Digital Signage Player Powered by AMD Ryzen Embedded V2000 Processors
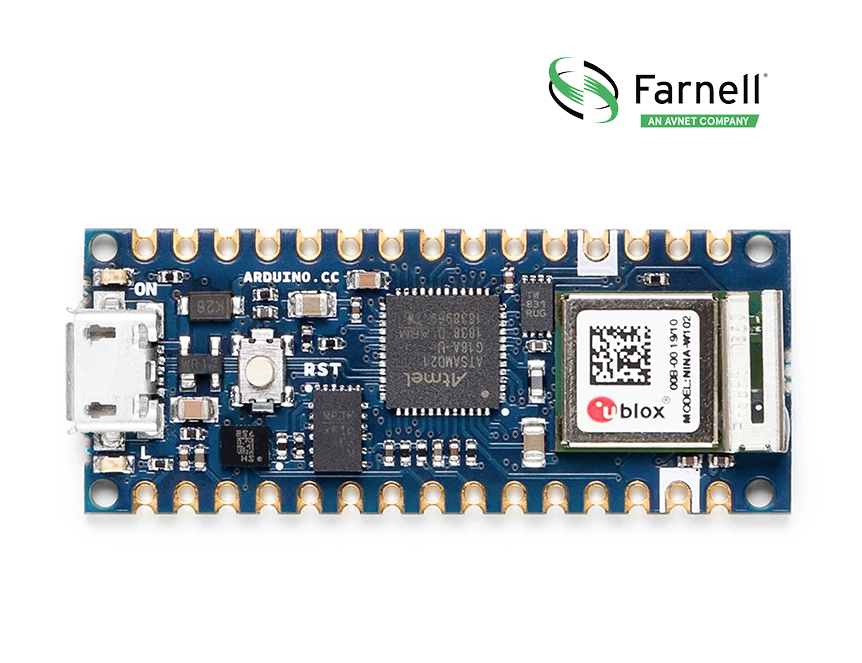 24 October, 2021 Win an Arduino MKR WiFi 1010 Development Board
 23 February, 2021 Advantech Launches AIMB-218 Mini-ITX Motherboard with Intel Atom® Processor for AIoT Edge Devices
 12 November, 2018 $6 C-SKY Linux Development Board Features GX6605S Media SoC


