

mixos
-
Posts
581 -
Joined
-
Last visited
Content Type
Profiles
Forums
Events
Everything posted by mixos
-
Inside Transformers http://www.du.edu/~jcalvert/tech/transfor.htm Transformer Basics http://www.federalpacific.com/university/transbasics/transbasics.html
-
The best way to print it out correctly is to make some test prints to find the correct ratio. Take a part with fixed dimensions (like an IC) and try to fit it on the print out paper. Then change accordingly the ratio (resize scale) to achieve the correct dimensions. It is better to use a program that allows you to change the percentage (%) of the print out.
-
Members rated depending the messages they write. 0-50 posts: Newbie over 50 posts: Jr. Member over 100 posts: Full Member over 250 posts: Sr. Member over 500 posts: Electronics God
-
The best way to print it out correctly is to make some test prints to find the correct ratio. Take a part with fixed dimensions and try to fit on the print out paper. Then change accordingly the ratio to achieve the correct dimensions. It is better to use a program that allow you to change the percentage (%) of the print out and not the ratio. I don't know another more "easy" way to print a PCB from an image file.
-
Here is also a related topic: http://www.electronics-lab.com/forum/index.php?board=13;action=display;threadid=370;start=msg1463#msg1463
-
Here are two files related to ISL3871. These are not the datasheets but may help. ISL3871.zip
-
Hello SicMan I created a Sell/Buy category. Check it here: http://www.electronics-lab.com/forum/index.php?board=25 You can freelly post your "goods" there including price, photos, description etc. Please take care to make your listings as clear as you can to maintain the quality of our forum. If you have any question, don't hesitate to contact me.
-
Things are easy, don't be confuzed. ;) When you have +/-15V and ground (0V) that means that if you measure across ground and +15 you will get +15V reading and if you measure across ground and -15 you will get -15V reading if you don't move the test probe that was to the ground. These are called symmetrical voltages. If you measure across the +15V and -15V you will get a 30V reading. Take a look at the schematic I attach. It is a symmetrical power supply that is suitable for powering your opamp if you don't have a +/-15V PSU. To wire the opamp, put the +/-15V at the corresponding pins and take the output related to the groung (0V) of your power supply. You can also attach your schematic here.
-
Push button controlled Potentiometer? How?
mixos replied to Amps's topic in Electronic Projects Design/Ideas
Also here : http://www.electronic-circuits-diagrams.com/audioimages/audiockt11.shtml you will find a simple use of DS1669 digital potentiometer. The same circuit is here also : http://www.electronics-lab.com/projects/audio/033/ -
Sorry my friend, i thought it was ::)
-
I attach you the LAG668 Datasheet LAG668.pdf
-
Here it is: http://www-us16.semiconductors.com/acrobat/datasheets/PCF50732_2.pdf
-
Thanks for the corrections Ldanielrosa. I already updated the above images.
-
Fridge door Alarm http://www.electronics-lab.com/projects/sensors/011/index.html Explanation (based on the existing explanation): With the door closed the interior of the fridge is in the dark, the photo resistor R2 has a high resistance (>200K) thus clamping IC1 by holding pin 12 which is the RESET PIN at high logical state (logical 1) so the internal counters don't count and all output pins (Qx) are at logical 0. Pin 12 has a voltage [R2/(R1+R2)]*VDD where VDD is the battery voltage. The result is a volatge close to VDD which is a logical 1 and clamping 4060 to reset state. When a beam of light enters from the opening, or the fridge lamp lights, the photo resistor lowers its resistance (<2K), pin 12 goes low (0 logical state) and IC1 starts counting. IC1 starts counting means that the internal oscillator goes ON and it is producing a square wave with a frequency which is set by R3, C1 and give out from the form (depending on datasheet): f=1/(2,2*C1*R3) => f=454 Hz This square wave is taken out from Q14 with a result frequency f/(2^14) and from Q7 with f/(2^7) So the output waves Q14 and Q7 look like this: after a preset delay (around 20 seconds in this case) the piezo sounder beeps for 20 sec because the low output of Q14 makes D1 ON =>Q1 ON. Then stops for the same lapse of time (Q14 is in high state and D1 is OFF => Q1 is OFF) and the cycle repeats until the fridge door closes. D2 connected to pin 6 of IC1 makes the piezo sounder beeping 3 times per second.
-
Convert 0-30V 3A PSU to 5A or more
mixos replied to mixos's topic in Electronic Projects Design/Ideas
Here did you see it at 0-30v and 10A setup? Can you give more info? Does it gives you 3A at 30V? In tests i made i could't take more than 2,3A -
The above circuit uses the CD4060 IC which is a binary counter. I attach you the datasheet. CD4060BC.pdf
-
If it is a simple low voltage circuit you haven't to ground it to real earth, just connect all grounds together. If it is a power circuit that is powered from main power (110-220V) you have to do it for protection puproses.
-
I just noticed here: http://focus.ti.com/docs/prod/folders/print/tsl245.html that it is discontinued, but you may find it in stock, I don't know the price..
-
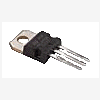
You just put them in isolated from the rest of the circuit pcb holes to stabilize the IC over the PCB. Nothing more - nothing less. Also you can cut this pins and make no holes for them. What IC is this?
-
I have a Grunding P37-040 color TV that lost it's colors. It was like a plain black-white one without any other problems. The problem fixed by re-adjusting the variable capacitor that the following images indicate. You can also replace this variable capacitor with a new one, because it seem that it's dry and lost his capacitance with time.
-
This is possilble for 1.5-2 meters using an infrared led for the detection, like this circuit is using: http://www.electronics-lab.com/projects/science/003/index.html Alternative you can use TSL245 from Texas Instruments which is infrared light-to-frequency converter and then convert the frequecny to voltage and have the reading in a voltmeter.
-
Here is what i found after a little search: Femto Capacitance Meter http://nov55.com/cap/cap1.htm Digital Capacitance Meter http://elm-chan.org/works/cmc/report.html LC METER http://www.qsl.net/iz7ath/web/02_brew/21_LCMeter01/ CAPACITANCE METER http://www.talkingelectronics.com/html/CapMeter.html Digital Capacitance Meter http://members.shaw.ca/roma/dcm.html These are good places to start reading ;)
-
PCB Etching Tank - Do it yourself
mixos replied to billy's topic in Mechanical constructions/Hardware
That's nice, i was thinking to make my own etching unit also. It would be very nice if you post your experiences, the matterials you used and how you glue them. You can take photos of the entire construction sequence, step by step and finaly make a nice article that will be added under Articles section and why not to be a cover story! ;) -
5 volt regulated power supply HELP!!!!
mixos replied to mphotis's topic in Electronic Projects Design/Ideas
Hello mphotis You can build a LM7805 regulator using discreet components following the internal circuit diagramm of it. Here it is: Also i found this page: http://www.usmicrowaves.com/voltreg/usm7805.htm this circuit diagramm: which is also an equivalent 780x regulator -
Unluckelly i didn't find anything! :(