

mixos
-
Posts
581 -
Joined
-
Last visited
Content Type
Profiles
Forums
Events
Posts posted by mixos
-
-
Fridge door Alarm
http://www.electronics-lab.com/projects/sensors/011/index.html
Explanation (based on the existing explanation):
With the door closed the interior of the fridge is in the dark, the photo resistor R2 has a high resistance (>200K) thus clamping IC1 by holding pin 12 which is the RESET PIN at high logical state (logical 1) so the internal counters don't count and all output pins (Qx) are at logical 0.
Pin 12 has a voltage [R2/(R1+R2)]*VDD where VDD is the battery voltage. The result is a volatge close to VDD which is a logical 1 and clamping 4060 to reset state.
When a beam of light enters from the opening, or the fridge lamp lights, the photo resistor lowers its resistance (<2K), pin 12 goes low (0 logical state) and IC1 starts counting.
IC1 starts counting means that the internal oscillator goes ON and it is producing a square wave with a frequency which is set by R3, C1 and give out from the form (depending on datasheet):
f=1/(2,2*C1*R3) => f=454 Hz
This square wave is taken out from Q14 with a result frequency
f/(2^14)
and from Q7 with f/(2^7)
So the output waves Q14 and Q7 look like this:
after a preset delay (around 20 seconds in this case) the piezo sounder beeps for 20 sec because the low output of Q14 makes D1 ON =>Q1 ON. Then stops for the same lapse of time (Q14 is in high state and D1 is OFF => Q1 is OFF) and the cycle repeats until the fridge door closes.
D2 connected to pin 6 of IC1 makes the piezo sounder beeping 3 times per second. -
Here did you see it at 0-30v and 10A setup? Can you give more info?
Does it gives you 3A at 30V?
In tests i made i could't take more than 2,3A -
The above circuit uses the CD4060 IC which is a binary counter. I attach you the datasheet.
-
If it is a simple low voltage circuit you haven't to ground it to real earth, just connect all grounds together. If it is a power circuit that is powered from main power (110-220V) you have to do it for protection puproses.
-
I just noticed here:
http://focus.ti.com/docs/prod/folders/print/tsl245.html
that it is discontinued, but you may find it in stock, I don't know the price.. -
You just put them in isolated from the rest of the circuit pcb holes to stabilize the IC over the PCB. Nothing more - nothing less.
Also you can cut this pins and make no holes for them.
What IC is this? -
I have a Grunding P37-040 color TV that lost it's colors. It was like a plain black-white one without any other problems.
The problem fixed by re-adjusting the variable capacitor that the following images indicate. You can also replace this variable capacitor with a new one, because it seem that it's dry and lost his capacitance with time.

-
This is possilble for 1.5-2 meters using an infrared led for the detection, like this circuit is using:
http://www.electronics-lab.com/projects/science/003/index.html
Alternative you can use TSL245 from Texas Instruments which is infrared light-to-frequency converter and then convert the frequecny to voltage and have the reading in a voltmeter. -
Here is what i found after a little search:
Femto Capacitance Meter
http://nov55.com/cap/cap1.htm
Digital Capacitance Meter
http://elm-chan.org/works/cmc/report.html
LC METER
http://www.qsl.net/iz7ath/web/02_brew/21_LCMeter01/
CAPACITANCE METER
http://www.talkingelectronics.com/html/CapMeter.html
Digital Capacitance Meter
http://members.shaw.ca/roma/dcm.html
These are good places to start reading ;) -
That's nice, i was thinking to make my own etching unit also. It would be very nice if you post your experiences, the matterials you used and how you glue them. You can take photos of the entire construction sequence, step by step and finaly make a nice article that will be added under Articles section and why not to be a cover story! ;)
-
Hello mphotis
You can build a LM7805 regulator using discreet components following the internal circuit diagramm of it. Here it is:
Also i found this page: http://www.usmicrowaves.com/voltreg/usm7805.htm
this circuit diagramm: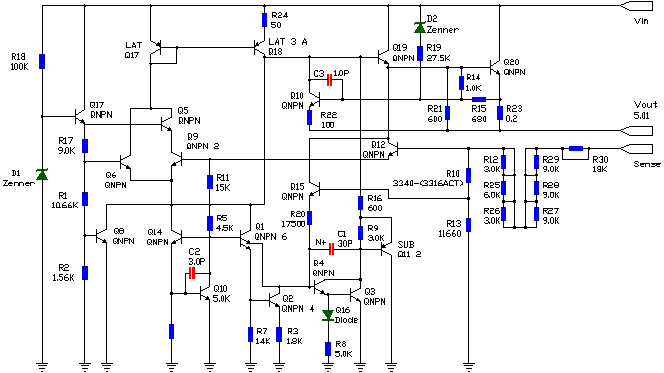
which is also an equivalent 780x regulator -
Unluckelly i didn't find anything! :(
-
Thanks ;)
Check this out:
How to Create Footprints in OrCAD Layout
http://www.egr.msu.edu/eceshop/pdf/an_pcb_2t12.pdf -
If you are looking for labels to organize your resistors and be able to find them easy and fast you can print out the following sheet and cut each piece of label to attach it to your boxes. It inlcudes all the common resistor values at 5% tolerance.

-
This topic has been also discussed here:
http://www.electronics-lab.com/forum/index.php?board=13;action=display;threadid=58;start=msg153#msg153 -
Hello iraq_mosul
To make fine soldering you need:
1. a very thin nose on your soldering iron that may be less than a millimetre at the end
2. a very steady arm
3. lot of passion
4. lot of exercise
5. and a fine piece of soldering
That's all you need to make a succesfull fine soldering.
Alternative to the fine nose you can take a piece of copper wire and turn it over the current nose of your soldering iron. Then you will solder with the end of this wire.
-
Hello
Read this:
Digital Stopwatch 0-99sec
http://www.electronics-lab.com/projects/oscillators_timers/014/index.html
and then read this:
Digital Stopwatch 0-60sec
http://www.electronics-lab.com/projects/oscillators_timers/015/index.html
To understund the basic of a digital stopwatch. Then you will have to make it also reverse count with a little research. You can replace the timebase using the 555 timer.
Hope this helps for beggining.
Also i attach you exaclty the same schematic as "Digital Stopwatch 0-99sec" but in another design that will help you to understund it better.
-
:'( :'( Bad to hear it! I searched on the net and found nothing either.
What means "OUS" here: "....who did find a similar type product from OUS"
Now i am going to search:
VPC at 800-447-1944
Metal Photo at 800-482-7758
I will post later the results.
Also another way to label boxes is the Toner Transfer Method from Pulsar.gs
You can find more info about this product on their site, but i think you can't label BLACK or dark color boxes. -
I done the corrections for you maestrodamuz! Thanks
-
Here is a schematic and board layout that was donated by someone to the Eagle site. It is free to use. It looks like the project, but might be a little different. If you have the free version of the eagle, you can view it or even edit it to be what you want. If you do not have the free version of Eagle, go to http://www.cadsoftusa.com/ and download it.
These are the contents of the zip file for fast view of another 7107 digital voltmeter (it's almost the same, but this one incudes the +/-5V power sources)


-
This is the FIXED SCHEMATIC (22-2-04):


-
First of all I attach here the FIXED SCHEMATIC (22-2-04):
I attach also two sample power supplies for this voltmeter:

Hope this one solves all previously mentioned inconsistencies. Also the schematic at the project's page is updated:
http://www.electronics-lab.com/projects/test/014/
blacksheep : To measure the current flows a load you use a small resistor in series with the load and you measure the voltage drop on it. Then with ohm's law you calculate the current pass throught the resistor and throught your load. You can't easily measure the current right away. So you can use the same circuit to measure the voltage drop across a resistor. For more info on how to do this see the pdf file i indicated previously. -
blacksheep: you can use this Voltemeter as ammeter also using the connections see below:

You connect the ammeter in series with the load and voltmeter in parallel with load. To take a current measure there must be a load connected :D
Also you can read this: http://www.electronics-lab.com/forum/attachments/Digital_Panel_Meter.pdf
explaining different connections and R calculations.
Or use this to measure current:
-
Why let your projects lying in a corner of your hard disk?
Make them available to the world...
...and enter the chance to win an auto range digital multimeter
Submit your project to [email protected] until 21/4/2004 with your name and contact e-mail address. Files are preferred to be in a zip format. Subject of the e-mail must be: "Contest Participation". All projects will be published under "Projects" section with your name and e-mail.
>>more info here


E12 Resistor Series
in Electronic Resources
Posted
Thanks for the corrections Ldanielrosa. I already updated the above images.