Node Red with Raspberry Pi Tutorial
- CETECH
- 241 Views
- medium
- Non tested
- 0 Likes


Node-RED is a powerful open-source visual programming tool for building Internet of Things (IoT) applications. In this tutorial, we’ll cover what Node-RED is, how to install it, and how to use the visual interface to create a simple flow.
What is Node-RED?
Node-RED is an effective open-source platform for developing Internet of Things (IoT) applications that aim to make the programming part simpler.
Node-RED is a web-based application that employs visual programming to let you link code fragments, or “nodes,” together to carry out a task. When the nodes are connected, they form flows.
SPONSOR
Get PCBs For Your Projects Manufactured
You must check out PCBWAY for ordering PCBs online for cheap!
You get 10 good-quality PCBs manufactured and shipped to your doorstep for cheap. You will also get a discount on shipping on your first order. Upload your Gerber files onto PCBWAY to get them manufactured with good quality and quick turnaround time. PCBWay now could provide a complete product solution, from design to enclosure production. Check out their online Gerber viewer function. With reward points, you can get free stuff from their gift shop.

Why Node-RED?
IBM created open-source Node-RED software. The Raspberry Pi flawlessly runs Node-RED. Because it is a visual programming tool, a wider spectrum of users can use it. Node-RED allows you to spend less time writing code and more time creating exciting things.
Applications with Node-RED?
Node-RED forms are easy to manage these tasks:
- Access the GPIOs on your RPi
- Connect to other devices via MQTT
- For your projects, develop a responsive graphical user interface
- Interact with outside services.
- Get information from the internet, such as stock prices, emails, and weather forecasts
- Organize time-based events
- Keeping and getting information from a database.
Now that we are aware of Node-Red, okay. We need a physical medium to install Node-Red, and the Raspberry Pi will serve that purpose.
Let’s Boot the Pi:
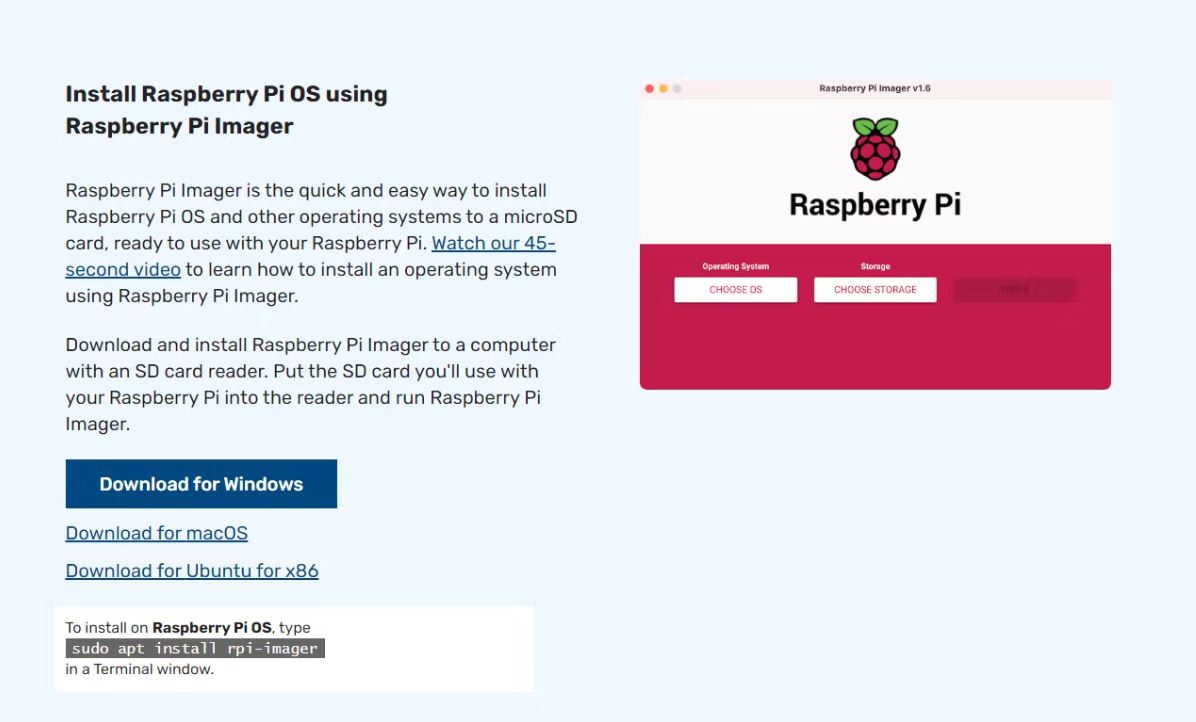
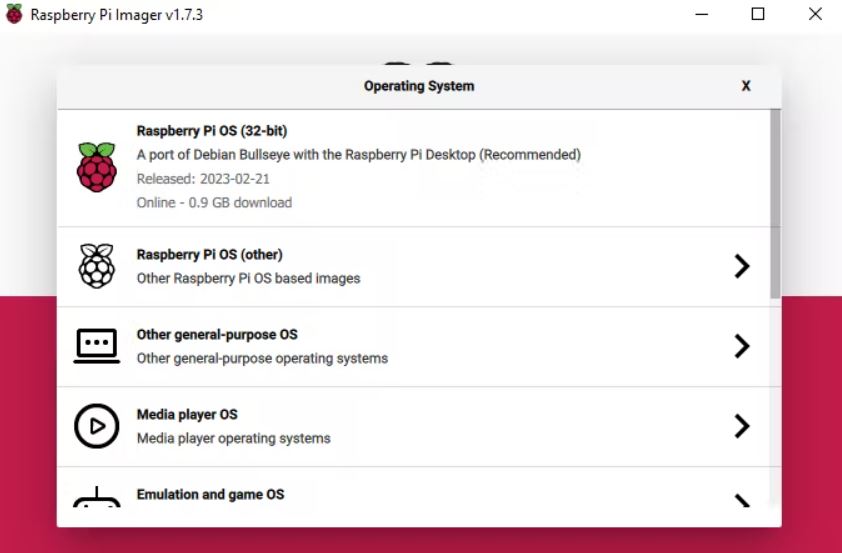
First, we need to boot our OS to Raspberry Pi, and we need a tool called Raspberry Pi Imager.
Once installed, the software opens the tool.
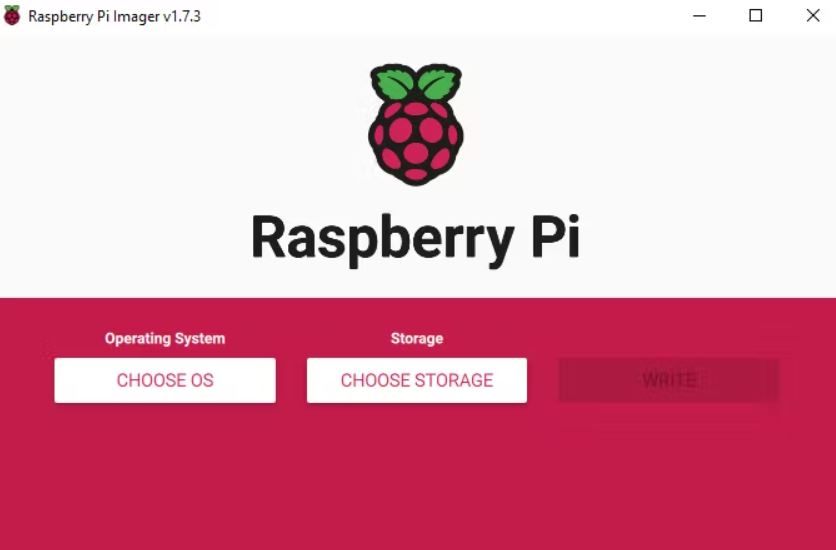
Next, choose the OS type.
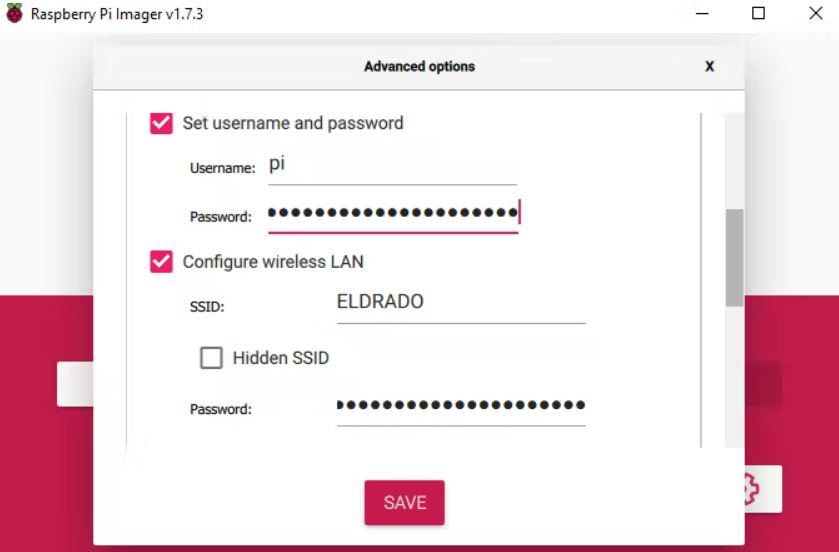
Then select the drive. One of the great features of this tool is we can add the SSH and Wi-Fi credentials directly into the OS file, even without turning on the Raspberry Pi. For that, select the settings icon in the tool.
Next, start burning the OS into the SD card.
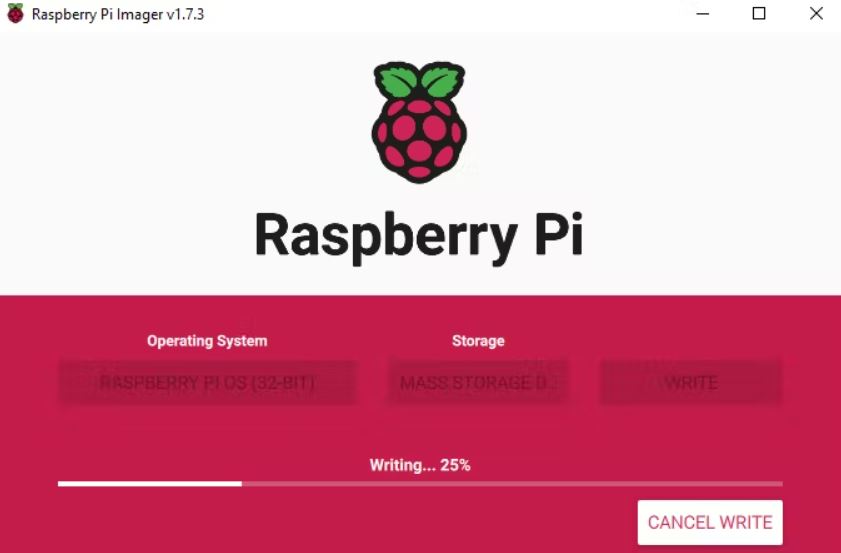
Once the writing is finished, insert the SD card into the Raspberry Pi.
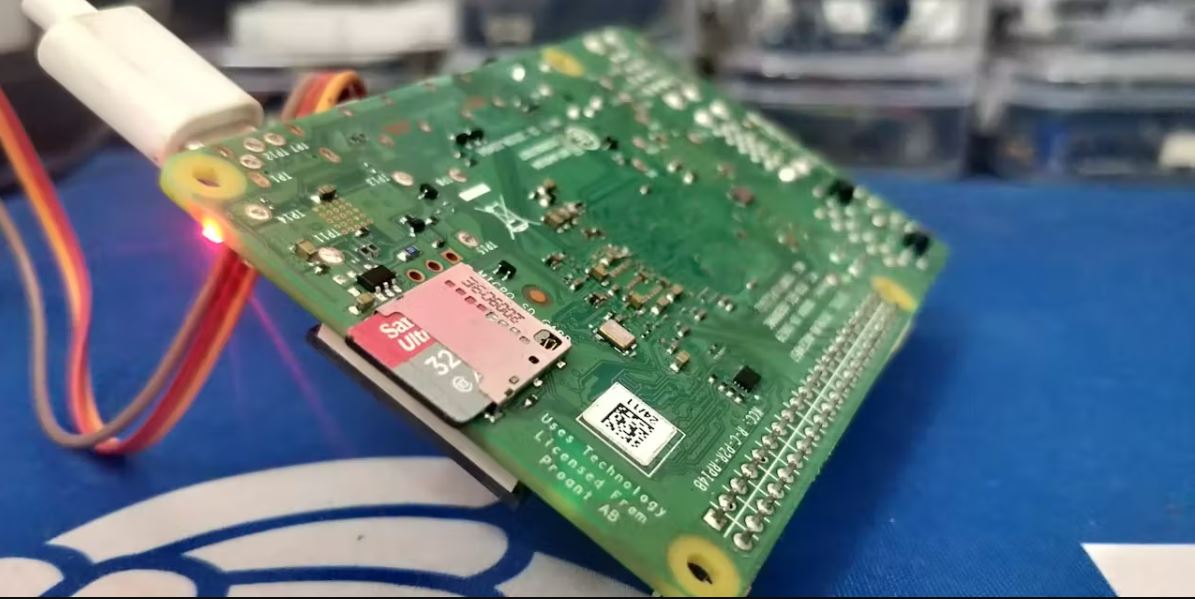
Then power on the device. The first time it will take some to boot and connect to Wi-Fi to 5–10 minutes and look at your router status, you can see there will be a new device connected to your router.
 Next, copy the IP address and use serial terminal software to access the serial port.
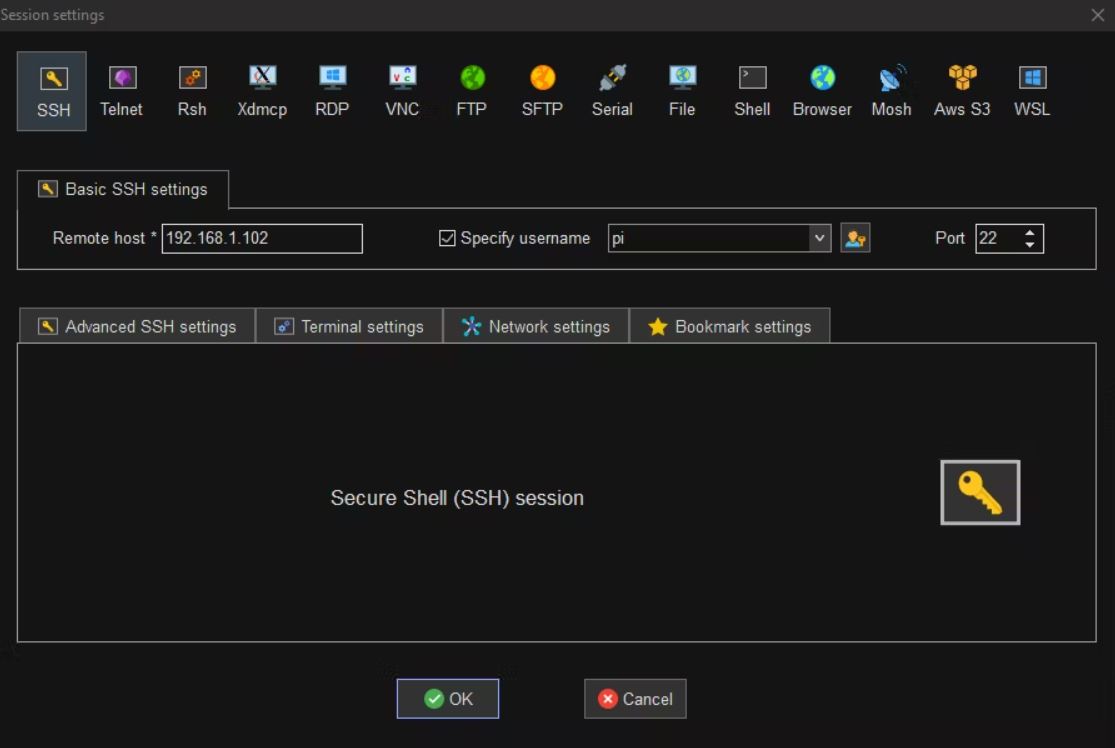
Then try to connect to the SSH.
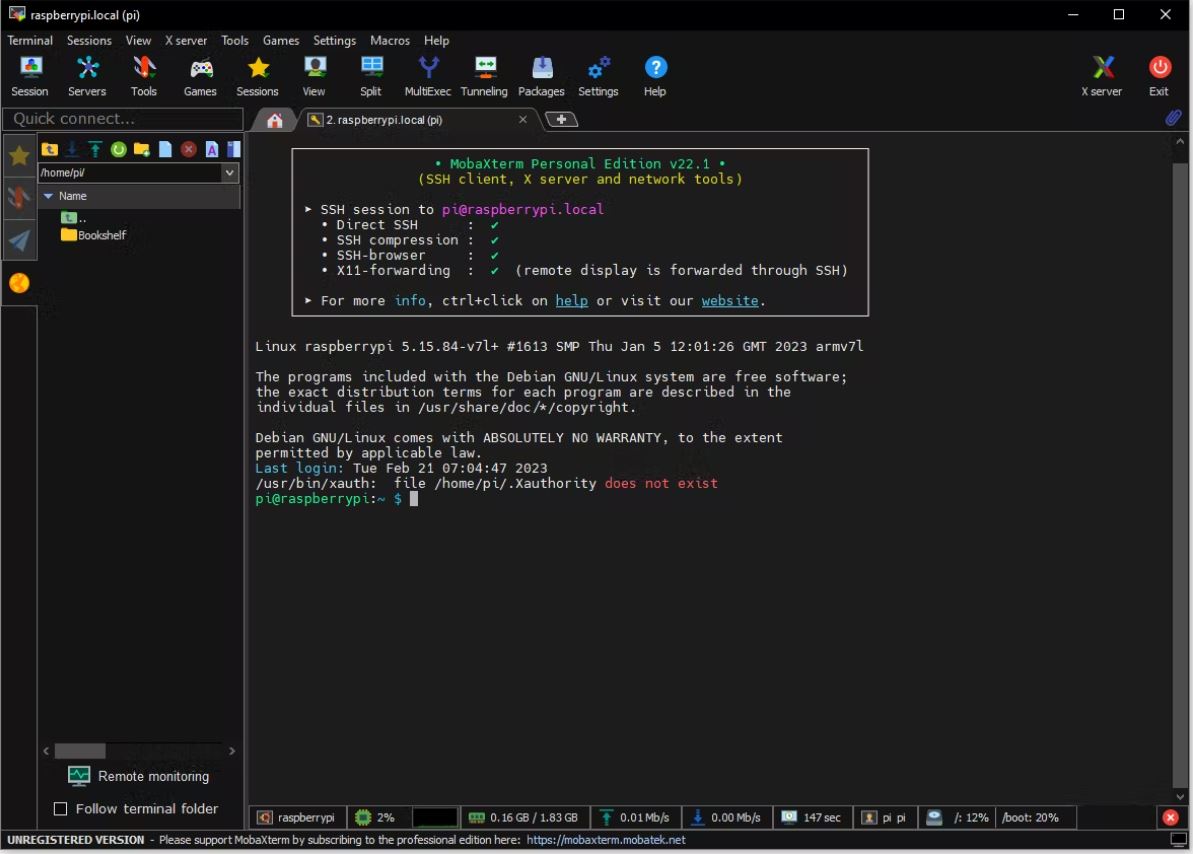
After that, we have to update the system, for that, we can use the following command sudo apt-get update
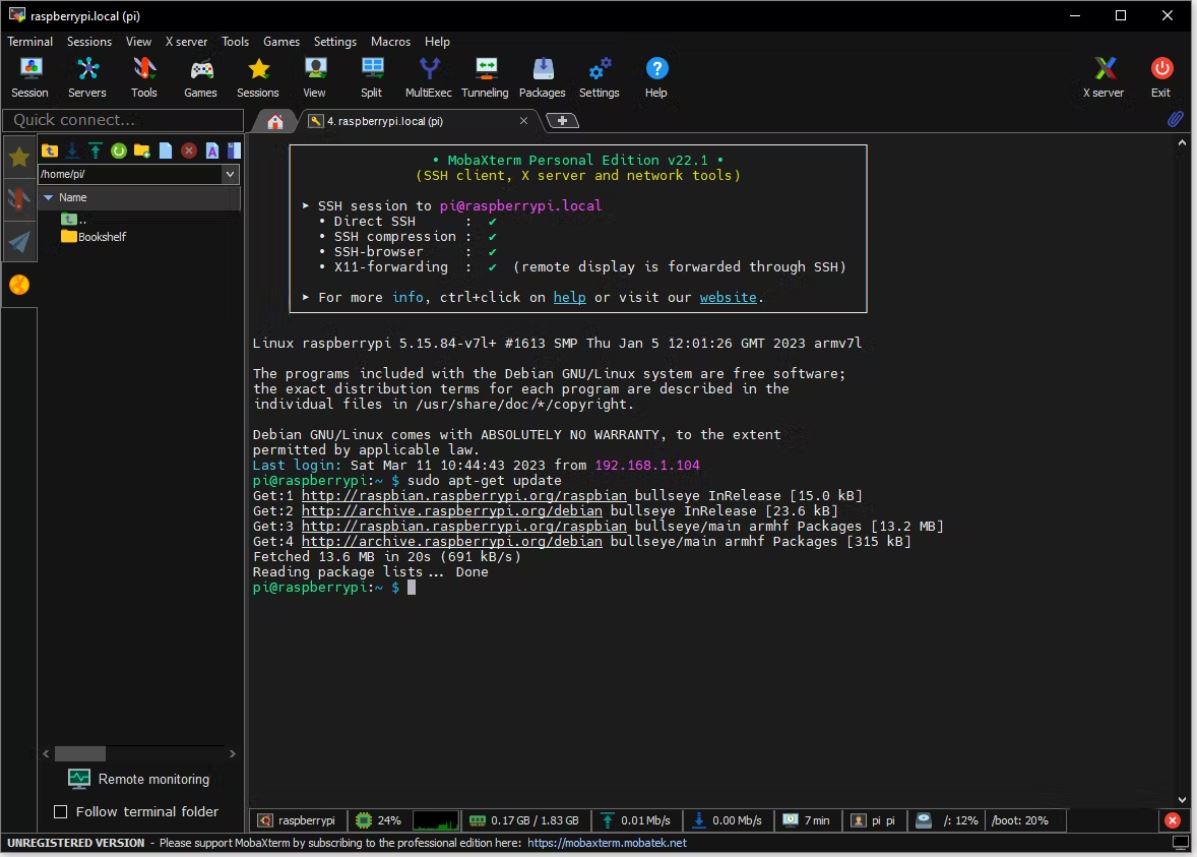
Next sudo apt-get upgrade.
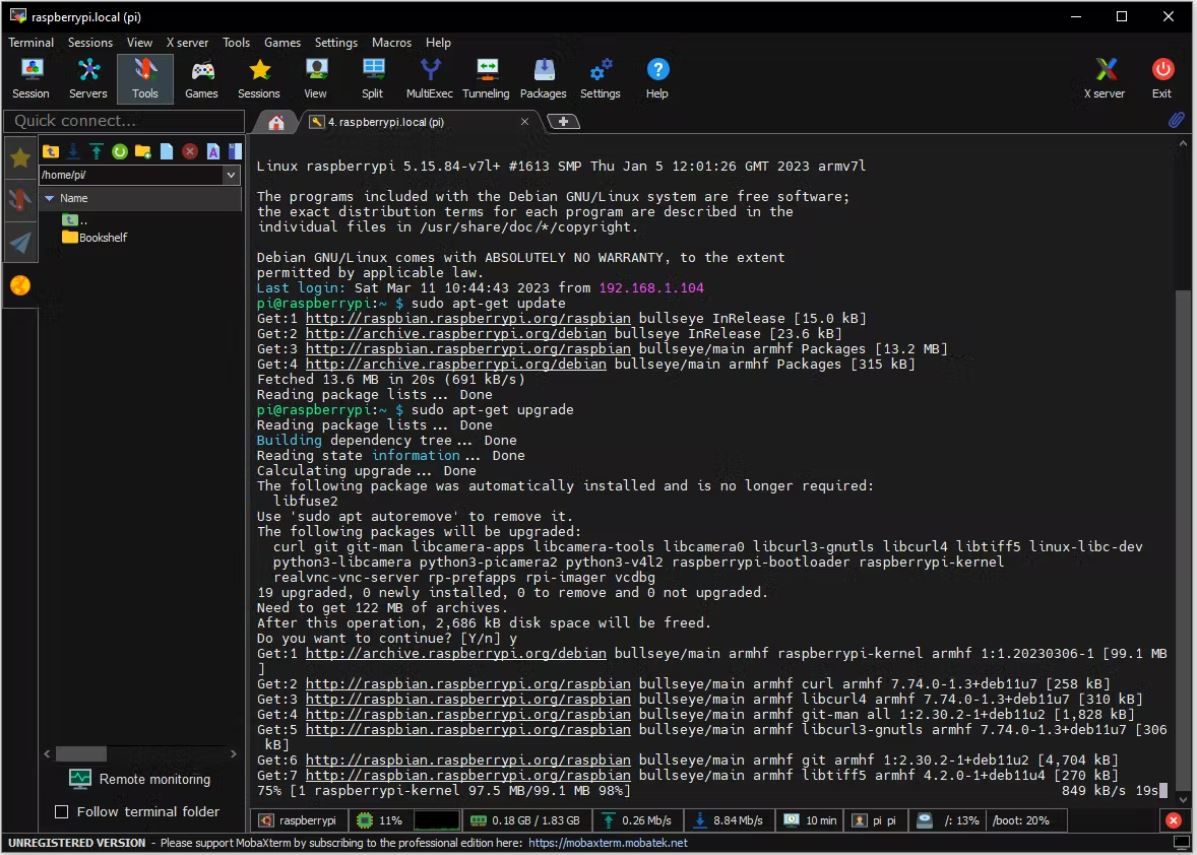
That’s all now are system is ready to install the node-red.
Node-Red Installation:
Type the following command in the Raspberry Pi SSH to install the Node-Red
CODE
bash <(curl -sL https://raw.githubusercontent.com/node-red/linux-installers/master/deb/update-nodejs-and-nodered)
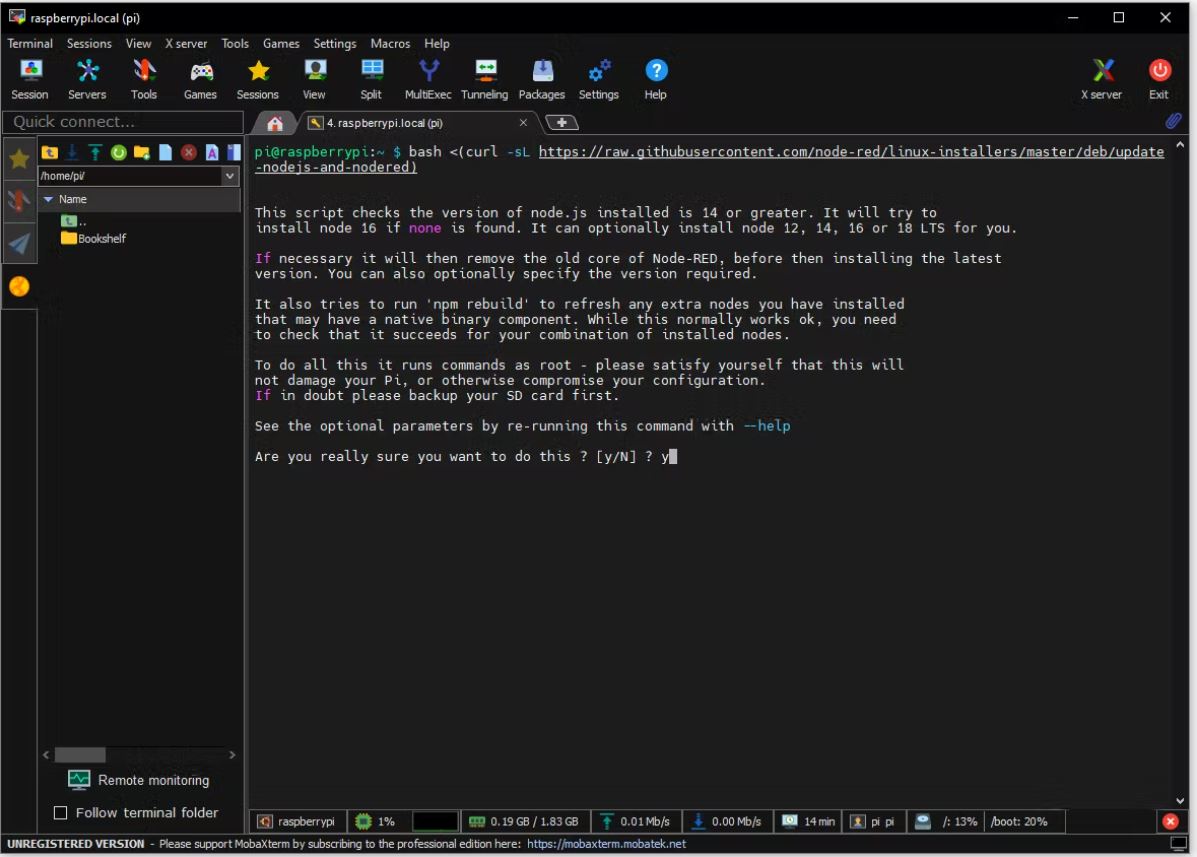
You need to give some input to the system in order to install the Node-Red. Type Y to install the Node-Red.
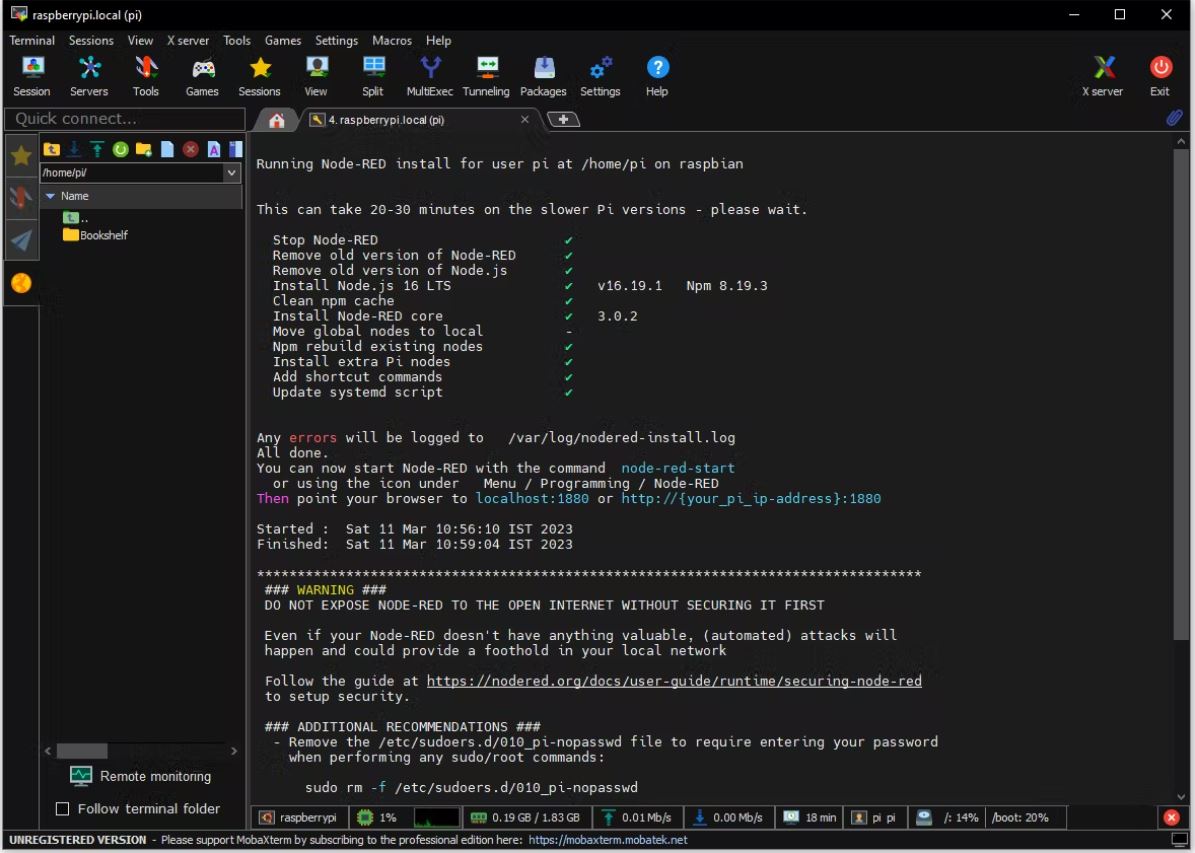
The first time, it will automatically install Node.js and all the other necessary components. Once the installation is done, type the following command to start the node-red.
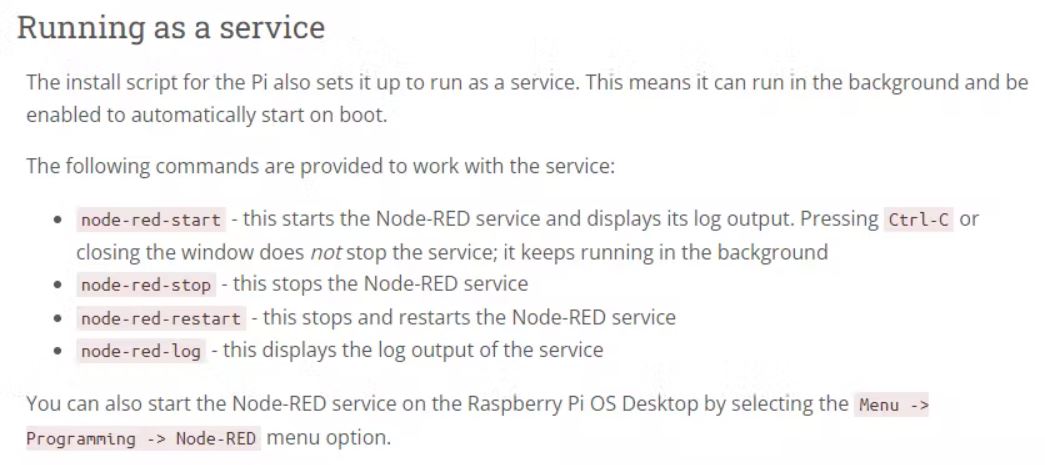
We can make the Node-Red auto start at boot using the following commands.

In the console, you can see the IP address.
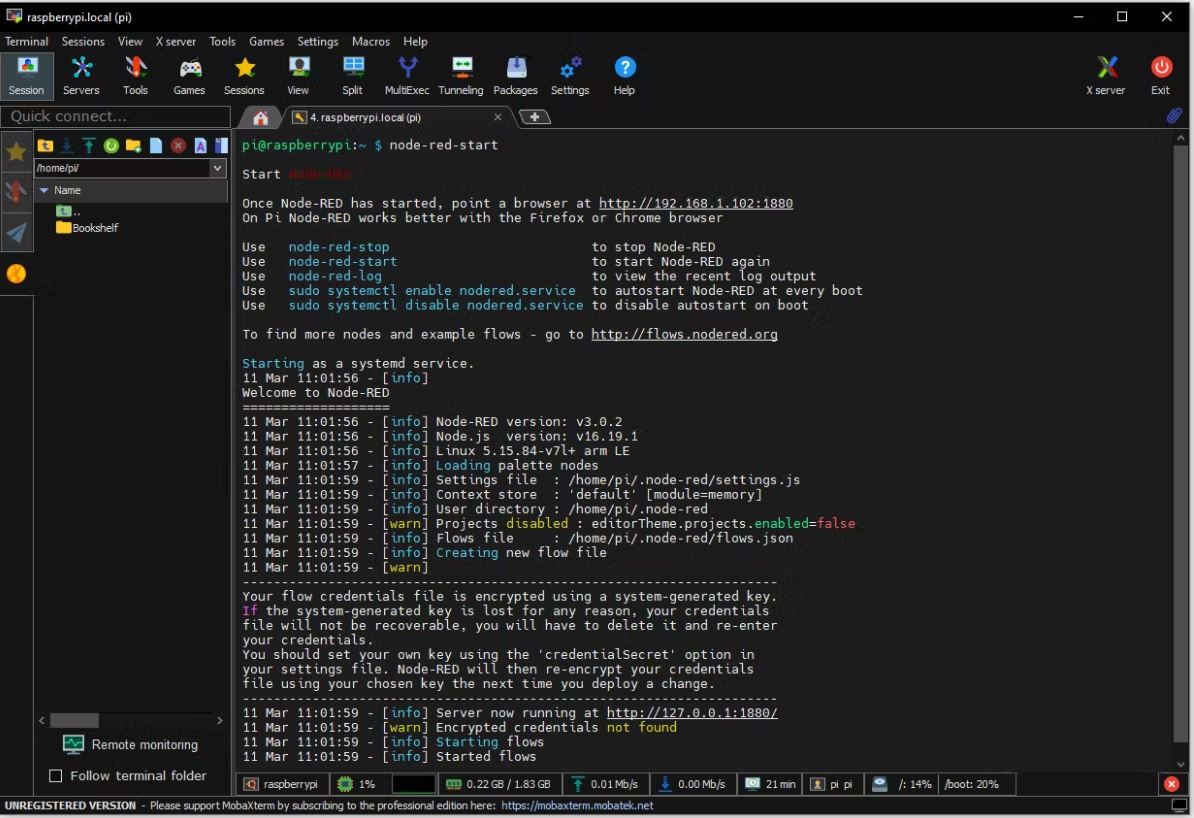
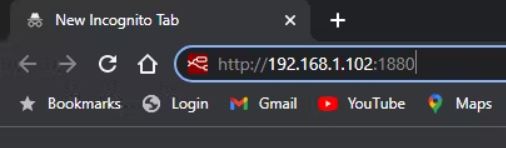
Just type in the IP address in your browser, and it will open up the Node-Red dashboard.
First Flow with Node-Red
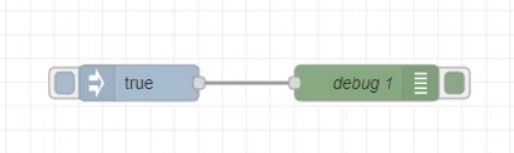
To get you used to the Node-RED interface, let’s create a simple flow. The flow we’ll create, prints a message to the debug console when triggered.
Drag an inject node and a debug node to your flow and wire them together.
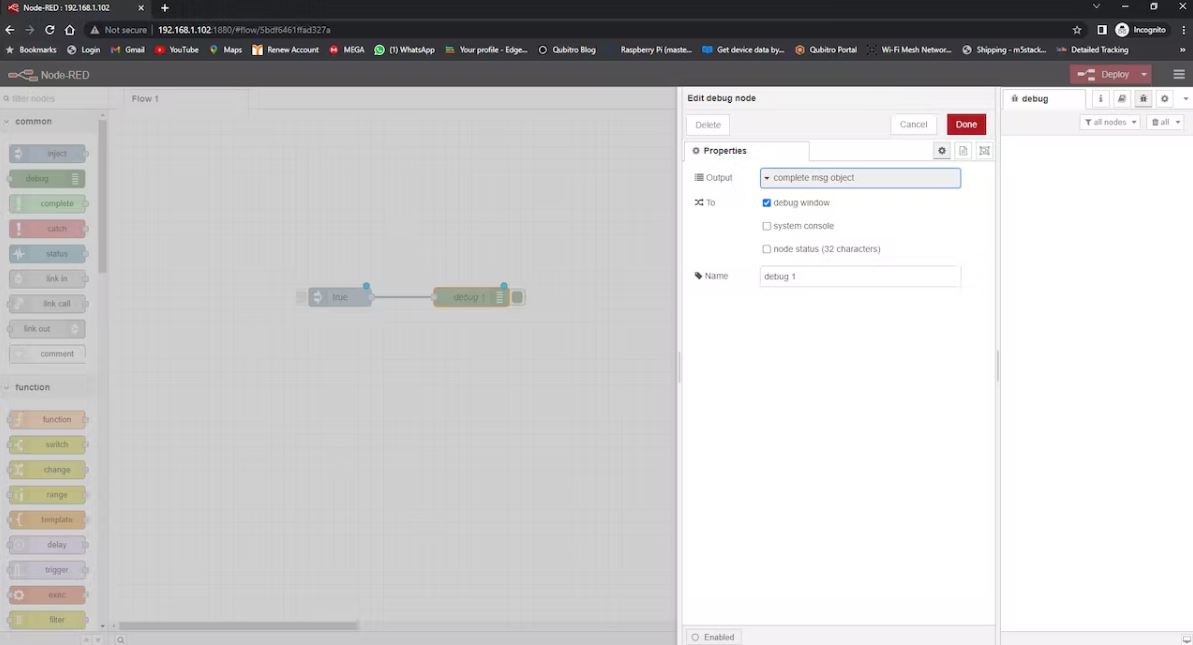
Now, let’s edit the inject node. Double-click the node. In the figure below, you can see the different settings you can change.
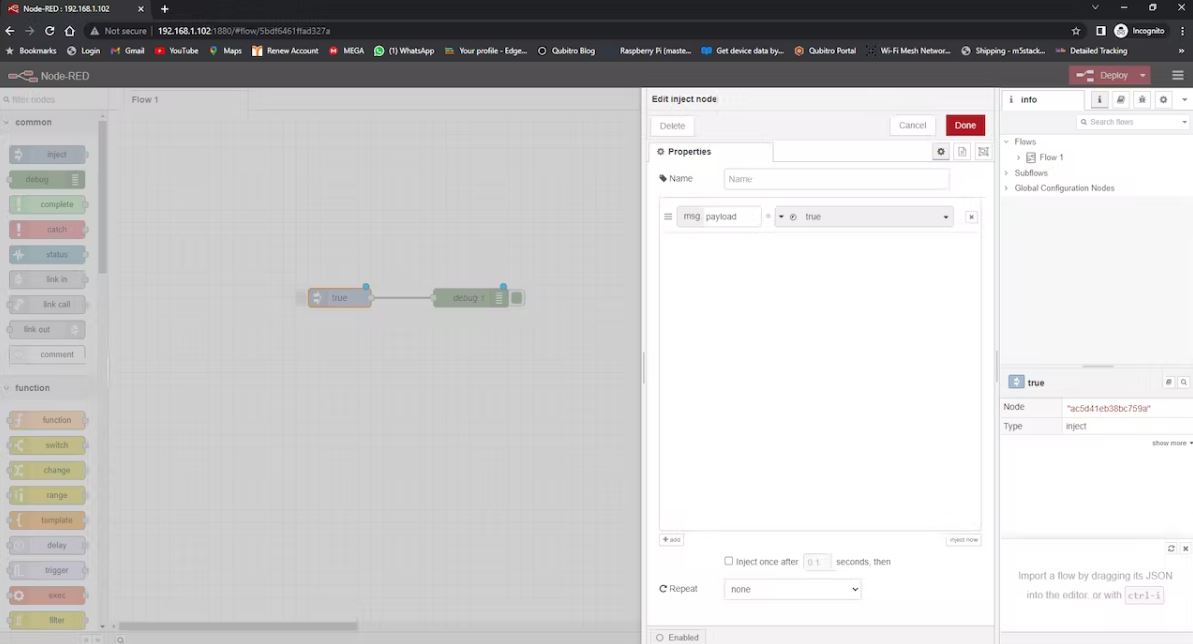
In the msg. Payload field, select Boolean and true. Then, click Done. Next, click on the debug node, and select the content as a complete message object.
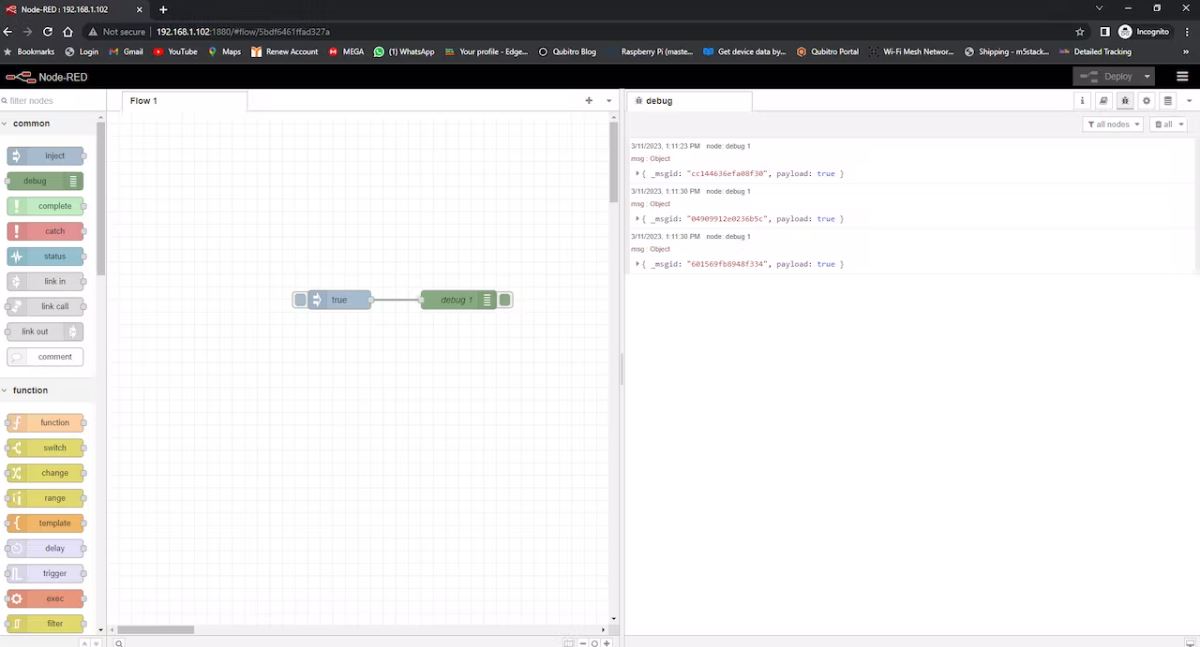
Then click on the Red deploy icon and it will start the flow,

Next, click the trigger node, it will print the boolean data into the debug console on the right-side panel.
Now we are done with the “Hello Word” section, let’s try to control the GPIO using Node-Red.
GPIO Control with Node-Red
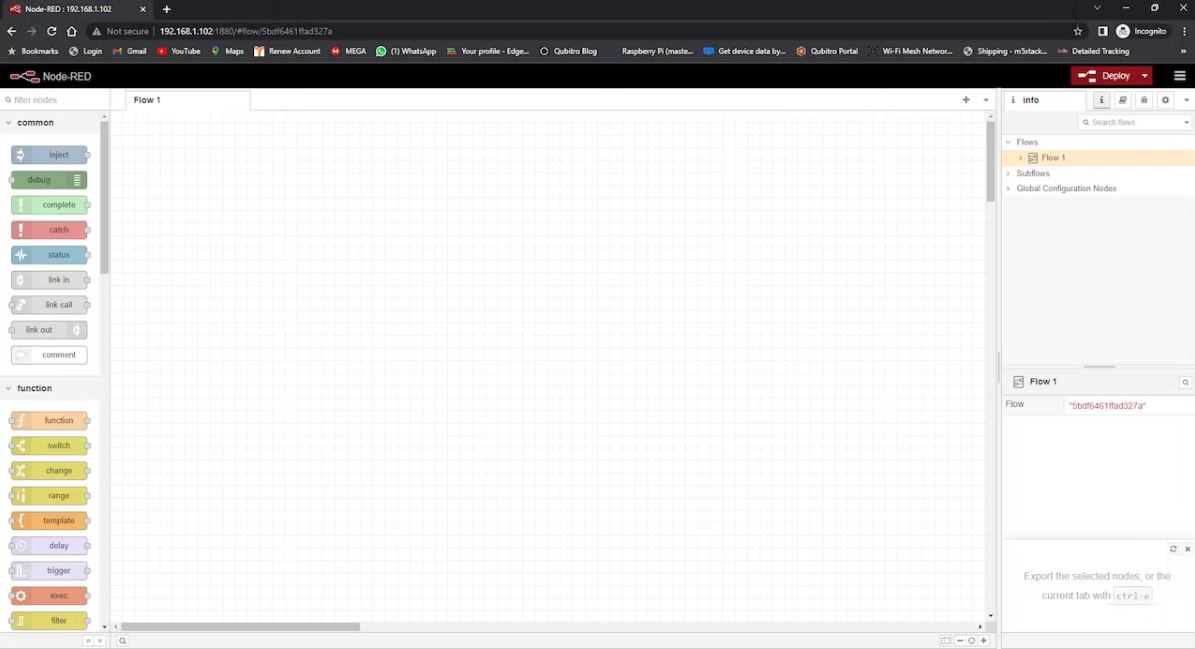
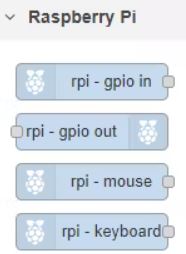
In the Node’s pallet, scroll down to the last section, and you can find an additional node specifically for Node-Red.
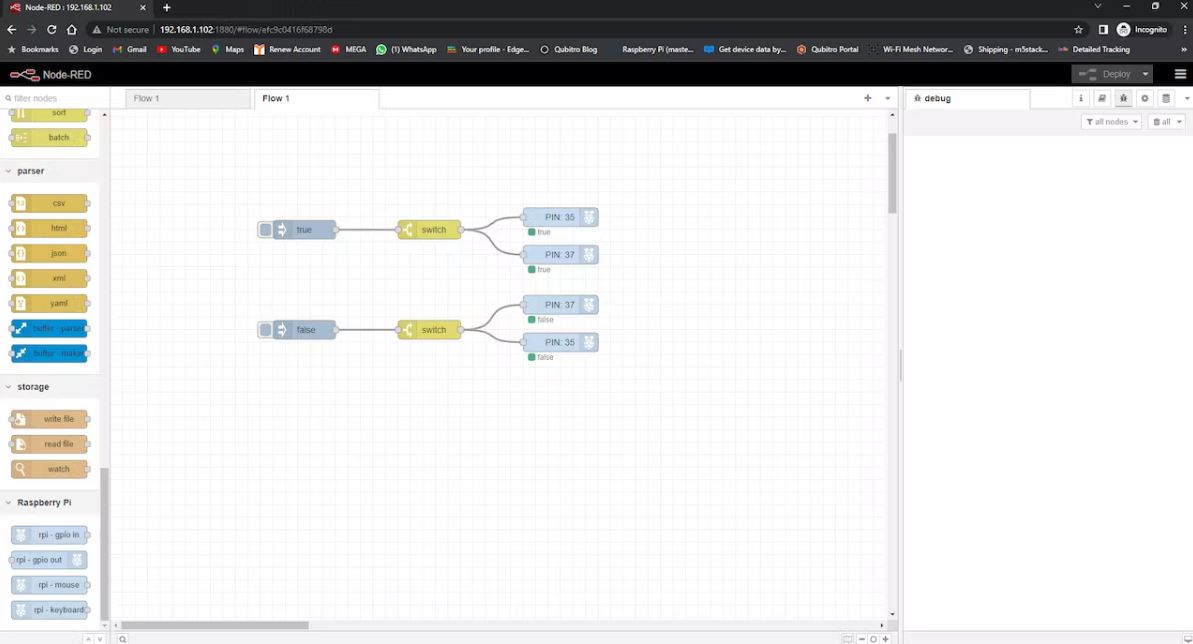
Then add some inject nodes, switch, and GPIO out nodes and connect them as follows.
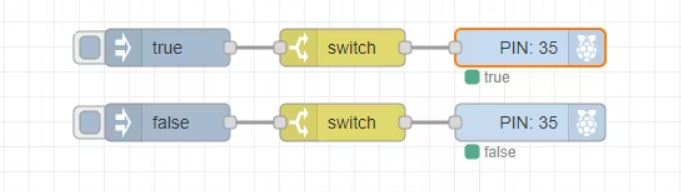
Click on the switch node and enter the on signal as 0.
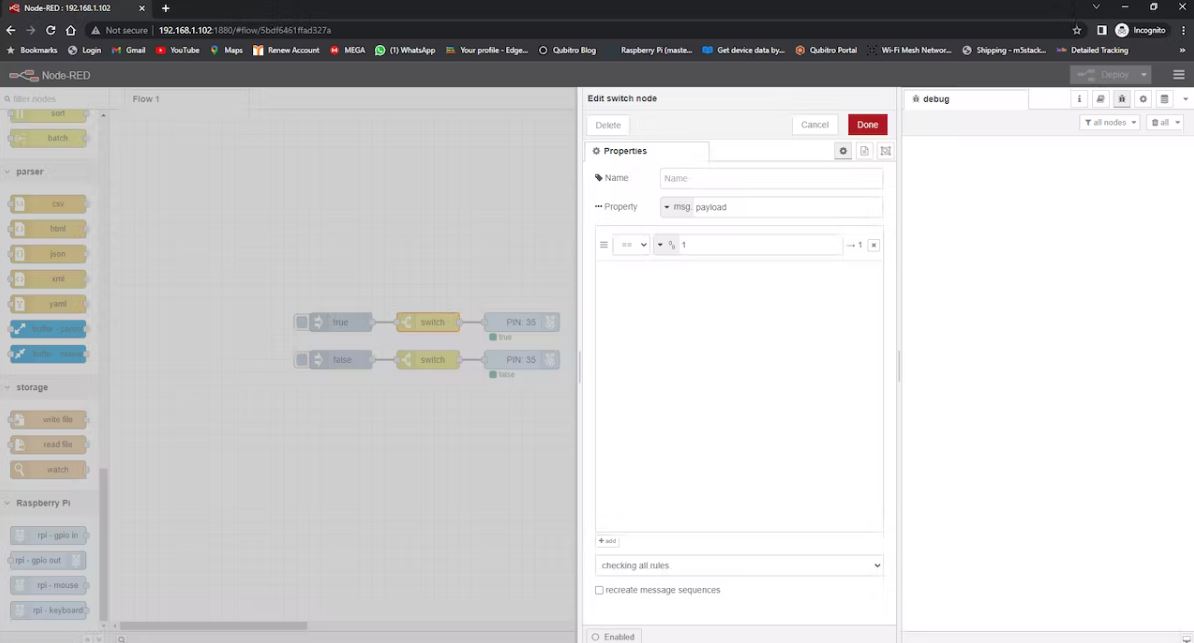
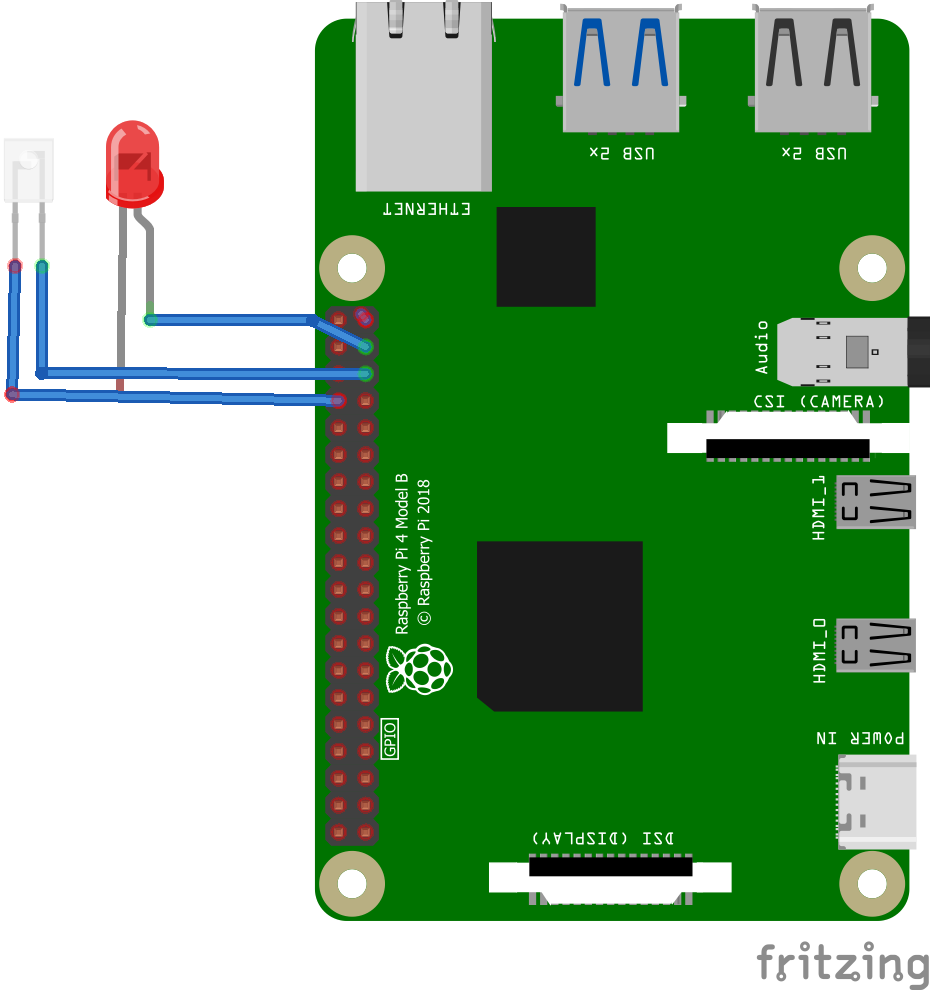
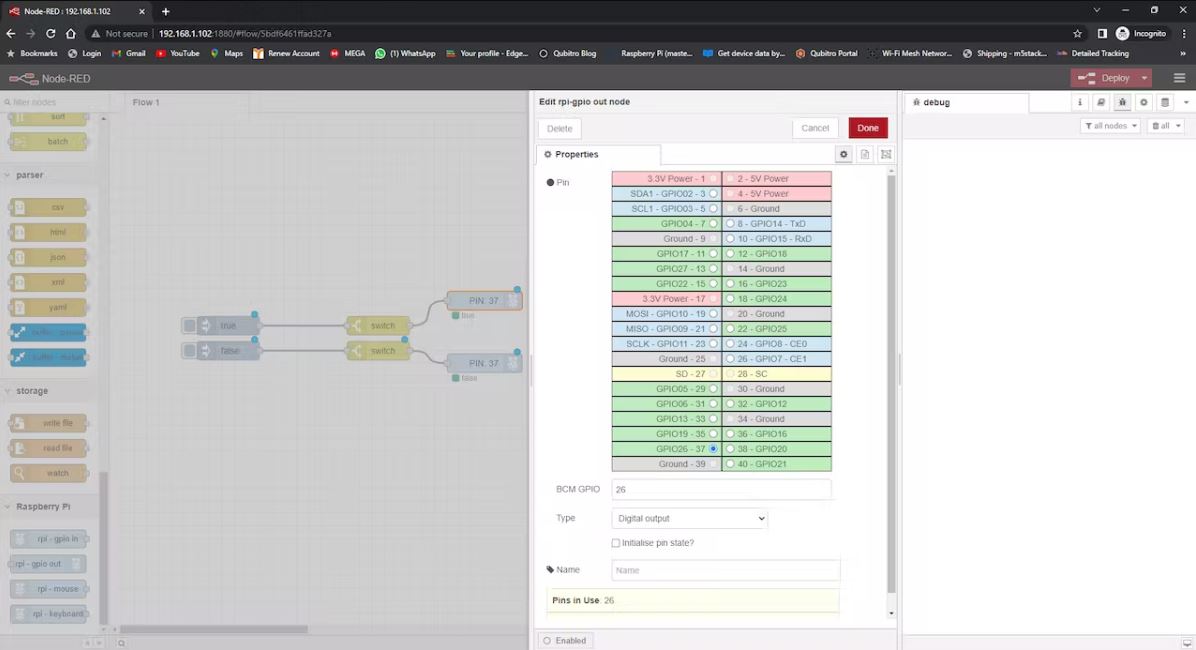
Repeat the same step with the signal as 1 in another node. Then click on the Raspberry Pi out node and select the pin. In my case, I’m using GPIO 19.
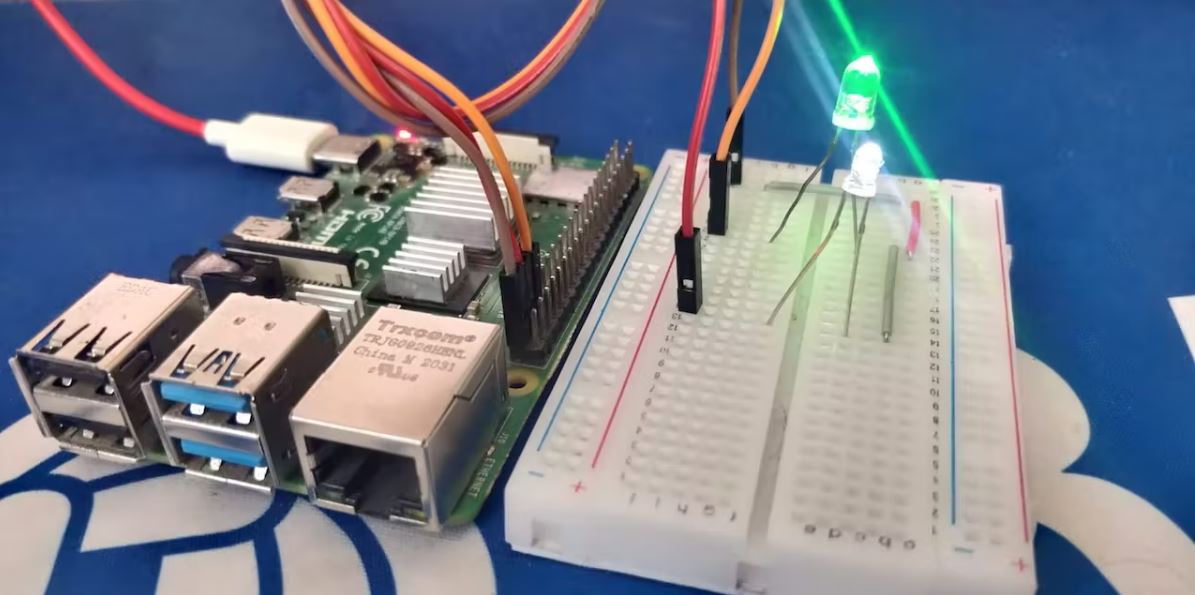
Here is the complete JSON of my flow I have added two led’s on the Raspberry.
Code
[
{
"id": "5bdf6461ffad327a",
"type": "tab",
"label": "Flow 1",
"disabled": false,
"info": "",
"env": []
},
{
"id": "bcccd9aac1596b24",
"type": "rpi-gpio out",
"z": "5bdf6461ffad327a",
"name": "",
"pin": "26",
"set": "",
"level": "0",
"freq": "",
"out": "out",
"bcm": true,
"x": 720,
"y": 380,
"wires": []
},
{
"id": "034c6ccdd7eccd7f",
"type": "switch",
"z": "5bdf6461ffad327a",
"name": "",
"property": "payload",
"propertyType": "msg",
"rules": [
{
"t": "eq",
"v": "1",
"vt": "num"
}
],
"checkall": "true",
"repair": false,
"outputs": 1,
"x": 510,
"y": 340,
"wires": [
[
"bcccd9aac1596b24",
"93780305db7d14f0"
]
]
},
{
"id": "72c0d7a9a642486d",
"type": "inject",
"z": "5bdf6461ffad327a",
"name": "",
"props": [
{
"p": "payload"
}
],
"repeat": "",
"crontab": "",
"once": false,
"onceDelay": 0.1,
"topic": "",
"payload": "false",
"payloadType": "bool",
"x": 310,
"y": 500,
"wires": [
[
"5bc162fcf714ce93"
]
]
},
{
"id": "925d9a563c4b4e8d",
"type": "rpi-gpio out",
"z": "5bdf6461ffad327a",
"name": "",
"pin": "26",
"set": "",
"level": "0",
"freq": "",
"out": "out",
"bcm": true,
"x": 720,
"y": 460,
"wires": []
},
{
"id": "5bc162fcf714ce93",
"type": "switch",
"z": "5bdf6461ffad327a",
"name": "",
"property": "payload",
"propertyType": "msg",
"rules": [
{
"t": "eq",
"v": "0",
"vt": "num"
}
],
"checkall": "true",
"repair": false,
"outputs": 1,
"x": 510,
"y": 500,
"wires": [
[
"925d9a563c4b4e8d",
"08fe29effb029c40"
]
]
},
{
"id": "ac5d41eb38bc759a",
"type": "inject",
"z": "5bdf6461ffad327a",
"name": "",
"props": [
{
"p": "payload"
}
],
"repeat": "",
"crontab": "",
"once": false,
"onceDelay": 0.1,
"topic": "",
"payload": "true",
"payloadType": "bool",
"x": 310,
"y": 340,
"wires": [
[
"034c6ccdd7eccd7f"
]
]
},
{
"id": "93780305db7d14f0",
"type": "rpi-gpio out",
"z": "5bdf6461ffad327a",
"name": "",
"pin": "19",
"set": "",
"level": "0",
"freq": "",
"out": "out",
"bcm": true,
"x": 720,
"y": 320,
"wires": []
},
{
"id": "08fe29effb029c40",
"type": "rpi-gpio out",
"z": "5bdf6461ffad327a",
"name": "",
"pin": "19",
"set": "",
"level": "0",
"freq": "",
"out": "out",
"bcm": true,
"x": 720,
"y": 520,
"wires": []
}
]
If you inject the true node both LEDs will turn on if you inject the false node both LEDs will turn off
Summary
In this article, we see how we can install the Node-Red on Raspberry Pi and how we can control the GPIO using Node-Red. In upcoming tutorials will see how we can connect and communicate the sensors with Raspberry Pi via Node-Red.