

Programming Arduino on Visual Studio Code Editor with Platform.io or Arduino extension
- Emmanuel Odunlade
- https://twitter.com/emmaodunlade
- emmaodunlade@gmail.com
- 32.930 Views
- moderate
- Tested
- 0 Likes

The Arduino IDE is a great programming tool, it is simple to use and it contains probably all resources one will need to build a project, but evaluating it as a code editor, it is a not the perfect tool. It lacks programming aiding features like IntelliSense, code suggestions, auto-complete, auto-correct, and debug tools, which make the development of projects with a large codebase, easy and endears developers to use code editors like Visual Studio Code and Atom. The above reason coupled with the large user base of most of these editors led to the development of plugins/extensions that enabled the use of some of them for development code for Arduino and other compatible boards.
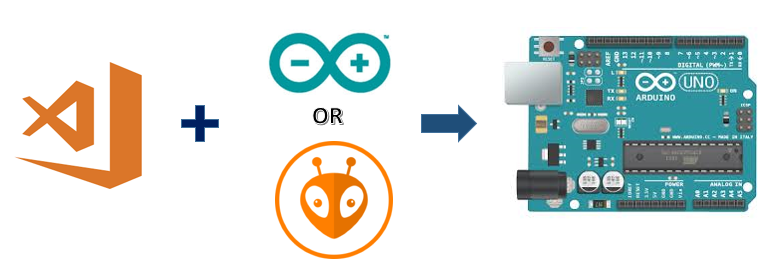
For this tutorial, we will take a look, how these extensions can be used to program Arduino. Quite a number of editors exist and different variation of extensions have been developed but for today’s tutorial, we will focus on Visual Studio Code (VScode) as our code editor and explore it’s use with the Platform.io and Arduino extensions.
At the end of today’s tutorial, you will know how to develop code for the Arduino and similar/compatible boards using the Arduino and Platform.io extensions on VScode.
Required components
We will use the Arduino blink example for demonstration of today’s tutorial, thus you will only need the target boards.
- Arduino Uno (or any other board of the family)
- NodeMCU
Any versions/variations of these boards are fine, as long as they work well when you program them using the Arduino IDE. In addition to the components mentioned above, you will need the latest VScode setup. Follow this link to download the setup file and install it on your computer. Ensure you select the “add files to path” option during installation. After installation, restart your computer to allow the installation to settle in.
With this done, we are now ready to use the extensions.
The Arduino Extension
The Arduino IDE for VScode (Visual Studio Code) was one of the earliest extension developed. There is a version of the extension developed by the community while there is another version developed by Microsoft. Any of these extensions can be used. For this tutorial, we will use the Microsoft version of the Arduino extension.
Features and Functionality
The Visual Studio Code Arduino extension retains the ease of use that comes with the Arduino IDE but also provides access to the superb features embedded in the visual studio code which makes coding and debugging a lot easier. Some of the features and functionalities as stated on the extension description, include:
- intelliSense and syntax highlighting for Arduino sketches
- Verify and upload your sketches in Visual Studio Code
- Built-in board and library manager
- Built-in example list
- Built-in serial monitor
- Snippets for sketches
- Automatic Arduino project scaffolding
- Command Palette (F1) integration of frequently used commands (e.g. Verify, Upload…)
- Integrated Arduino Debugging New
Requirements
The only requirement is to have the Arduino IDE installed from arduino.cc. The extension requires the IDE version to be version 1.6.x and up. However, do your best to avoid the version 1.8.7 as it has issues that prevent library and boards installation/updates.
Installation
The Arduino extension can be installed from the extensions market place or via the command line within VScode.
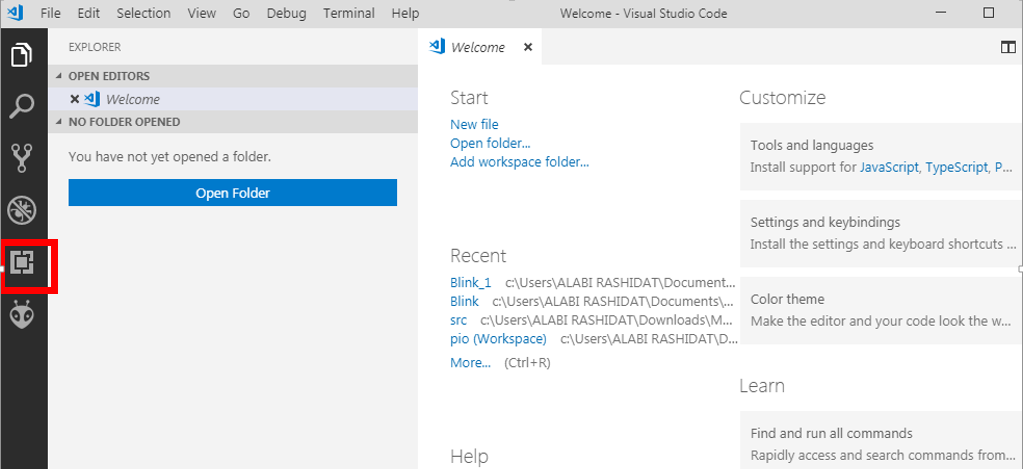
To install from the market place, launch the VScode editor. You should see a welcome page (shown below) -> click on the extension icon (highlighted in the image below) to access the market place.
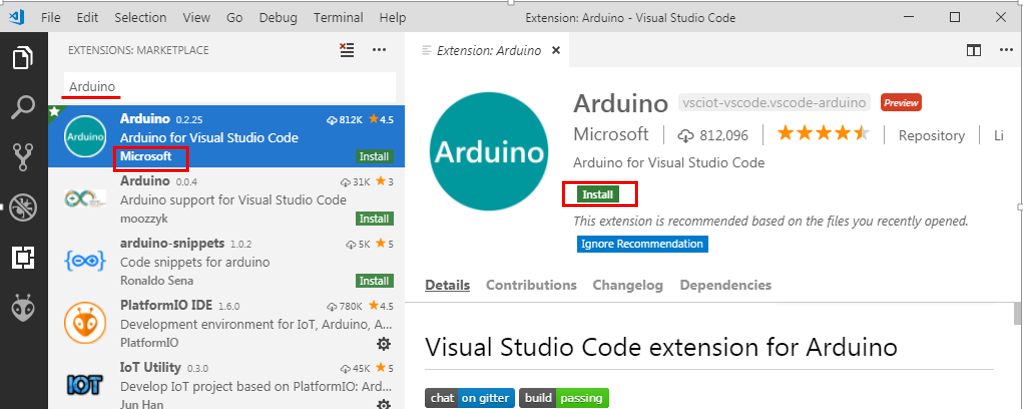
Enter Arduino into the search bar and select the one that says developed by Microsoft. Click on the install button as shown below and re-launch VScode after installation completes.
After re-launch, the Arduino extension should be visible under your enabled extensions. With the installations done, we can now proceed to run an example with Arduino.
Example
Press the F1 function key to open the command line on VScode. Once the command line becomes visible, type in Arduino. It should show you a list of commands applicable to the Arduino as shown below.
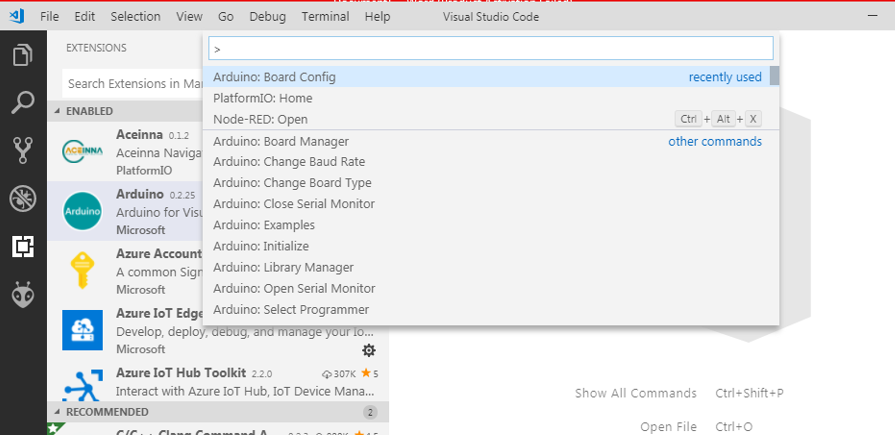
With these commands you can install new Arduino libraries, install new boards, select target board for code upload, select a programmer and pretty much everything you can do with the Arduino IDE or even more. As mentioned earlier, we will use the Arduino blink example as a demonstration. To start with, press F1 and select the “Arduino: Examples” option. Navigate and select the blink example.
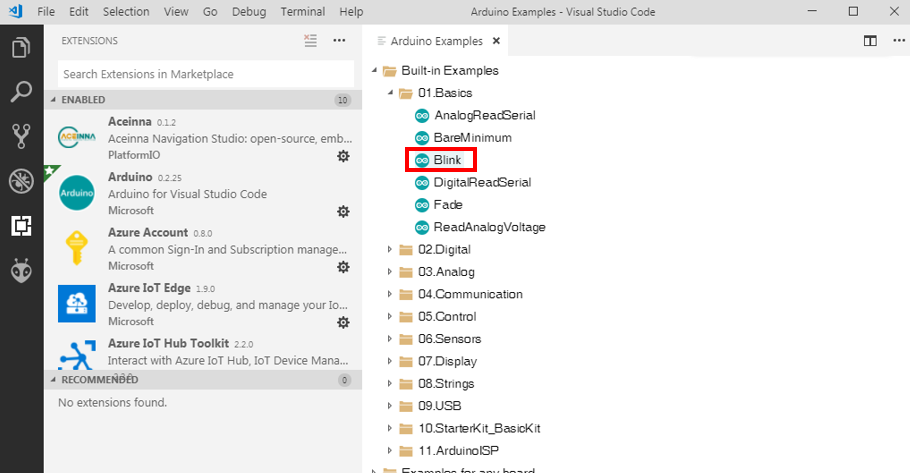
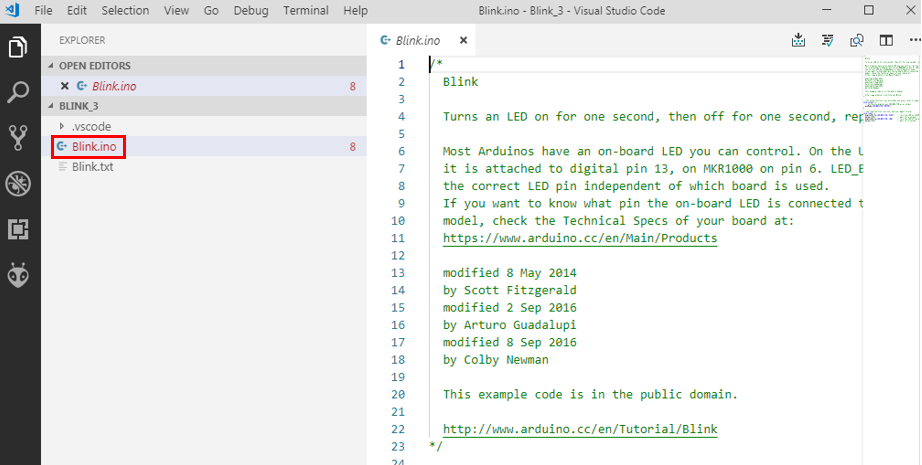
This will open the folder containing the sketch under the explorer pane in a new window. Select the .ino file if you wish to make any changes to the code.
Ready to upload the code?
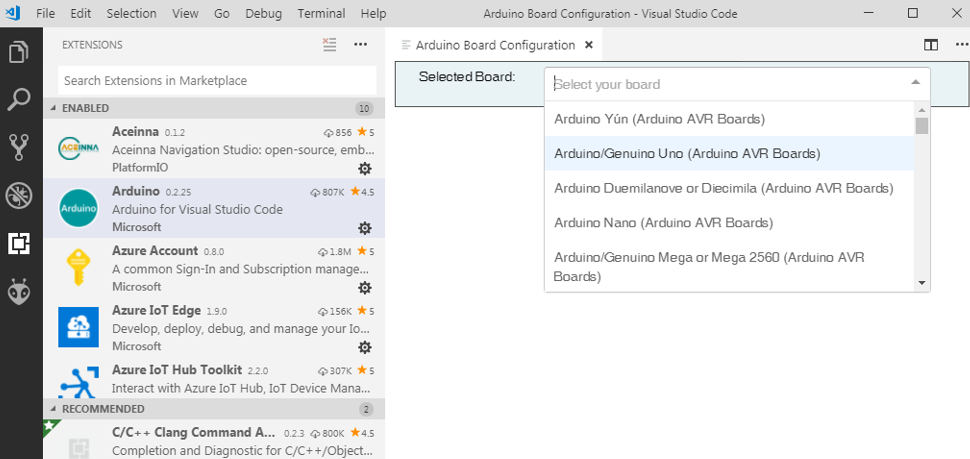
Just like when working with the Arduino IDE, press the F1 function button and select the “Arduino: Board configuration” option to set the target board which in our case, is the Arduino Uno.
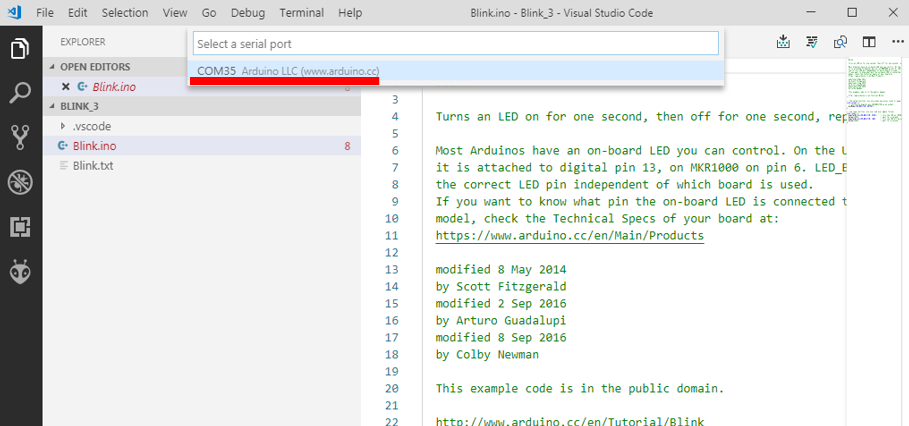
At this point, connect your Arduino board and select the “Arduino:select serial port” option after pressing F1. It will bring up a list of all devices connected to the serial port. Select the one to which your Arduino is connected.
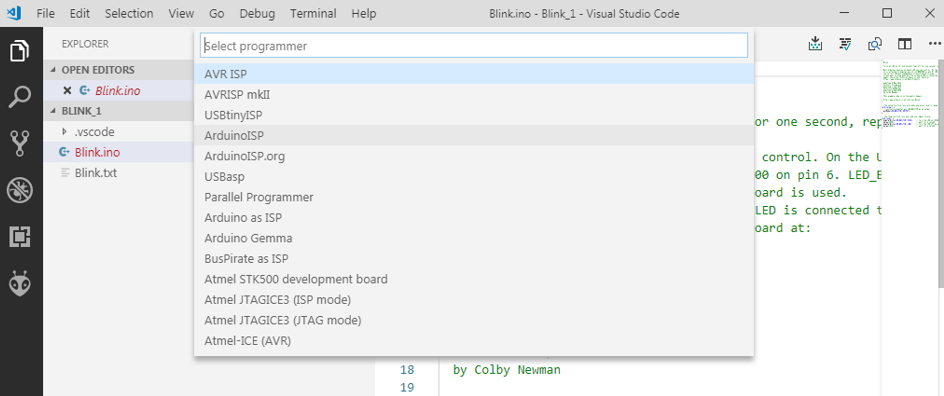
Next, select the programmer by clicking on the “Arduino: Select programmer” option from the function menu. Choose any that you want.
With this done, we are now ready to upload the code. If you made any change to it and you would like to verify code before uploading you can use the “Arduino: Verify” option after pressing F1. If the code is satisfactory and you are ready to upload, press F1 and click the “Arduino: upload function”.
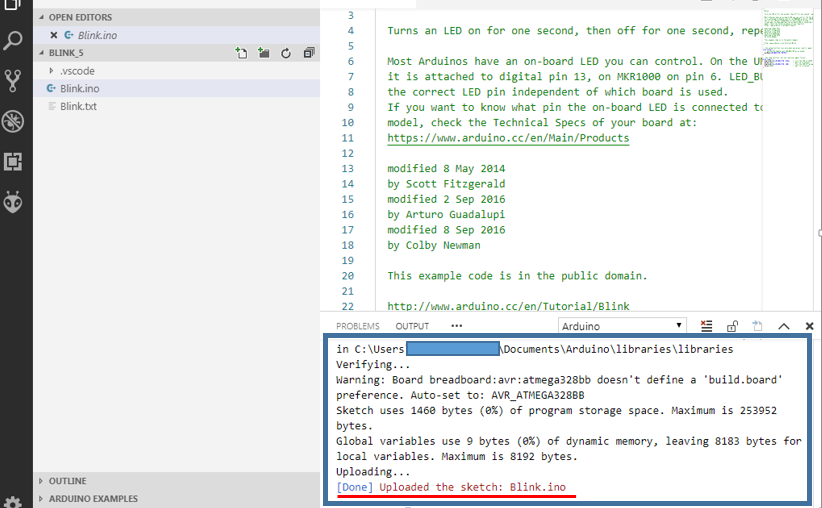
If you follow all the steps carefully, the process should be easy and the code should upload successful as shown below.
The Platform.io Extension
Platform.io is an open-source platform developed to facilitate the deployment of IoT solutions. It allows the easy integration of IoT specific features like remote firmware update and testing. The platform supports several boards from Arduino, Espressif and their variations to TI’s MSP430, Tiva and others. It also supports frameworks like the Arduino, Energia for TI boards, and Mbed, effectively making it one of the most comprehensive cross-platform development tool for IoT.
Platform.io Features
Some of the outstanding features of platform.io according to their website include:
- Cross-platform build system without external dependencies to the OS software: 550+ embedded boards, 30+ development platforms, 15+ frameworks
- PIO Unified Debugger
- PIO Remote
- PIO Unit Testing
- C/C++ Intelligent Code Completion
- C/C++ Smart Code Linter for rapid professional development
- Library Manager for hundreds of popular libraries
- Multi-projects workflow with multiple panes
- Themes support with dark and light colors
- Serial Port Monitor
- Built-in Terminal with PlatformIO Core (CLI) and CLI tool (pio, platformio)
Just like we did with the Arduino extension for VScode, we will take a look on how the platformio.org extension for VScode can be used for programming Arduino boards.
Installation
Just like the Arduino extension, the platform.io extension for visual studio code can also be installed via extension market place.
Click on the extensions/package manager icon, when it opens, enter “platformIO IDE” into the search bar and click on the install button as shown below. After installation, reload VScode to allow installation to take effect.
Putting it to Use
Once the reload is complete, a platform.io icon will be visible on the sidebar and the platform.io toolbar will be added to the status bar of VScode. The toolbar contains buttons for popular commands. This makes it easy to quick build, upload, or perform any of the commands without much navigation.

From left to right, each icon represents;
- PlatformIO Home
- PlatformIO: Build
- PlatformIO: Upload
- PIO Remote
- PlatformIO: Clean
- PIO Unit Testing
- Run a task… (See “Task Runner” below)
- Serial Port Monitor
- PIO Terminal
Example
As mentioned earlier, we will use the blink example here too. To create a new project, click on the platform.io home icon and select the “New Project” button. A window similar to the one shown below should open up.
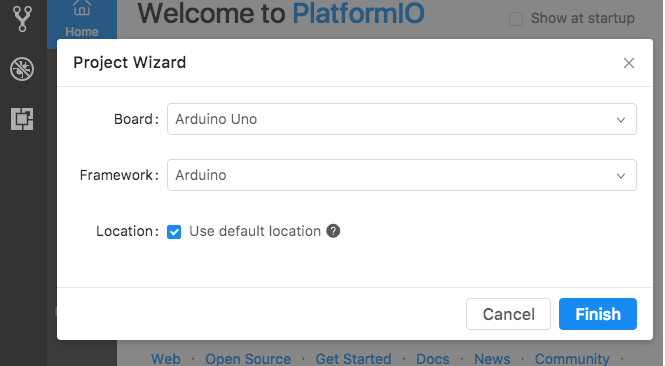
This window will allow you to select the board, the framework and other things to set up the IDE for use with your target board. Since we will use the Arduino Uno, we select it as the board type and the Arduino IDE as the platform. If this were to be the NodeMCU, you will need to select the nodemcu as the board type and the Arduino or the ESPressif 8266 as the framework.
With the setup done, a new project folder is created. Open the main.cpp file under the src folder to write the code for your project.
Since we are using the blink example, you can copy and paste the code below into the code editor.
/**
 * Blink
 *
 * Turns on an LED on for one second,
 * then off for one second, repeatedly.
 */
#include "Arduino.h"

// Set LED_BUILTIN if it is not defined by Arduino framework
// #define LED_BUILTIN 13

void setup()
{
  // initialize LED digital pin as an output.
  pinMode(LED_BUILTIN, OUTPUT);
}

void loop()
{
  // turn the LED on (HIGH is the voltage level)
  digitalWrite(LED_BUILTIN, HIGH);

  // wait for a second
  delay(1000);

  // turn the LED off by making the voltage LOW
  digitalWrite(LED_BUILTIN, LOW);

   // wait for a second
  delay(1000);
}
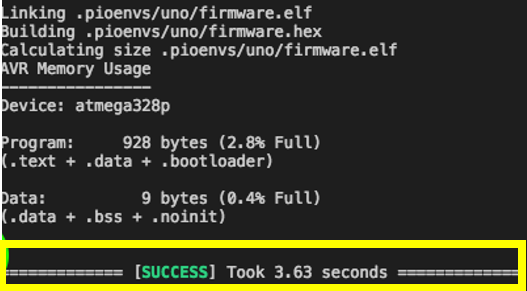
With this done, use the “Build button” on the toolbar to build your code and the “Upload button” to upload it to the target Arduino board. If the installation was properly done, you should get the success remarks on the console window.
Conclusion
The two extensions we examined today are quite powerful. They can be used to develop code for all kind of boards that are compatible with the Arduino IDE and boards that are not Arduino compatible but are supported by the plaform.io IDE (when using their extension). These extensions provide a lot of flexibility and features that make the development of projects with a large code base easy, ensuring you don’t repeat lines via code suggestions and intellisense. They also ensure you keep all the files for a project in a single folder which makes it easy to manipulate and move things around. It might be handy for your next mega project.
Feel free to reach out via the comment section if you have any difficulty setting things up.
That’s all for today’s tutorial.
Till Next time.


I am using Arduino IDE to develop software for ESP8266/ESP32 boards. I intend to try Platformio: if I upload to these boards with Platformio, can I reuse these boards should I revert to Arduino IDE ?