

Room Weather Station Using Arduino and BME280 Sensor
- Emmanuel Odunlade
- https://twitter.com/emmaodunlade
- emmaodunlade@gmail.com
- 10.201 Views
- easy
- Tested
- 0 Likes

We have built quite a number of weather stations in several past tutorials, with each one differing from the other by the use of a different sensor, different display, etc. Today, we are going to build another weather monitoring station using the BME280 Temp and humidity sensor from Adafruit and an OLED display.
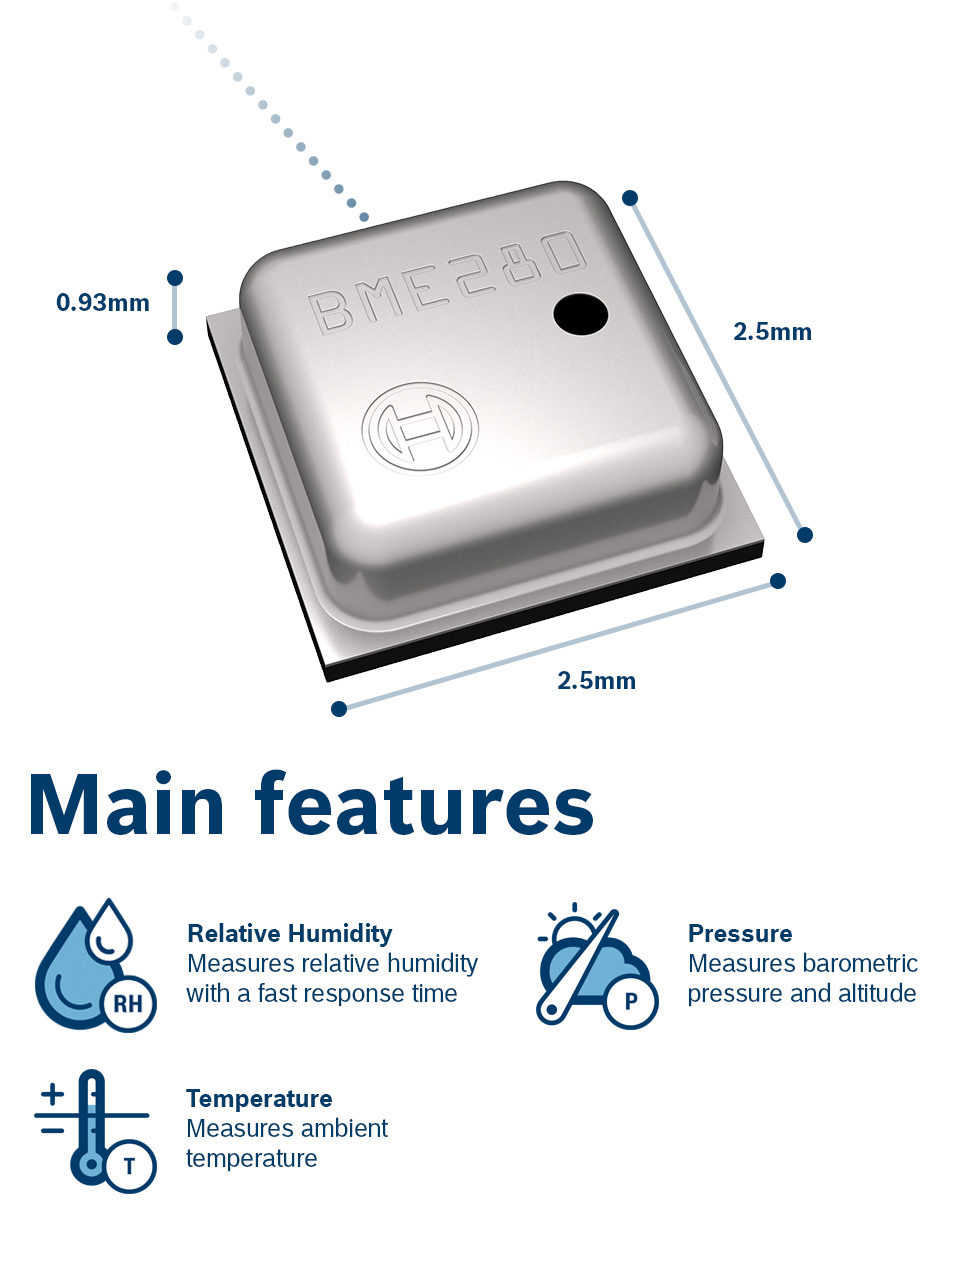
The BME280 is an integrated environmental sensor developed specifically for applications where the overall device size and low power consumption are key design constraints. It combines individual high linearity, high accuracy sensors for pressure, humidity and temperature, with an I2C/SPI interface for communication with MCUs. It is designed for low current consumption (3.6 μA @1Hz), long term stability and high EMC robustness.
The humidity sensor embedded in the BME280 features an extremely fast response time to support performance requirements for new applications such as context awareness, and high accuracy over a wide temperature range. The embedded pressure sensor is an absolute barometric pressure sensor with superb accuracy and resolution with very low noise. The integrated temperature sensor was designed to be used for temperature compensation of the pressure and humidity sensors, but can also be used for estimating ambient temperature with high resolution and low noise.
BME280 supports divers operating ranges which makes it flexible and super useful for applications including;
- Context awareness, e.g. skin detection, room change detection
- Fitness monitoring / well-being
- Warning regarding dryness or high temperatures
- Measurement of volume and air flow
- Home automation control
- Control heating, ventilation, air conditioning (HVAC)
- Internet of things
- GPS enhancement (e.g. time-to-first-fix improvement, dead reckoning, slope detection)
- Indoor navigation (change of floor detection, elevator detection)
- Outdoor navigation, leisure and sports applications
- Weather forecast
- Vertical velocity indication (rise/sink speed)
For today’s tutorial however, we will use it to simply obtain temperature, pressure and humidity data to be displayed on adafruit’s 128×64 OLED display. At the end of today’s tutorial, you would know how to use the BME280 and an OLED display with an Arduino Board.
Required Components
The following components are required to build this project;
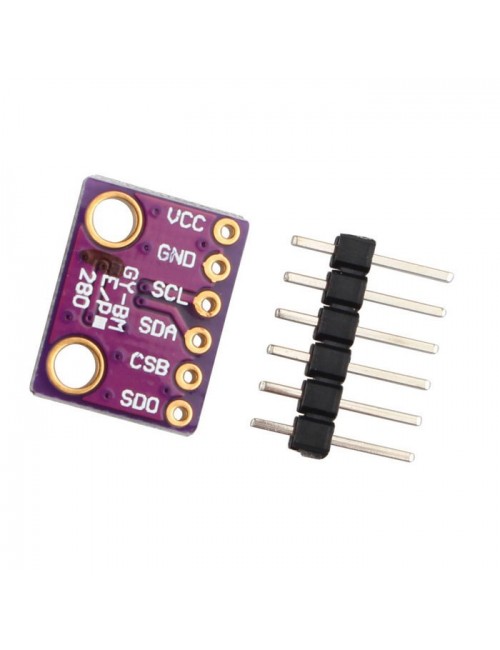
- GY-BME280 Sensor
- Arduino UNO
- OLED 128*64 Display
- Breadboard
- Jumpers
As usual, the exact version of these components, used for this tutorial can be purchased via the attached links.
Schematics
The schematic for today’s project is relatively easy. The BME280 and the OLED display are both I2C based devices, as such, they will be connected to the same pins on the Arduino bus. Connect the components as shown in the schematics below.
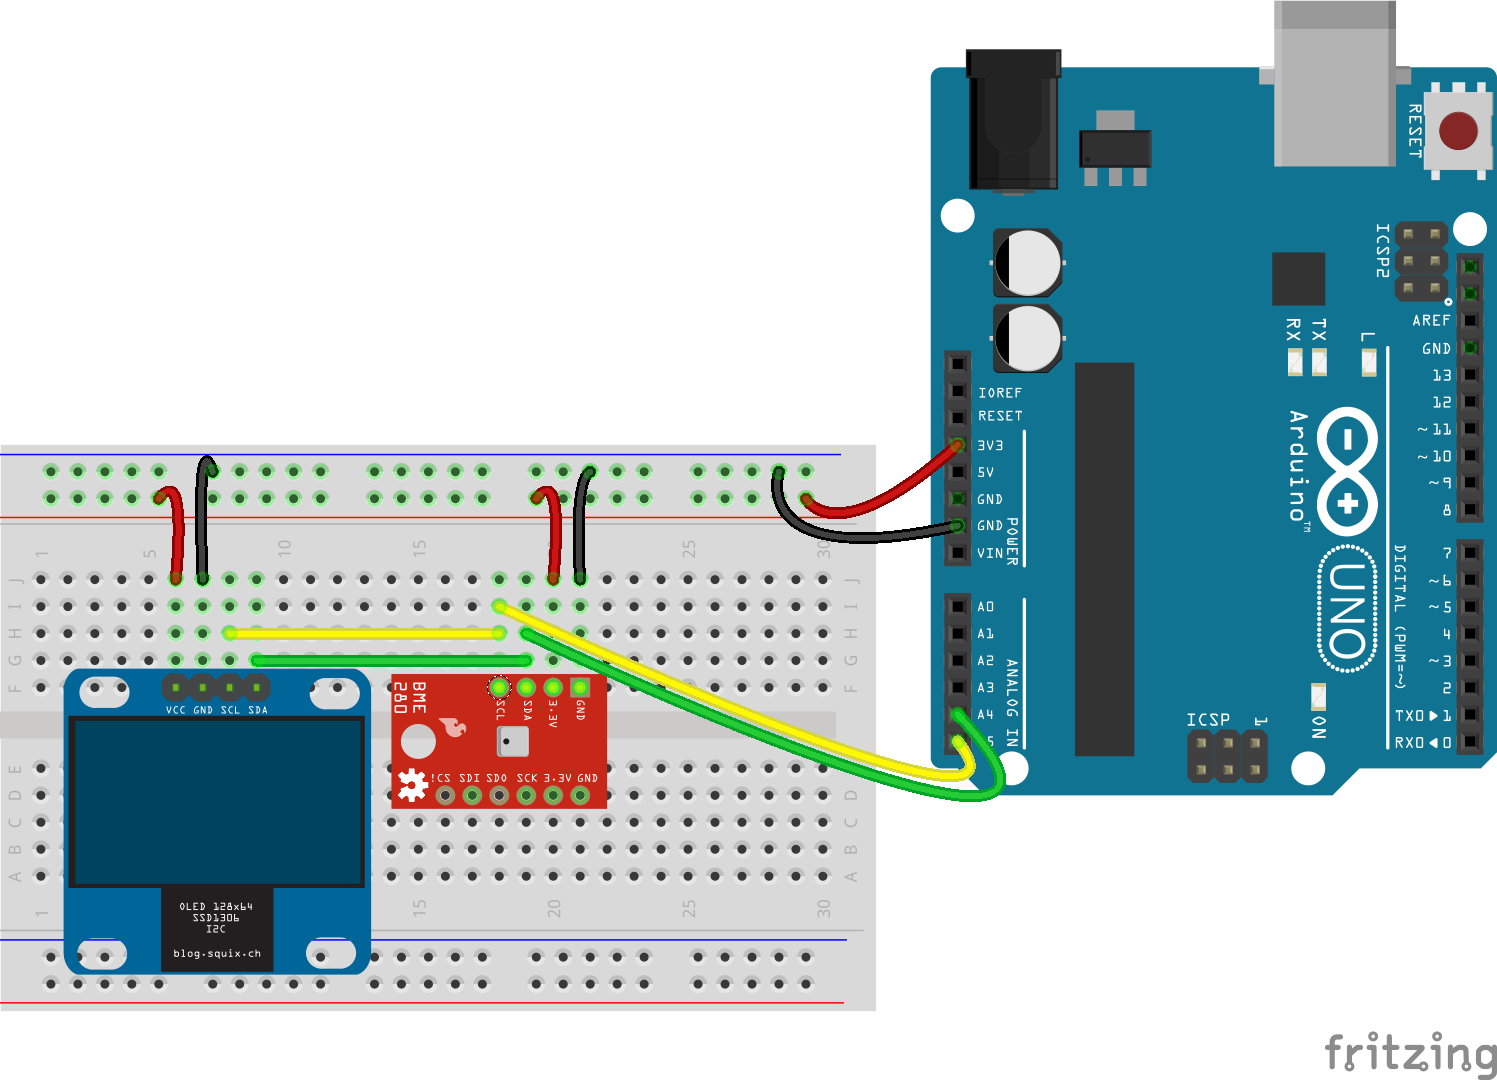
To show how the devices connect pin to pin, a map is shown below;
OLED – Arduino
SCL - A5
SDA - A4
VCC - 3.3v
GND - GND
BME280 – Arduino
SCL - A5
SDA - A4
VCC - 3.3v
GND - GND
Ensure the connections are properly done before proceeding to the next section.
Code
With the connections done, its now time to program the Arduino. Our goal for today’s project, as described in the introduction, is to simply measure the temperature, humidity, and pressure of the environment and display on the OLED display. To achieve this, we will use three major libraries; the adafruit BME280 library, the Adafruit SH1106 library, and the GFX library. The BME280 library helps to easily interface with the BME280 sensor while the GFX and SH1106 libraries help interface with the OLED display. The libraries can all be installed via the Arduino IDE library manager.
The algorithm for the code is quite simple; Initialize the BME280, obtain readings for each of the parameters and display on the OLED.
To do a breakdown of the code, we start as usual, by including the libraries that will be used. In addition to the three libraries mentioned earlier, we will use a fonts library for better user experience.
#include <Adafruit_BME280.h>
#include <Adafruit_SH1106.h>
#include <Adafruit_GFX.h>
#include <Fonts/FreeSerif9pt7b.h>
With that done, define the OLED_RESET pin, create an instance of the SH11o6 class specifying the OLED_RESET variable as an argument and create an instance of the BME280 class. This will be used to communicate with the BME280 sensor over I2C.
#define OLED_RESET 4
Adafruit_SH1106 display(OLED_RESET);
Adafruit_BME280 bme;
With this done, we then proceed to the setup() function. We start the function by initializing the serial monitor with baudrate at 9600, then initialize the display using the display.begin() function with the I2C address of the OLED display(0x3C) as an argument. This is then followed up with the display.setFont() function to set the font after which the display is cleared.
void setup()
{
  Serial.begin(9600);
  display.begin(SH1106_SWITCHCAPVCC, 0x3C);
  display.setFont(&FreeSerif9pt7b);
  display.display();
  delay(2000);
  display.clearDisplay();
To wrap up the setup() function, the BME280 is also initialized with the I2C address. the function is initialized such that it stays in a perpetual while loop if the initialization fails.
if (!bme.begin(0x76))
  {
          Serial.println("Could not find a valid BME280 sensor, check wiring!");
          while (1);
        }
}
The I2C address of each of the components, if not written in its datasheet, can be obtained by scanning the I2C line using the method described on the Arduino website.
Next, we write the void loop() function. We start by clearing the display using the display.clearDisplay() function after which, for each of the parameters, the value is read using the corresponding function; i.e bme.readTemperature() for temperature, bme.readPressure for pressure, and bme.readHumidity for humidity and displayed on the serial monitor and the OLED display.
void loop()
{
  display.clearDisplay();

  // display Temperature
  Serial.print("Temperature = ");
  Serial.print(bme.readTemperature()); //prints in *C
  //Serial.print(bme.readTemperature() * 9 / 5 + 32); //prints in *F
  Serial.println("*C");
  display.setTextSize(1);
  display.setTextColor(WHITE);
  display.setCursor(0,15);
  display.print("Temp:");
  display.print((int)bme.readTemperature()); //prints in *C
  //display.print(bme.readTemperature() * 9 / 5 + 32); //prints in *F
  display.println("*C");
  display.display();

  //display pressure
  Serial.print("Pressure = ");
  Serial.print(bme.readPressure()/100.0F);
  Serial.println("hPa");
  display.setTextSize(1);
  display.setTextColor(WHITE);
  display.print("Press:");
  display.print(bme.readPressure()/100.0F);
  display.println("Pa");
  display.display();

  // display humidity
  Serial.print("Humidity = ");
  Serial.print(bme.readHumidity());
  Serial.println("%");
  display.setTextSize(1);
  display.setTextColor(WHITE);
  display.print("Hum:");
  display.print((int)bme.readHumidity());
  display.println("%");
  display.display();
  Serial.println();
  delay(1000);
}
The complete code for the project is available below and attached under the download section.
#include <Adafruit_BME280.h>
#include <Adafruit_SH1106.h>
#include <Adafruit_GFX.h>
#include <Fonts/FreeSerif9pt7b.h>

#define OLED_RESET 4
Adafruit_SH1106 display(OLED_RESET);
Adafruit_BME280 bme;

void setup()
{
  Serial.begin(9600);
  display.begin(SH1106_SWITCHCAPVCC, 0x3C);
  display.setFont(&FreeSerif9pt7b);
  display.display();
  delay(2000);
  display.clearDisplay();
  if (!bme.begin(0x76))
  {
          Serial.println("Could not find a valid BME280 sensor, check wiring!");
          while (1);
        }
}

void loop()
{
  display.clearDisplay();

  Serial.print("Temperature = ");
  Serial.print(bme.readTemperature()); //prints in *C
  //Serial.print(bme.readTemperature() * 9 / 5 + 32); //prints in *F
  Serial.println("*C");
  display.setTextSize(1);
  display.setTextColor(WHITE);
  display.setCursor(0,15);
  display.print("Temp:");
  display.print((int)bme.readTemperature()); //prints in *C
  //display.print(bme.readTemperature() * 9 / 5 + 32); //prints in *F
  display.println("*C");
  display.display();


  Serial.print("Pressure = ");
  Serial.print(bme.readPressure()/100.0F);
  Serial.println("hPa");
  display.setTextSize(1);
  display.setTextColor(WHITE);
  display.print("Press:");
  display.print(bme.readPressure()/100.0F);
  display.println("Pa");
  display.display();

  Serial.print("Humidity = ");
  Serial.print(bme.readHumidity());
  Serial.println("%");
  display.setTextSize(1);
  display.setTextColor(WHITE);
  display.print("Hum:");
  display.print((int)bme.readHumidity());
  display.println("%");
  display.display();
  Serial.println();
  delay(1000);
}
Demo
Go over the connections once again to ensure you connected everything properly. With that done, copy the code, paste in the Arduino IDE and upload to the Arduino board. You should see the display comes alive as shown in the image below.

Works right?
While this is a simple example of what’s is possible with the BME280, by going through the list of applications listed during the introduction, you can begin to imagine the amount of complex problems that can be solved using this sensor.
That’s all for this tutorial guys, thanks for following. Feel free to hit me up via the comment section if you have with all questions you might have about today’s tutorial.


