

Flood Detector
- Rui Cabral
- http://www.ruijc.webnode.com
- rui.j.cabral@googlemail.com
- 37.911 Views
- medium
- Non tested
- 0 Likes

Introduction
Last week I had a big flood in my house. A water tube broke in the middle of the night making lots of damage. Wooden floor, furniture, small electronic appliances, all damaged due to the water. This made me think on a project that would sense water on the floor and trigger an alarm.
The detector should be able to sense water and trigger an alarm. Also it should be small and battery operated. Battery‘s voltage should be checked also.
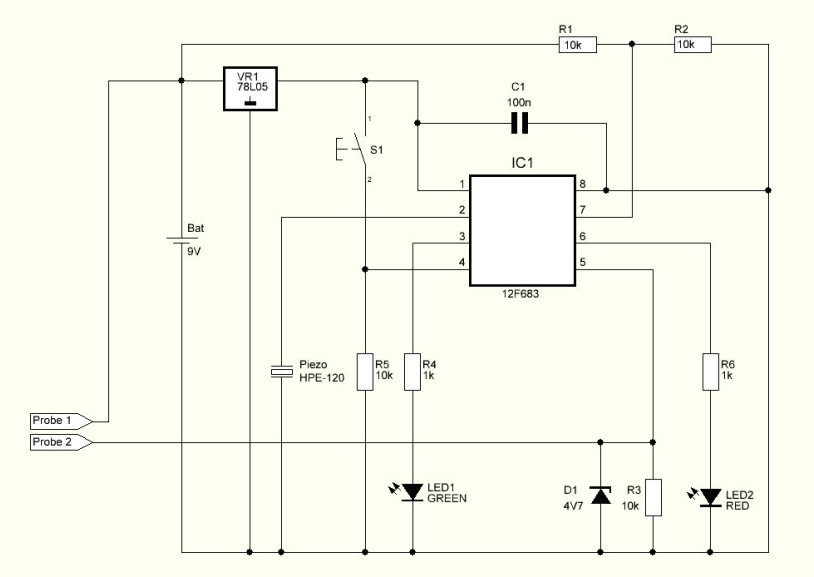
Schematic
Parts
R1 10K ohms resistor
R2 10K ohms resistor
R3 10K ohms resistor
R4 1K ohms resistor
R5 10K ohms resistor
R6 1K ohms resistor
C1 100nF cap
Led1 5mm green led
Led2 5mm red led
D1 4V7 zener diode
Piezo Piezo HPE-120
VR1 78L05 regulator
IC1 12F683 SOIC microcontroller from Microchip
S1 Push button
Others:
Box
9V battery clip
PCB
Metal strips
Hex program for the microcontroller
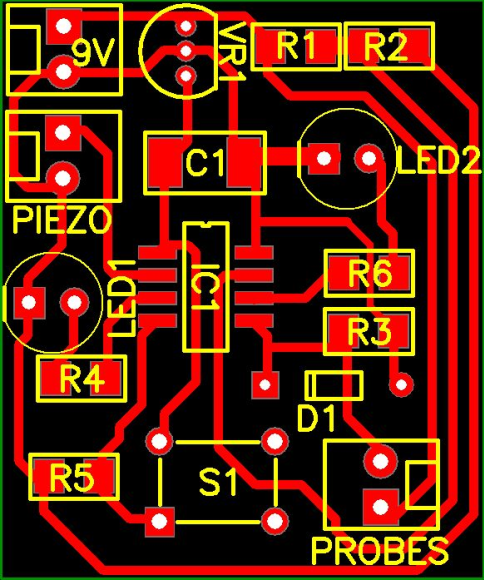
PCB
The PCB used for this Project is single layer and its size is 27.02 mm x 32.41mm. The SOIC version of the microcontroller helps to reduce the size of the PCB.
Box and probes
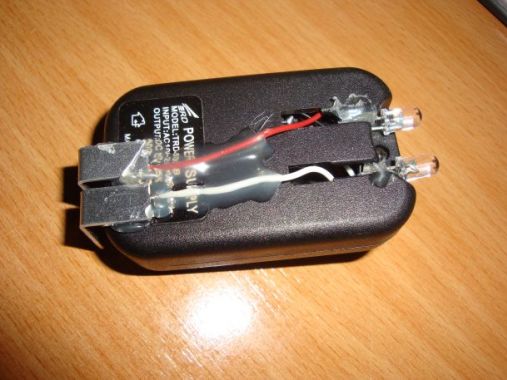
I tried to find a small box that would fit both circuit and box. This way it would be more discrete.
The box that I used did not had enough room for all components, so I had to place both leds and piezo on the exterior of the box. That detail didn’t make any difference since the leds should stay visible and the piezo free to make the loudest sound possible.
The probes can be made from any conductive material, but I preferred not to use copper because it deteriorates with time. In my opinion a good material to be used is stainless steel or aluminium. However, maintenance should be done from time to time checking the probes and testing them with water.
Also, the probes should be placed not to far apart from each other and they never should touch each other. The more probe area available for water sensing the better.
The probes I used in my project are made from aluminium.
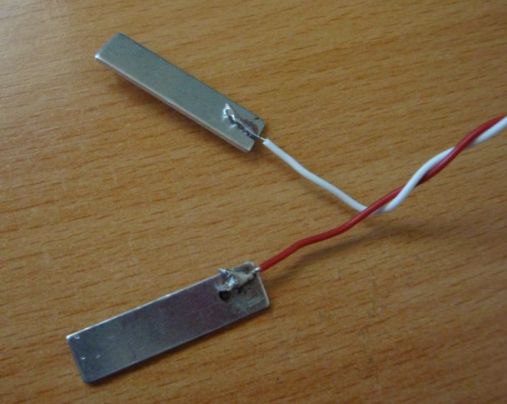
The probes are bent 90º and glued to the box. They must be parallel to each other always.
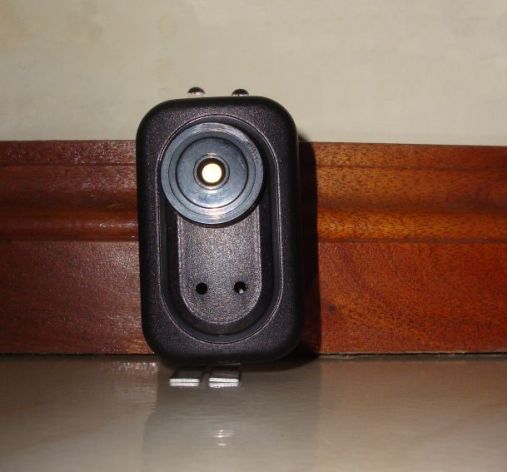
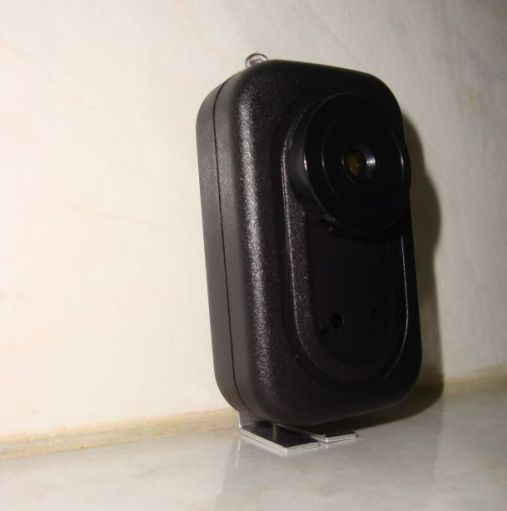
The final assembly looks like this:

The detector is placed on the floor. It’s possible to use some double side tape and stick the detector against the wall or just leave it like the picture below. The probes are on the bottom of the box touching the floor and the leds on the top.
Hex program
The Hex program must be saved in the microcontroller’s memory before soldering on the PCB. Download hex in the download section below.
Testing
Turning on the circuit, both leds and piezo are tested. Also the probes are checked. If the probes are sensing water or any kind of leakage it will turn on the red led and it will trigger the piezo.
After everything is checked ok the detector will enter it’s normal state.
Every 10 seconds it will check the probes and the battery’s voltage.
If water gets between the probes the detector will enter the alarm mode where the red led will turn on and the piezo will start making a loud sound. The detector will keep itself in alarm mode until S1 is pressed.
If the battery’s voltage is good, the green led will flash every 10 seconds but if the voltage reaches 7V the red led will flash every 10 seconds and the piezo will make a short sound to indicate it’s time to change the battery.
The water detection time is less than 10 seconds. Since the microcontroller enters a low consumption state between readings to preserve battery life, this state is always 10 seconds long. If water reaches the probes while being in the low power state it will have to wait until it finishes the sleep state before it can trigger the alarm.
Conclusion
This is a simple but effective water detector. I have built 2 units and have one inside the kitchen and one inside the bathroom. It’s possible to replace the 9V battery with any 9V wall power supply.
Video
Please follow and like us:
PCB


hai..i try to use your hex program but some error occur.can you help me to give the latest programming of this project.
hope you can help me..
halo, could you tell me the steps to programming the hex for flood detector? please send it to may email, thank you
Where’s the hex file? I cannot find it on the download section. Thanks
hex file is uploaded on the download section above. Thanks for letting me know!
hi admin plz can u help me i have problem for find prgramme of this progect at form language c can u give to me and thank u very much