Send an email with your Wemos D1 board using a PHP script – ESP8266
The ESP8266 WiFi module and development boards based on it, enable makers to add an extra layer of intelligence, usefulness, value, and coolness to their creations as it provides an easy and cheap way to build IoT projects. Today's tutorial will center around sending an email using the ESP8266 as a demonstration of capabilities of this module.
The ESP8266 WiFi module and development boards based on it, enable makers to add an extra layer of intelligence, usefulness, value, and coolness to their creations as it provides an easy and cheap way to build IoT projects. Today’s tutorial will center around sending an email using the ESP8266 as a demonstration of capabilities of this module. The tutorial will be particularly useful if you are building projects that involve alerts and notifications like an intruder alarm system or a gas leakage notification system.
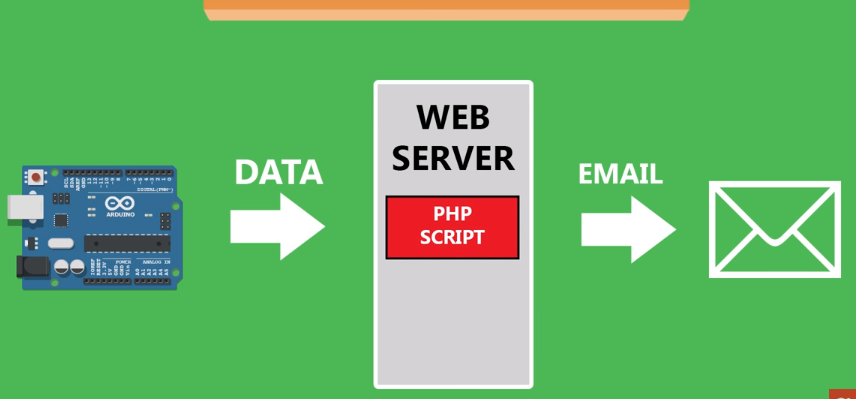
The inspiration for this project is based on the thinking about different ways through which we can get reports from a board. I felt it will be cool if a project could send hourly or per minute reports based on readings from a sensor via email. So for this tutorial, we will connect a DHT22 temperature and humidity sensor to the Wemos D1 (Esp8266 based) board, such that, when the project boots up, it will measure the temperature and humidity and sends the data to a web server hosted on Bluehost. The web server which runs a simple 7-line PHP script, forwards the received data to a predefined email address.
Instead of using our own web server, we could use an IoT cloud platfrom like adafruit.io and set up an email trigger/alert, but I believe going this route is more effective and flexible as you have full control of the source code.
Require Components
The following components are required to build this project:
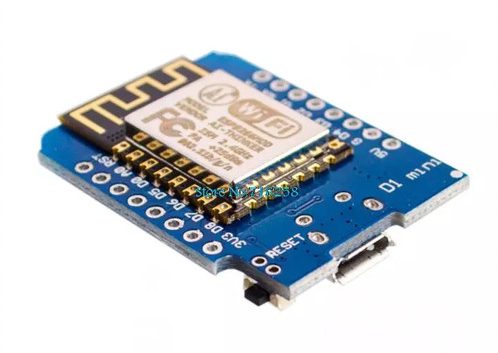
The exact components used for this tutorial can be purchased via the links attached to them. It is important to note that any of the Wemos boards listed above will work , so you need just one of the two.
As mentioned above, a web server is also needed for this tutorial. There are several free web hosting platforms available which you can use for this project, but since I already had an account with Bluehost, I decided to go with them.
Schematics
The schematic for this project is simple. All we need to do is connect the DHT22 temperature and humidity sensor to the Wemos board. Although the Wemos D1 mini was used for this schematic, you can use any of the other ESP8266 boards available. Connect the components as shown in the schematics below.
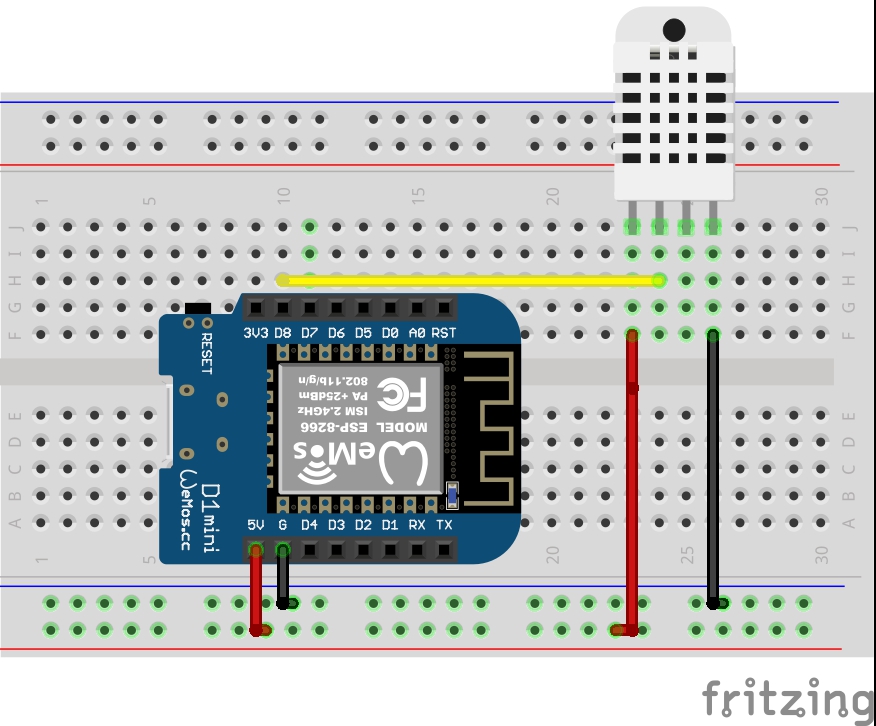
Here is a breakdown of the connections between the pins to make the connections clearer.
DHT11 – Wemos
VDD – 5v
Data – D8
GND – GND
The connections seems simple enough, but go over it one more time to be sure the wires are properly connected.
Code
There are two parts of the code for this project. The first one is the PHP script which will run on the webserver. This script will take the data sent by the Wemos and forward it to the designated email address.
The second part of code is the Arduino sketch which will run on the Wemos. It will obtain temperature and humidity data from the DHT22 and send it to the Bluehost webserver via a WiFi-based connection.
Arduino Code
We will start with the sketch for the Wemos. If this is the first time you are using the Arduino IDE to program an ESP8266 based board, you will need to download the board support files. This can be easily done using the Arduino board manager, just enter ESP8266 into the search bar and select ESP8266 by the community. Along with the board support files, this will also install a bunch of libraries that may be needed when working with any ESP8266 based board.
The sketch for the Wemos is a simple one. We start by including two important libraries; the ESP8266WIFI.h library and the DHT library. The DHT library makes it easy for us to obtain data from the DHT22 without many lines of code while the ESP8266WIFI.h library makes it easy for us to use the WiFi features of Wemos.
//Written by Nick Koumaris
//info@educ8s.tv

#include <ESP8266WiFi.h>
#include "DHT.h"
After including the libraries, we add the SSID and password of the WiFi network through which the Wemos D1 will connect to the internet and create an instance of the WiFiclient followed by the name/address of the server to which data will be sent.
const char* ssid     = "ZyXEL";      // SSID of local network
const char* password = "YourPasswordGoesHere";   // Password on network
WiFiClient client;
char servername[]="educ8s.tv";  // remote server we will connect to
Next, we declare the variables; temperature, and humidity which we will use to store corresponding data and we specify the pins of the Wemos to which the DHT sensor is connected. We also create an instance of the DHT library with the DHT type and the pin to which it is connected on the Wemos as inputs.
float temperature;
float humidity;

#define DHTPIN D8

#define DHTTYPE DHT22
DHT dht(DHTPIN, DHTTYPE);
Next is the void setup() function. Since the code is just a demonstration, all the tasks will be performed under the setup function. We initializing communication with the DHT and setting up serial communication between the Wemos and the Arduino serial monitor. With that done, we initiate a connection to the internet via the provided access points and add the code to obtain the data from the DHT using the readsensor() function. The obtained data is then sent to the web server using the sendDataToServer() function.
void setup() {
  dht.begin();
  delay(2000);
  Serial.begin(115200);
  Serial.println("Connecting");
  WiFi.begin(ssid, password);

  while (WiFi.status() != WL_CONNECTED) {
    delay(100);
  }
  Serial.println("Connected");
readSensor();
  String temperatureString = String(temperature,1);
  String humidityString = String(humidity,1);
  sendDataToServer(temperatureString,humidityString);
}
The void loop, as has mentioned earlier is left empty.
void loop() {

}
The complete code for this project is available below. It is also attached in the zip file located under the downloads section.
//Written by Nick Koumaris
//info@educ8s.tv

#include <ESP8266WiFi.h>
#include "DHT.h"

const char* ssid     = "ZyXEL";      // SSID of local network
const char* password = "YourPasswordGoesHere";   // Password on network

WiFiClient client;
char servername[]="educ8s.tv";  // remote server we will connect to
String result;

float temperature;
float humidity;

#define DHTPIN D8

#define DHTTYPE DHT22
DHT dht(DHTPIN, DHTTYPE);

void setup() {
  dht.begin();
  delay(2000);
  Serial.begin(115200);
  Serial.println("Connecting");
  WiFi.begin(ssid, password);

  while (WiFi.status() != WL_CONNECTED) {
    delay(100);
  }
  Serial.println("Connected");
  delay(1000);
  readSensor();
  String temperatureString = String(temperature,1);
  String humidityString = String(humidity,1);
  sendDataToServer(temperatureString,humidityString);
}

void loop() {

}

void sendDataToServer(String temperature, String humidity)
{
  if (client.connect(servername, 80)) {  //starts client connection, checks for connection
    Serial.println("connected");
    client.println("GET /send_email.php?temperature="+temperature+"&humidity="+humidity+" HTTP/1.1"); //Send data
    client.println("Host: educ8s.tv");
    client.println("Connection: close");  //close 1.1 persistent connection
    client.println(); //end of get request
  }
  else {
    Serial.println("connection failed"); //error message if no client connect
    Serial.println();
  }

 while(client.connected() && !client.available()) delay(1); //waits for data
  while (client.connected() || client.available()) { //connected or data available
    char c = client.read(); //gets byte from ethernet buffer
      result = result+c;
    }

  client.stop(); //stop client
  Serial.println(result);

}


void readSensor()
{

  humidity = dht.readHumidity();
  temperature = dht.readTemperature();
  Serial.println("Temperature:");
  Serial.println(temperature);
  Serial.println("Humidity:");
  Serial.println(humidity);

}
Server side PHP Code
The second part of the code is the PHP script that receives the data from the Wemos and forwards it to the specified email address.
The code starts with by retrieving the temperature and humidity data and merges them into a text string.
<?php
$temperature = $_GET["Temperature"];
$humidity= $_GET["Humidity"];


$text ="Temperature: {$temperature} C Humidity: {$humidity} %";
?>
Next, the email details of the sender and that of the receiver are added after which the email is sent using the mail() function. This takes the sender email, the subject, the body, and the receiver email address as arguments.
<?php
$admin_email 	= "youremail@something.com";
$email 	= "youremail@something.com";
$subject ="Temperature and Humidity Report";


//send email
mail($admin_email,"$subject",$text,"From:" .$email);
?>
The complete code is shown below and attached to the zip file under the downloads section.
<?php

$temperature = $_GET["Temperature"];
$humidity= $_GET["Humidity"];


$text ="Temperature: {$temperature} C Humidity: {$humidity} %";

$admin_email 	= "youremail@something.com";
$email 	= "youremail@something.com";
$subject ="Temperature and Humidity Report";


//send email
mail($admin_email,"$subject",$text,"From:" .$email);

?>
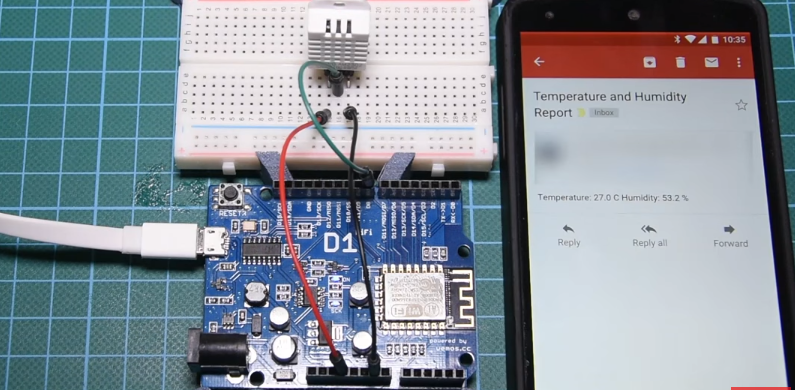
Demo
Upload the code to the Wemos, after a while, depending on the signal strength of your internet connection, you should get an email notifying you about the current temperature and humidity.
As mentioned earlier, this can be done using a couple of other methods. We could use MQTT with a cloud platform like adafruit.io or shiftr.io, but this process, is most rewarding due to its low cost and the fact that you have full control on everything.
That’s it for this tutorial, feel free to drop any questions or suggestions about the tutorial under the comment section below.
Till next time.
The youtube version of this tutorial is available here.
EXCELENT WORK, thanks very much for share this, with this I make alert sistem in my domain without any pay to servers, I use my server and run perfect, I made the test setp by step and all run perfect, I receipt emails from the script PHP, just one commet the email receiver and dender are inverted, and the speed need satbility in 9600 in skecth or fail to delivery data,
Dave.