

Arduino Button Debounce Tutorial
- Nick Koumaris
- http://educ8s.tv/
- info@educ8s.tv
- 30.239 Views
- Tested
- 0 Likes

One of the major problems encountered when using push buttons and switches in digital electronics project is the problem of bouncing. When we press a button once it may register twice and when we press it four times, in a row, for instance, it may register just twice. This occurrence is due to a property of switches known as bounciness which is as a result of the physical property of the switches.
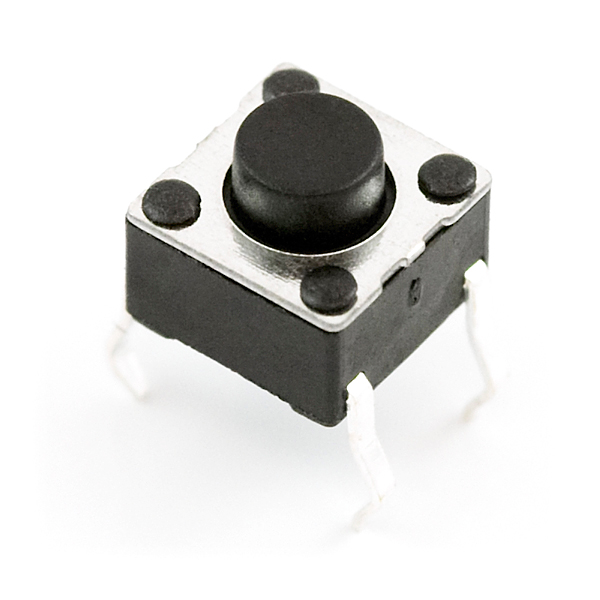
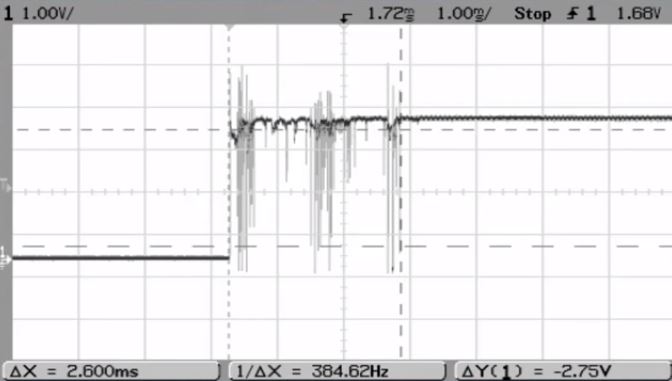
Contact bounce (also called chatter) is a common problem with mechanical switches and relays. Switch and relay contacts are usually made of springy metals so when a switch is pressed, its essentially two metal parts coming together and even though the connection may seem already made to the user, it may not happen immediately, as a matter of fact, it may make contact on one side – then both – and then the other side –, technically bouncing between in-contact and not-in-contact until it finally settles down. This result in a rapidly pulsed electric current instead of a clean transition from zero to full current as shown in the graph below.
The effect of bouncing is usually unimportant in power circuits but causes problems in some analog and digital circuits that respond fast enough to misinterpret the on‑off pulses as a data stream and as such even though bouncing occurs within a millisecond time frame, the microcontroller often works at a faster speed and may fail or succeed to register the press of the switch due to the state of the bounce.
The effects of contact bounce can be eliminated (debounced) by use of mercury-wetted contacts, but these are now infrequently used because of the hazard of mercury release. Alternatively, contact circuits can be low-pass filtered to reduce or eliminate multiple pulses. In digital systems, multiple samples of the contact state can be taken or a time delay can be implemented in order for the contact bounce to settle before the contact input is used to control anything.
For today’s tutorial, we will be looking at how to remove the bounce effect in switches used for an Arduino project using software debounce method.
Required Components
The following components are required to build this project.
As usual, each of the components can be purchased by clicking on the link attached to them.
Schematics
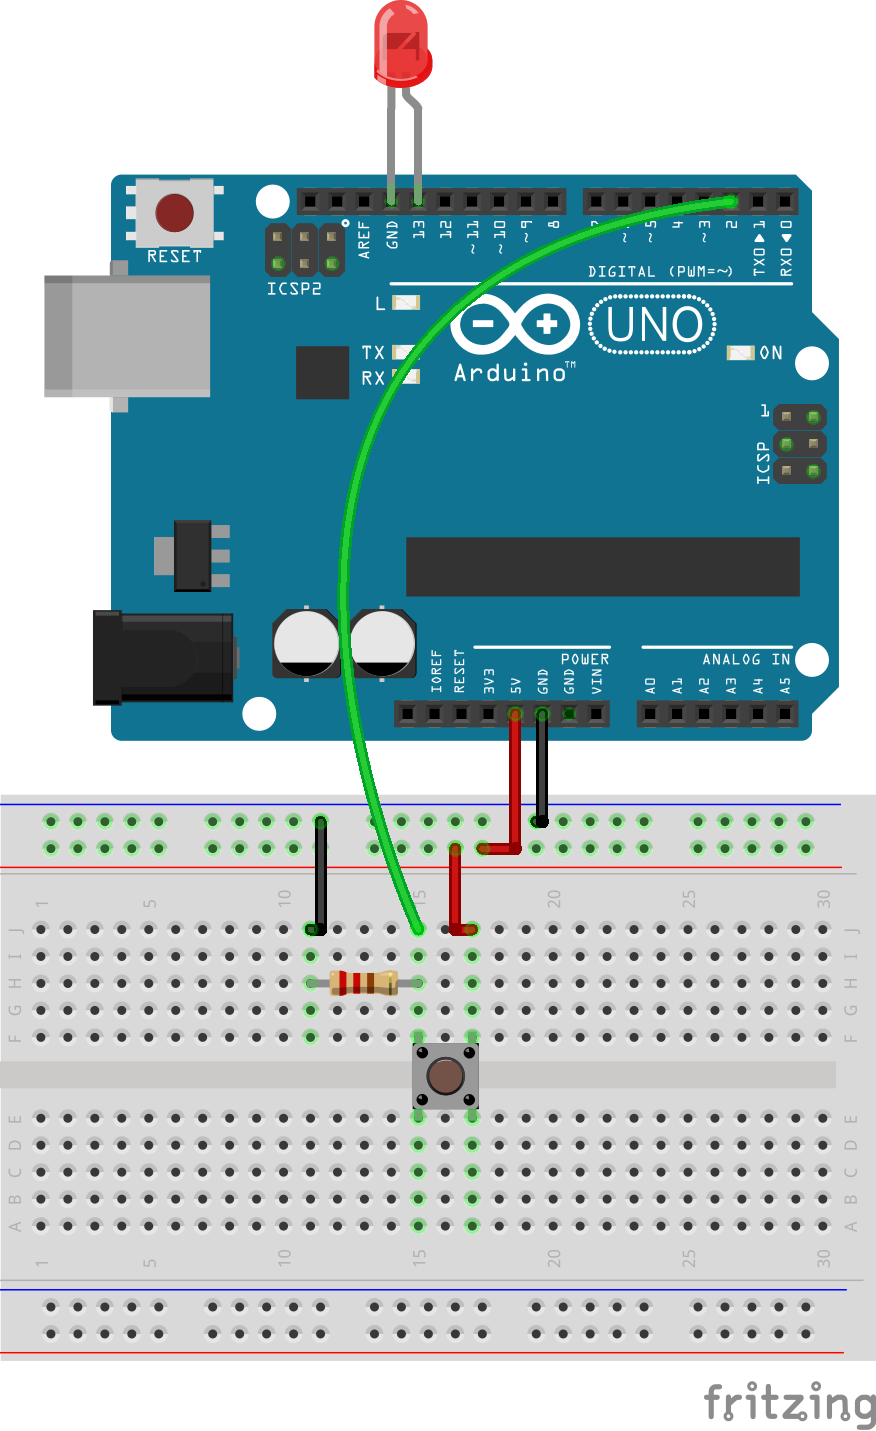
The circuit for this project is fairly easy. Connect the components as shown in the schematics below.
Check the connection once more to be sure everything is as it should be.
Code
Code for this project is a fairly simple one, we will not be using any library and our goal is to easily handle the debounce problem such that the when the switch is pressed it is read accurately by the microcontroller.
The first thing we do in the code is to declare the pins to which the LED and the pushbutton is connected to on the Arduino. We also declare variables which will be used to hold the state of the LED and the button.
    /////////////////////////////////////////////////////////////////
   //            Arduino Debounce Button     v1.01     //
  //         Get the latest version of the code here:            //
 //     http://educ8s.tv/arduino-button-debounce-tutorial       //
/////////////////////////////////////////////////////////////////

const int buttonPin = 2;
const int ledPin =  13;
int ledState = LOW;
boolean buttonState = LOW;

int pressed=0;
Next, we then move to the void setup function where we set the pin mode of the pin to which the LED and the push button are connected to on the Arduino.
void setup() {
  pinMode(ledPin, OUTPUT);
  pinMode(buttonPin, INPUT);
}
With that done, we move into the void loop section. The actions performed within the void loop is heavily reliant on the debounce button function, which basically reads the state of a button then waits for a few ms after which it checks if the state is the same before it is registered.
boolean debounceButton(boolean state)
{
  boolean stateNow = digitalRead(buttonPin);
  if(state!=stateNow)
  {
    delay(10);
    stateNow = digitalRead(buttonPin);
  }
  return stateNow;

}
The void loop uses this function to determine if a button was pressed and the number of times it has been pressed. When the number of times which the button has been pressed gets to 10, the LED is turned on.
void loop() {

  if(debounceButton(buttonState) == HIGH && buttonState == LOW)
  {
    pressed++;
    buttonState = HIGH;
  }
  else if(debounceButton(buttonState) == LOW && buttonState == HIGH)
  {
       buttonState = LOW;
  }
   if(pressed == 10)
  {
    digitalWrite(ledPin,HIGH);
  }
}
The full code for the project is available below and can also be downloaded from the download section at the end of this tutorial.
    /////////////////////////////////////////////////////////////////
   //            Arduino Weather Station Project #2     v1.01     //
  //         Get the latest version of the code here:            //
 //     http://educ8s.tv/arduino-button-debounce-tutorial       //
/////////////////////////////////////////////////////////////////

const int buttonPin = 2;
const int ledPin =  13;
int ledState = LOW;
boolean buttonState = LOW;

int pressed=0;

void setup() {
  pinMode(ledPin, OUTPUT);
  pinMode(buttonPin, INPUT);
}

void loop() {

  if(debounceButton(buttonState) == HIGH && buttonState == LOW)
  {
    pressed++;
    buttonState = HIGH;
  }
  else if(debounceButton(buttonState) == LOW && buttonState == HIGH)
  {
       buttonState = LOW;
  }
   if(pressed == 10)
  {
    digitalWrite(ledPin,HIGH);
  }
}

boolean debounceButton(boolean state)
{
  boolean stateNow = digitalRead(buttonPin);
  if(state!=stateNow)
  {
    delay(10);
    stateNow = digitalRead(buttonPin);
  }
  return stateNow;

}
Demo
Copy the code, paste in the Arduino IDE and upload to your Arduino board. With the circuit setup as shown in the image below, you should see the LED come on after 10 button press.

With this, we can now build more reliable pushbutton/switch based projects.
That’s it for this tutorial guys, As usual, let me know if you have any questions or comments via the comment section.
You can watch the video of this tutorial here.


Please don’t forget to use a resistor in the LED or the LED will break.
It is scaring this is the first result returned by Google: debouncing using a delay is such a bad idea….
Could you let us know why?
Sure! Sorry for the harsh comment, I was in a hurry.
Reason number one: using the delay() function you are actually putting the processor “on-hold”, meaning you can’t do anything while waiting for the debounce.
Imagine you are using your processor to drive a stepper motor and you want to start/stop the motor spin via the button. When you detect a button press, your motor will stop spinning while you are waiting for click to be confirmed, no matter if that was a “real” click or just a bounce.
Reason number two: while waiting for the delay to expire the processor is also unaware of anything occurring in the processor and so unable to respond to any other event. If you want to debounce two buttons at the same time that will be impossible: you have to debounce one button first, then debounce the second. Not even mentioning intercepting other events generated by other “sensors”.
Reason number three: teaching people to use the delay() function as a way to wait for things to happen don’t put them on the right path, even if it might look much more intuitive. It can be used as a form of simplification whenever necessary, but these processors are capable of doing only one thing at a time, the use of delay prevents any form of “apparent concurrency”.
To all of that you might argue that you are introducing only 10ms of delay, something not even the human eye can perceive, but those 10ms are just an example value, which really depends on the button and the level of certainty we are looking for, right?
There is a better way of debouncing buttons which doesn’t use any delay(): store the previous state of the button and the last time the state has changed and compare that with the current time. There are plenty of examples out there, most pretty clear, others a little more convoluted.
I personally prefer a very efficient (but less understandable) way of debouncing buttons which uses one number, bit manipulation and multiple readings: https://gist.github.com/rlogiacco/75fea22fd21e97e3466d.