Search the Community
Showing results for tags 'arduino'.
-
 Hello friends, hope you all are fine and having fun with your lives. In today’s post we are gonna have a look at How to use Temperature Sensor 18B20 in Proteus ISIS. I will use Arduino board as a microcontroller and will connect the temperature sensor with it and then will display the code on LCD. I have already posted the same tutorial in which I have done Interfacing of Temperature Sensor 18B20 with Arduino but in that project I have used the real components and designed the hardware. But today, I will just show you the simulation so that you could test the simulation first and then design it in hardware. Temperature Sensor 18B20 is the most commonly used temperature sensor. Its a one wire sensor means it sends data through a single wire and we can connect multiple sensors with a single wire, that’s why its quite efficient and easy to use as well. I have also posted a tutorial on How to Interface LM35 sensor with Arduino in Proteus ISIS which is another temperature sensor so give it a try as well and let me know which one you think is better. Anyways let’s get started with temperature sensor 18B20 in Proteus ISIS. HOW TO USE 18B20 IN PROTEUS ISIS First of all, get these components from Proteus components list as shown in below figure: Now design the circuit as shown in below figure: As you can see in above simulation, we have used Arduino UNO board along with LCD and 18B20 temperature sensor. 18B20 in Proteus can’t detect the real temperature but we can change the temperature by pressing + and – buttons. So, now we have interfaced the temperature sensor and the LCD with Arduino. Next we are gonna design the code for Arduino and will upload it in Arduino baord. Note: If you don’t know How to use Arduino in Proteus then read Arduino Library for Proteus. You should also read How to get Hex File from Arduino, as Arduino software doesn’t generate the hex file. Now download these three libraries, one is “one wire” library which is the protocol for 18B20 temperature sensor, next is the Dallas Temperature sensor library which is the actua library for temperature sensor 18B20 and uses one wire library. Third library is the Crystal LCD library which is used for displaying character on LCD. So, download all these three libraries by clicking on below buttons and then paste them in your libraries folder of Arduino software. Download One Wire LibraryDownload Dallas Temperature LibraryDownlaod Liquid Crystal Library Now after adding these libraries, open your Arduino software and paste the below code into it. #include <OneWire.h> #include <DallasTemperature.h> #include <LiquidCrystal.h> #define ONE_WIRE_BUS 6 OneWire oneWire(ONE_WIRE_BUS); DallasTemperature sensors(&oneWire); LiquidCrystal lcd(12, 11, 5, 4, 3, 2); void setup(void) { Serial.begin(9600); Serial.println("Welcome to TEP !!!"); Serial.println("www.TheEngineeringProjects.com"); Serial.println(); sensors.begin(); lcd.begin(20, 4); lcd.setCursor(5,0); lcd.print("Welcome to:"); lcd.setCursor(1,2); lcd.print("www.TheEngineering"); lcd.setCursor(4,3); lcd.print("Projects.com"); delay(5000); } void loop(void) { sensors.requestTemperatures(); Serial.print("Temperature : "); Serial.println(sensors.getTempCByIndex(0)); //lcd.clear(); lcd.setCursor(0,0); lcd.print("Temperature: "); lcd.print(sensors.getTempCByIndex(0)); lcd.print("C"); delay(1000); } Now get your hex file from Arduino and upload it to your Proteus Arduino board and hit the RUN button. If everything goes fine then you will something like this at the start: After a delay of around 5 sec you will start receiving the Temperature sensor 18B20 values on your LCD as shown in below figure: Now you can see the value shown in the temperature sensor is the same as in LCD. So, now by clicking the + and – buttons on temperature sensor, you can increase and decrease the value of temperature and same will be changed in LCD. That’s how you can do simulation of Temperature sensor 18B20 in Proteus ISIS. Its quite simple and easy to use. That’s all for today, hope you get some knowledge out of it.
 -
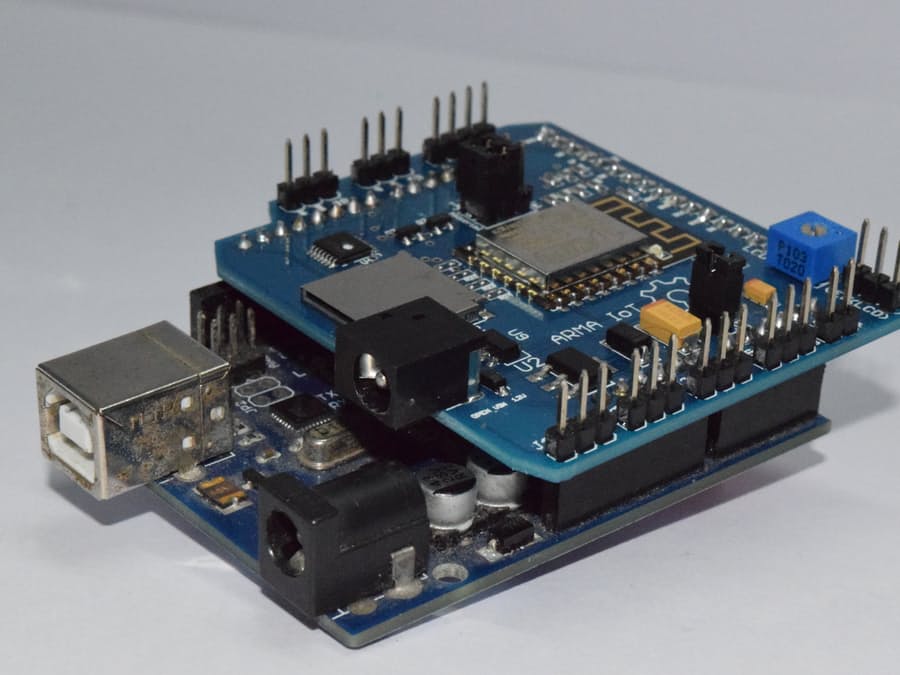
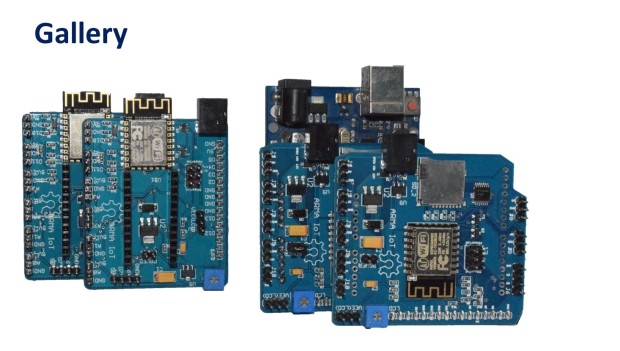
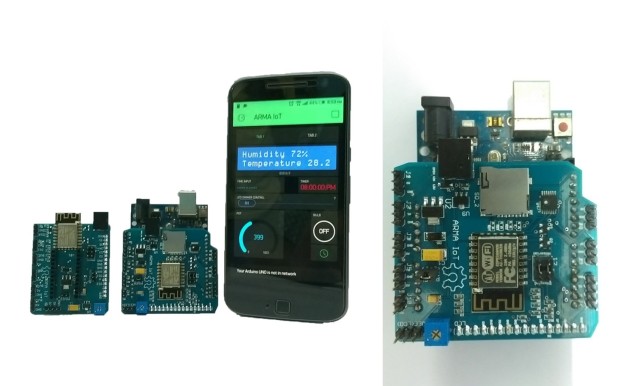
Are u looking for a way to connect the Arduino to the internet easily? Do you want to develop your IoT project quickly without much hassle? ARMA IoT might just be the thing for you! The simple and efficient Arduino shield is powered through a esp12f wifi module, which enables it to be connected to the wifi network. it also has an SD card slot for for extra data storage like its wired brethren the Ethernet Shield. The ARMA IoT goes a step further and provides an easy plug and play feature for most of the common devices such as sensors, motors, LCDs and relays. The ARMA IoT is a great place for beginners to start their IoT project, as it requires minimum time to setup the hardware all thanks to the plug and play feature. Even the programming is simplified through the help of apps such as Blynk, which provides easy feature of controlling the Arduino through your Android or iOS phone. Thingspeak an upcoming IoT platform is also supported by the shield. The ARMA IoT platform proves as a tool for aspiring beginners and also a prototyping tool for advanced users. IoT products can be developed much faster with the help of this board. Weather it is creating a simple IoT project such as blinking LEDs or controlling relays, or developing your own Home automation system, the ARMA IoT facilitates it all and things seem to happen rather quickly with all the features provided on the board. The wifi connection feature can provide fast communication between devices or two instances of ARMA itself, making it applicable for simple swarm robotics, wireless controllers etc. The applications can also be extended to simple robotics, Energy management systems and it does not stop there as it all depends upon the users creativity. To get started simple tutorials are provided on the YouTube page of ARMA IoT, the link below guides on the setup of Arduino and ARMA IoT with the help of Blynk app More tutorials and projects will be posted to help you make the most of the shield. Of Course there are also various DIY communities that can provide you with both support and inspiration for your upcoming IoT projects. thus ARMA is another simple board that has the ability to bind many devices together. The ARMA IoT is still undergoing a crowdfunding campaign in Indiegogo and is available for pre-order. https://www.indiegogo.com/projects/arma-iot-breakout-board-for-arduino#/
-
Integrated with the homemade low-pass filter, this Arduino-based simple WAV player is to send out PWM signal generated by UNO, then through the low-pass filter and make the PCM data stored in the flash of UNO into sounds. Basically, the player cannot be regarded as a pure WAV playback, because by extracting the data from the WAV file and storing it in an array format in UNO, this tutorial is for reference. You can make SD card based WAV player by referring to this idea. The WAV player is easy to make on different platforms and applicable for various scenarios like voice broadcast system, electronic keyboard, as long as you understand the principle of sound. The hardware: 1.USB mini speaker 2.Digital push button 3.Freaduino UNO 4.4×6 cm universal board 5.Dupont line 6.Audio port more imformation >>>http://www.tenco-tech.com/article.php?id=94


-
Starting with this post, you’ll find on my website a tutorial about the new Arduino Yun: I’m going to blog about my experiments with that board and show its features through real examples… today you’ll learn how to connect it to your wifi network! Yun and wifi One of the most useful features Arduino Yun has is the ability to connect to wired (Ethernet) or wireless networks without the needing of an external shield. I decided to supply my Yun using an external micro USB power supply (power supplies for modern cellphones works fine): By default, Arduino Yun acts as an access point, broadcasting an unprotected wifi network with Arduino Yun-xx SSID: After having established a connection, your PC obtains an IP address on the network 192.168.240.0/24: You can reach the administrative interface of Arduino Yun pointing a web browser to the address http://192.168.240.1. The default password is arduino: After having logged in, click on configure: You can change the board’s name (in the screenshot I chose Yun-Luca), the password, the timezone and connect the Yun to one of the wireless networks it detected: After a reboot, the board will be connected to your network! Upload via wifi Now you can use a new feature of Arduino Yun: the ability to upload a sketch using the network, without the needing to connect the board to your PC using a USB cable. Open the IDE (warning: you must download the latest version, at the moment I’m writing 1.5.4r2) and choose Arduino Yun as your board. The IDE will scan your network searching for Yun boards and, under the port menu, will display your board and its IP address: You can now compile and upload your sketch as usual… when the upload process will start, you’ll be prompted for the Yun password: SSH terminal You can also connect to your Yun in text mode, using an SSH client (for example PuTTY per Windows)… in the next posts you’ll discover why this can be useful: For more details,please refer to original post http://www.lucadentella.it/en/2013/11/05/yun-collegamento-alla-rete-wifi/
-
Project with Arduino to share... I have tried to make a similar one befire, but it failed. Hope this article helps you like it helps me.
-
 I am quite new to Matlab, I heard that its quite easy to rotate servo to any precise angle using matlab. I have tried searching but not getting proper procedure, also tell me some good resources to learn Matlab?