Help validating a 3.3 V resistor heater for BMI270

Abis1045

Sep 17, 2026
1
Joined
Sep 17, 2026
Messages
1
Hello everyone,
I am designing a resistor-based sensor heater for a BMI270 accelerometer with temperature sensor. My target is to maintain the BMI270 local temperature near −20°C, Even though ambient is greater than−20°C. Reason is across temperature accuracy for the BMI270 is reducing. So, to get accelerometer accuracy within +-1% across temperature.
The heater will be controlled by a microcontroller STM32G031F6P6 using PWM and a MOSFET. The design requirement calls for a heat resistor thermally coupled to the accelerometer and PWM activation below an experimentally determined temperature threshold.

I simulated these arrangements in MATLAB:

One 75 Ω resistor​

  • 3.3 V supply
  • Approximately 145.2 milli watts at 100% duty
  • Simulated BMI270 average temperature: approximately −19.1°C
  • Required PWM duty: approximately 95.7%

Two 200 Ω resistors with BMI270 in the middle​

  • Equivalent resistance: 100 Ω
  • Total heater power: approximately 108.9 milli watts
  • Power per resistor: approximately 54.45 milli watts
  • Total current: approximately 33 mA
  • Simulated BMI270 average temperature: approximately −19.24°C
  • Required PWM duty: approximately 96.3%
The two-resistor arrangement produces a more symmetrical temperature distribution in the MATLAB model. The power sheet also evaluates a 100 Ω heater at 3.3 V and calculates 108.9 milli watts

My main questions are:
  1. 1. Is one resistor or two symmetrical resistors better for heating the BMI270 uniformly?
  2. 2. Is approximately 100 to 145 milli watts a realistic heater-power range for a small PCB at −40°C ambient?
  3. 3. Is a 2 mm spacing between the heater and BMI270 reasonable?
  4. 4. Should the heater and sensor be placed on a shared copper island?
  5. 5. How should copper layers, FR-4, traces, vias, convection, and the enclosure be represented in the thermal model?
  6. 6. Is a steady-state 2D MATLAB model sufficient for initial sizing?
  7. 7. What prototype measurements should I take to validate the model and tune the PWM controller?
  8. 8. Is my calculation correct?
I have attached the calculation spreadsheet, MATLAB temperature plots, and the equations used.
Any suggestions or corrections would be appreciated.
 

Attachments

  • Power_Estimation - Copy.csv
    787.4 KB · Views: 5

Sunnysky

Jul 15, 2016
577
Joined
Jul 15, 2016
Messages
577
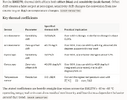
The important thermal paths are:

  • Heater to PCB and sensor: Rhs
  • Sensor package and PCB to ambient: Rsa
  • Heater and copper planes to the rest of the board: Rhb
  • Board, enclosure, and surrounding air to ambient: Rba
At steady state, the approximate temperature rise is governed by:

ΔT ≈ Pheater x Rθ,effective

For a 20 °C rise, 109 mW on 100 Ω equals an effective 184 °C thermal resistance.

With self-adhesive stripfoam insulation on either side of the board you can increase the Rba significantly and use less heat or raise the setpoint point to reduce thermal errors even more and give more design margin with your new micro-ovenized accelerometer and improve the accuracy of your gyro.

For even greater immunity to environmental effects, you a mini double oven approach which is how OCXO's achieve great immunity to operating temp. range by operating at 70'C

Consider how to dampen and board resonances with proper design and check the self-resonant frequency is not excited by self-induced vibration elsewhere.


The Rth of concern then is across the epoxy thermal insulation from the heater to sensor and each other sensor.


1790100820949.png

Now your questions;

  1. 1. Is one resistor or two symmetrical resistors better for heating the BMI270 uniformly?
  2. Two is better than one

  3. 2. Is approximately 100 to 145 milli watts a realistic heater-power range for a small PCB at −40°C ambient?
  4. It depends if the PCB has a thermal ground plane with acts as a heatsink and ambient cold source. But a foam insulator on both sides will improve that.

  5. 3. Is a 2 mm spacing between the heater and BMI270 reasonable?
  6. Air and FR4 are poor thermal conductors so there may be latency and overshoot. But it's reasonable.

  7. 4. Should the heater and sensor be placed on a shared copper island?
  8. That is very wise with neoprene foam insulation and perhaps a kapton heat island on top, under self-adhesive foam.
  9. If the PCB is 2 sided for SMD, then put one heater on the bottom with foam insulation. The top side thermal couple resistance is high in air and epoxy when coplanar. Consider a heat coupler strip on top side with foam.

  10. 5. How should copper layers, FR-4, traces, vias, convection, and the enclosure be represented in the thermal model?
  11. There is a mass, m and Rth variable for each as well as Pw local sources. Thermal traces used for SMD pads could be neglected.

  12. 6. Is a steady-state 2D MATLAB model sufficient for initial sizing?
  13. Not likely but it depends on the 3D geometry, heat sources and masses. But you can use a 2D thermal camera to examine similar boards to your intended design or a mockup. verify real results in a mockup using an SMD Thermistor are more trustworthy than a 2D simulation, although your sim results look great.

  14. 7. What prototype measurements should I take to validate the model and tune the PWM controller?
  15. Get a thermal Camera (cheap) and test with interference, case insulation and local power radiator influences. Give yourself even tighter error specs by using a higher setpoint temp like 25'C. Check for Temp noise effects and latency. Inject EMI nearby using a an oscillating relay coil and current loop mini antenna nearby your designs.
  16. 8. Is my calculation correct?
Seems ok for limited assumptions. But there are other sources of error or unknown disturbances. But it seems you are just trying to avoid Winnipeg temperatures in January for a week. < -30'C 🤣😂😅 when you could eliminate the ambient errors even more.

1790100820949.png
 
Top