Small circuit design

Jefff

Nov 20, 2025
10
Joined
Nov 20, 2025
Messages
10
Hi everyone,

I’m new to electronics (I’m more of a mechanical person), and I’m trying to put together a small UV-C disinfection box. I’ve done some research and picked parts that I think make sense, but I’d really appreciate help checking the feasibility, choosing the right resistor/capacitor values, and turning this into a proper circuit diagram.

Goal / Functionality
Power the circuit from a USB fast charger via USB-C. A PD trigger board requests a fixed voltage (e.g. 12–15 V). When I press a button, a UV-C LED turns on for about 30 seconds, then automatically switches off. This only runs once or a few times per day.

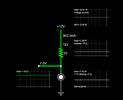
My understanding of the circuit so far

  • A USB-C cable plugs into a ZY12PDN PD trigger board, which negotiates with the charger and provides a fixed DC output (e.g. 12–15 V).
  • A slow-blow fuse on the input protects the circuit if there’s a short or overcurrent event.
  • A Schottky diode provides reverse-polarity protection so I don’t fry anything if something gets wired backwards.
  • An LM317 configured as a constant-current source sets the LED current to about 350 mA so the UV-C LED runs safely.
  • A TLC555 timer in monostable mode generates a ~30 s pulse. Its output drives an IRL540N MOSFET, which acts as a low-side switch for the LED/LM317 path. When the 30 s are up, the MOSFET turns off and the LED goes dark.
  • The S3535-H-DR350-W265-P170-V7.0 (265 nm, 7 V, 350 mA) UV-C LED is mounted inside the box to disinfect the object.
Main components I’ve chosen

  • ZY12PDN PD trigger board
  • Slow-blow fuse (input protection)
  • Schottky diode (reverse-polarity protection)
  • LM317 constant-current stage (to set LED current to 350 mA)
  • TLC555 timer (monostable, ~30 s)
  • IRL540N MOSFET (switching the LED current)
  • S3535-H-DR350-W265-P170-V7.0 UV-C LED (265 nm, 7 V, 350 mA)
What I need help with

  • Verifying that this overall concept is safe and sensible for powering a 7 V / 350 mA UV-C LED from a PD trigger (likely at 12 V or 15 V).
  • Calculating the exact resistor and capacitor values for:
    • LM317 constant-current setting (for 350 mA).
    • TLC555 timing parts to get a reliable ~30 s pulse.
    • Any necessary gate resistor, pull-downs, and decoupling capacitors.
  • Suggestions on thermal considerations (LM317 power dissipation, resistor wattage, etc.).
  • A proper schematic tying all of this together so I don’t mis-wire something and destroy the LED (or myself).
I’d be very grateful for any corrections, part value recommendations, or example schematics. I’m trying to learn as I go and avoid doing anything unsafe, especially since this involves UV-C.

Thanks in advance for your patience and help!
 

Harald Kapp

Moderator
Moderator
Nov 17, 2011
14,270
Joined
Nov 17, 2011
Messages
14,270
Your setup should work, but here are a few considerations (just my humble opinion)

  1. Why start with 12 V for a 7 V LED? This means that 5 V nedd to be dropped by the regulator, causing 5 V × 0.35 A = 1.75 W power dissipation.
  2. Why use a comparatively complex curent source using an LM317 (I know, the circuit issimple, but still...)?

My suggestions:
  1. Use only 9 V from the PD board. The one you want to use can be set to 9V.
  2. Use a simple series resistor instead of the LM317 current source. AT 9 V source voltage and 7 V operating voltage of the LED, the resistor needs to drop 2 V. 2 V at 0.35 A is equivalent to a 8.5 5.8 Ω resistor. Rated at P = 2 V × 0.35 A = 0.7 W. A 8.5 5.8 Ω 1W resistor will work just fine.
  3. There are many 555 calculators online, see e.g. this one to find the required components.
  4. The MOSFET you use needs to be able to be controlled by a gate voltage of VGS < 9 V. These are usually so called "logic level MOSFETs", see e.g. here.
    Since the 555 has a push-pull output, there is no need for a gate pull-down resistor. You may add a 100 Ω series resistor between the output of the 555 and the MOSFET to reduce the peak current.
  5. The 555 should be decoupled by 100 nF from Vcc to GND next to the pins, and another 100 nF from pin 5 to GND.
 
Last edited:

Jefff

Nov 20, 2025
10
Joined
Nov 20, 2025
Messages
10
Thanks a lot for the guidance — switching the PD trigger to 9 V makes sense and really helps reduce the wasted heat.

I’m also open to replacing the LM317 with the 8.5 Ω / 1 W series resistor, but since I’m still new to electronics, could you please explain a bit more clearly why the resistor becomes a safe option at 9 V, whereas it wasn’t ideal at 12–15 V? I’d like to understand the reasoning so I don’t misuse this approach in other projects.

I’ll keep the TLC555 monostable for the ~30 s pulse, use the IRL540N logic-level MOSFET with a 100 Ω gate resistor, and add the recommended 100 nF decoupling capacitors.

Could you also confirm that the updated concept and component list below look reasonable?

Updated component list:

  • ZY12PDN USB-C PD trigger (set to 9 V)
  • Slow-blow fuse (~0.5 A)
  • Schottky reverse-polarity diode
  • 8.5 Ω / 1 W series resistor (LED current limiting)
  • TLC555 timer (monostable, ~30 s)
  • 100 nF decoupling capacitors
  • IRL540N logic-level MOSFET (low-side switch)
  • S3535-H-DR350-W265-P170-V7.0 UV-C LED (7 V, 350 mA)
 

Delta Prime

Jul 29, 2020
2,987
Joined
Jul 29, 2020
Messages
2,987
Your narrative or textual explanation that describes your Ultraviolet C ,UVC project,is wonderful yet prone to ambiguity & misinterpretation.
The language of electronic circuits is a schematic.
Please provide a schematic .Thank you.
 

Sunnysky

Jul 15, 2016
573
Joined
Jul 15, 2016
Messages
573
Thermal Issue:
Missing heatsink with low Rthb-a from board to ambient. b-a means board to ambient. The LED substrate only provides Rthj-b jcn. to brd. heat transfer. A 5W heatsink minimum.
1763680839662.png
 

Harald Kapp

Moderator
Moderator
Nov 17, 2011
14,270
Joined
Nov 17, 2011
Messages
14,270
Could you please explain a bit more clearly why the resistor becomes a safe option at 9 V, whereas it wasn’t ideal at 12–15 V?
A resistor can be used at 12 V, too, but the power dissipation will jump up. The resistor will now have to dissipate the 1.75 W the LM317 would dissipate, see the calulation in my 1st reply. At 9 V the power dissipation is only 0.7 W, more than 1 W less than at 12 V. I suggested a 1 W resistor just to add some safety margin.
Note the correction to my post. it is a 5.8 Ω resistor (not 8.5 Ω)!
You could also use 2 × 2.87 Ω 0.5 W resistors in series. The total resistance is then 5.74 Ω resuting in 0.348 mA LED current. 0.5 W resistors may be more readily available than a 1 W resistor.

The LM317 requires a minimum input-output voltage difference of 3 V. When used as a current source, the voltage drop across the sense resistor is 1.25 V and has to be added to this voltage difference. This means that in total the input voltage of a LM317 based current source neeeds to be 4 V higher than the output voltage. With your 7 V LED this amounts to at least 11 V, so the 12 V setting on your boost converter would be the one you need. Resulting in a comaparatively high power dissipation. You couldn't operate the LM317 based current source reliably from only 9 V.

Could you also confirm that the updated concept and component list below look reasonable?
The list looks reasonable, but as @Delta Prime pointed out: The language of electronics designers is a schematic. A schematic is worth more than 1000 words.

I also recommend you follow @Sunnysky 's advice about the heat sink for the LED.
 

Jefff

Nov 20, 2025
10
Joined
Nov 20, 2025
Messages
10
Thank you all for your contributions, I am absolutely pleased with the community involvement on this forum. The heatsink is a great point and I had already considered it as a design element. Additionally, I intend to integrate an SMD miniature Reed Switch NO as a circuit trigger. My next step is to work on the circuit diagram, an uphill task but I will give it my best. If anyone would like to share an example circuit which I could test on https://www.falstad.com/circuit/ that would be fantastic!
 

Sunnysky

Jul 15, 2016
573
Joined
Jul 15, 2016
Messages
573
This LED power is not well suited to the LM317 and will not work at 9V. It needs at least 10V and 12V is too hot or inefficient.

Here's how to model it in Falstad Analog cct design. Add LED under Draw> Outputs ... then edit it following the datasheet..
Add LM317 per below arrows.
1763920521051.png


I changed the color to white for appearance.

The LM317 regulates by making the voltage constant between Vout and Vadj pprox 1.26 ~ 1.3V, but only if the input offset voltage is at least 2V above the output. The constant current (CC) design uses a series current sensor using ~ 1.3V to regulate it. This means the input supply must be 1.3+2V = 3.3V above the nominal forward LED voltage , Vf = 6.5V or 9.8V on input. So this is a very inefficient design for this LED at best using 10V and even more inefficient at 12V in.

Other than a SMPS current regulator which is preferred, a better linear current regulator uses a lower reference voltage like Vbe=0.7.
Using one to sense current drop at 0.7V to cut off the series driver is the common simple approach. That could be a power NPN or Nch FET.
 

Sunnysky

Jul 15, 2016
573
Joined
Jul 15, 2016
Messages
573
A safer , simpler method , if you "must" use 12V is to waste the heat in a 5W 15~20 Ω series R depending on the Vf at 350 mA

The beauty of Falstad is you can model any diode with a simple or complex model using the datasheet min/nom or max Vf values @ If.

.

1763930346015.png


The safe limiting factors are first temperature rise of case, then power dissipation, then current which depend on your heat sink.
1763930402078.png
 

Attachments

  • 1763930092314.png
    1763930092314.png
    58.7 KB · Views: 1
Last edited:

Jefff

Nov 20, 2025
10
Joined
Nov 20, 2025
Messages
10
Thank you, for all your effort and inputs. As to the recommendations of Karald in an earlier post the components list was revised:
    • USB-C PD charger (9 V PDO, ≥18 W)
    • ZY12PDN USB-C PD trigger (set to 9 V)
    • Slow-blow fuse T500 mA
    • Schottky diode 1N5817 (reverse-polarity protection)
    • 220 µF 16 V electrolytic capacitor (bulk)
    • 100 nF ceramic capacitor (supply decoupling)
    • Ultra-miniature reed switch (NO, ≥0.5 A contacts)
    • 10 kΩ pull-up resistor (555 trigger conditioning)
    • TLC555 CMOS timer (DIP-8)
    • 270 kΩ timing resistor (Rₜ)
    • 220 µF 16 V timing capacitor (Cₜ)
    • 100 nF capacitor (pin 5 control-voltage stabilization)
    • 100 nF capacitor (pin 8 decoupling)
    • 100 Ω MOSFET gate resistor
    • IRL540N logic-level MOSFET
    • 5.8 Ω, ≥1 W LED series resistor
    • S3535-H-DR350-W265-P170-V7.0 UV-C LED (265 nm)
    • Miniature LED heatsink (10–15 mm aluminum fin or starboard)


  • The reasoning was to replace the LM317 with a 5.8Ω / 1 W series resistor, reducing total V needed for the circuit, although there would be some inefficiency this is okay as the circuit would only run once or perhaps twice a day for a very short period of time 60s. I've now included what i suspect to be the necessary capacitors and resistors.
I welcome any continued analysis as this is a project I really want to work, it would be so exciting to have my first electronics project be a successful one. Some of the criteria I am trying to achieve are: simple circuitry, inexpensive components, small footprint, and as mentioned earlier, energy efficiency and sofistication are not primary concerns.

Cheers,
 

Harald Kapp

Moderator
Moderator
Nov 17, 2011
14,270
Joined
Nov 17, 2011
Messages
14,270
although there would be some inefficiency
The inefficiency is the same as with an integrated regulator. The power dissipation depends onm the voltage dropped times the current. Regardless of the component that drops the voltage.
 

Jefff

Nov 20, 2025
10
Joined
Nov 20, 2025
Messages
10
The inefficiency is the same as with an integrated regulator. The power dissipation depends onm the voltage dropped times the current. Regardless of the component that drops the voltage.
Thank you for the clarification. I had meant to suggest that by reducing from 15V to 9V (as you suggested) provides the initial dissipation improvement, but also moving from an LM317 to a 5.8hom resistor would allow for lower V comparitively. Taking these clarifications into consideration, and analysing the strategy do you view this design as feasible for the application?
Would you suggest any other modifications?
Cheers,
 

danadak

Feb 19, 2021
1,062
Joined
Feb 19, 2021
Messages
1,062
An advantage of using LM317 is of course it has thermal and short circuit protection.

Tradeoffs, always tradeoffs.
 

Jefff

Nov 20, 2025
10
Joined
Nov 20, 2025
Messages
10
An advantage of using LM317 is of course it has thermal and short circuit protection.

Tradeoffs, always tradeoffs.
Thank you, would you consider the following two protection components insufficient?
  • Slow-blow fuse T500 mA
  • Schottky diode 1N5817 (reverse-polarity protection)


danadak

Feb 19, 2021
1,062
Joined
Feb 19, 2021
Messages
1,062
Thank you, would you consider the following two protection components insufficient?
  • Slow-blow fuse T500 mA
  • Schottky diode 1N5817 (reverse-polarity protection)

No, maybe....

Here is a rough sim comparing R vs LM317 solution

1763986988828.png

1763986964081.png

The above all nominal T and component tolerance.
 
Last edited:

danadak

Feb 19, 2021
1,062
Joined
Feb 19, 2021
Messages
1,062
Fuse blow times (ChatGPT) -

Short answer:
A 0.5-amp slow-blow (time-delay) fuse will usually not have a single “opening time.” Slow-blow fuses are designed to tolerate temporary surges, so their blow time depends strongly on how much current exceeds the rating.


Below are typical values from common time-delay fuse curves (e.g., Littelfuse / Bussmann). These numbers vary slightly by manufacturer and fuse series, but this gives you a reliable ballpark:


Typical Blow Times for a 0.5 A Slow-Blow Fuse


1. At 100% of rated current (0.5 A):


  • Will not blow
  • Fuse can run indefinitely at its nominal rating.

2. At 135% of rating (≈0.68 A):


  • Time to open: 1 hour minimum, often longer
    Slow-blow fuses are designed to survive minor overloads for a long time.

3. At 200% of rating (1.0 A):


  • Typical blow time: 5 to 30 seconds
    Often around 10–15 s for many 0.5-A slow-blow types.

4. At 300% of rating (1.5 A):


  • Typical blow time: 0.5 to 2 seconds
    Fast enough to protect components from sustained overload.

5. At 1000% of rating (5 A, 10× overload):


  • < 0.1 s
    Behaves almost like a fast-blow under extreme overload.


Why slow-blow fuses behave this way


Slow-blow fuses include a thermal-mechanical delay element (spring, solder blob, spiral wire, etc.). This allows them to tolerate:


  • Motor startup surges
  • Transformer inrush
  • Capacitor charging surges

They intentionally require higher overload or longer time to melt.


If you can tell me:​


  • The exact fuse part number (Littelfuse, Bussmann, etc.)
  • Or the application (AC, DC, motor, SMPS, transformer)

…I can pull the exact time-current curve and give you numbers directly from the datasheet.

Seems like upstream components could be challenged with slow blow fuse protection.
 
Last edited:

Jefff

Nov 20, 2025
10
Joined
Nov 20, 2025
Messages
10
Fuse blow times (ChatrGPT) -


Seems like upstream components could be challenged with slow blow fuse protection.
It is intended to be plugged into an ordinary mobile charger in any home in the eu. I was simply trying to integrate an additional safety feature with a small footprint and economical. How best to proceed, i don't know, i am inexperienced.
 
Top