Darkroom Timer v2.0A for PCB Exposure Box
- Vassilis Papanikolaou
- vpapanik@gmail.com
- 31.879 Views
- medium
- Tested
PIC based automatic timer for a PCB exposure box
This is an improved version of the Darkroom Timer originally created by Stan Ockers (1999). Some extra features were added and the PIC code was modified accordingly.
- Lamp(s) light at start of timing and turn off when timer reaches zero.
- A set of leds were added between the minute and second leds which blink during timer operation.
- 7 segment displays include tails for digits 6 and 9.
- A bicolor led (common cathode) indicates standby (green) and timer operation (red).
- Separate PCBs were designed for the led display and the timing system. The power supply is also integrated in the PCB.
The complete schematic, PCB and silkscreen are available in high resolution pdf format. The component values are clearly indicated on the silkscreen. The modified source code is available in asm and hex format (compiled in MPLAB).
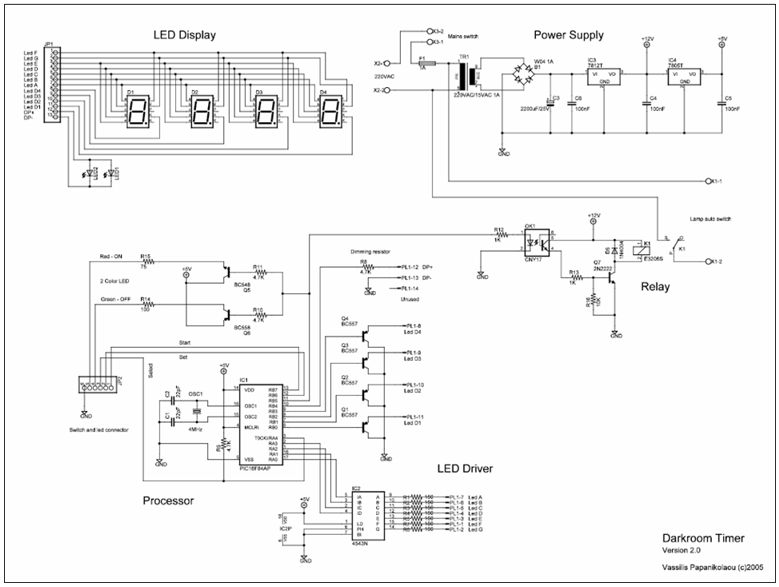
Darkroom Timer Schematic
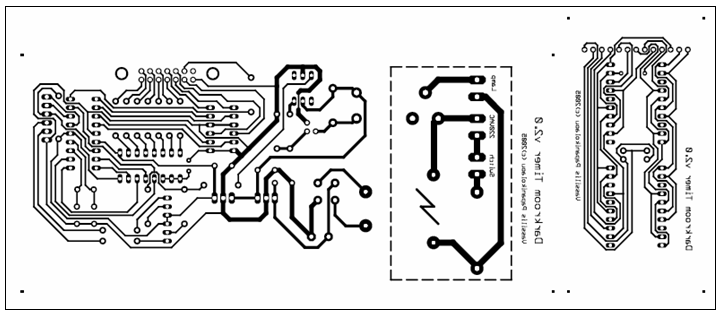
Darkroom Timer PCB
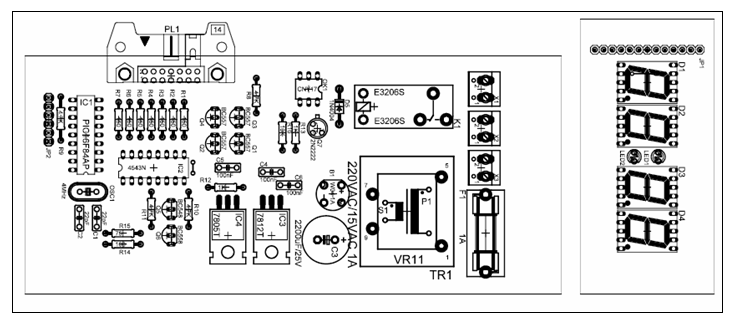
Darkroom Timer Silkscreen
Parts list
System board
R1 – R7 150 Ω 1/4W 5%
R8 – R11 4.7 KΩ 1/4W 5%
R12 – R13 1 KΩ 1/4W 5%
R14 100 Ω 1/4W 5%
R15 75 Ω 1/4W 5%
R16 10 KΩ 1/4W 5%
C1 – C2 22 pF
C3 2200 μF/25V electrolytic
C4 – C6 100 nF
D5 1N4001/4004/4007
F1 1A Fuse (with socket and cap)
B1 1A Bridge rectifier
IC1 PIC16F84AP Microcontroller (4MHz clock) (with IC socket)
IC2 74HC4543 BCD to 7-segment decoder (with IC socket)
IC3 7812 voltage regulator
IC4 7805 voltage regulator
PL1 14 pin connector
JP2 6 pin header
K1 12V DC / 220V AC Relay
OK1 CNY17-1 Optocoupler
OSC1 4MHz Crystal
Q1 – Q4 BC557/558 PNP Transistror
Q5 BC547/548 NPN Transistor
Q6 BC557/558 PNP Transistror
Q7 2N2222 NPN Transistor
TR1 220VAC/15VAC 1VA PCB Transformer
X1 – X3 2 pin WAGO screw clamp
Led board
D1 – D4 Common cathode 7-segment display
LED1 – LED2 Orange Led 3 mm
JP1 Not a connector, cable is soldered directly on the back of the led PCB
Box front
Bicolor common cathode led (green-red)
3 push-button switches
Switch connections
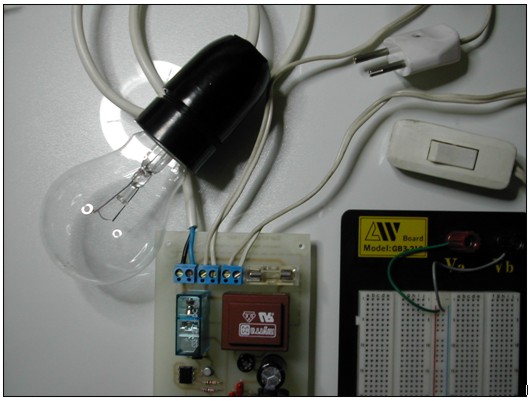
Connector X1 is connected to the lamp(s)
Connector X2 is connected to 220VAC mains
Connector X3 is connected to the mains switch
Led board is connected to system board via connector PL1
JP2 pin number - Connection
1 - START Switch
2 - SET Switch
3 - SELECT Switch
4 - Green bicolor led anode
5 - Red bicolor led anode
6 - Ground
Operation
- Connect the three switches between pins 1, 2, 3 and ground (pin 6). Bicolor led common cathode is connected to ground (pin 6).
- Start switch starts the timer. Pressing Start again (before or after timer reaches zero) resets the timer to its initial value.
- Set switch sets the time of the current memory position. This is done in a digit‑by‑digit fashion.
- Select switch rolls the time values through the 15 memory positions.
Photos
The system board
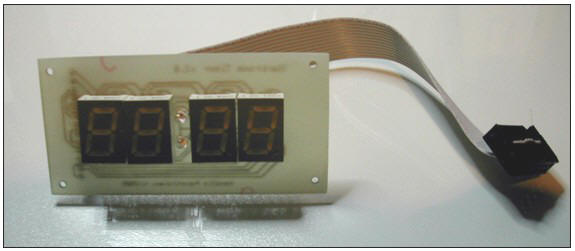
The led board
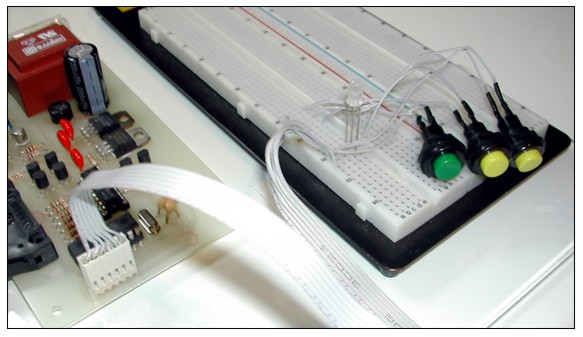
Connection of switches and bicolor led (JP2) done in breadboard
Normally switches and bicolor led are attached to the front of exposure box
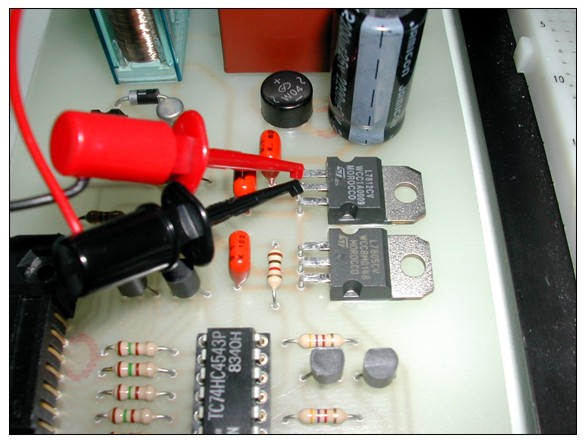
Board testing with externally applied DC on the 7812 regulator (for safety reasons)
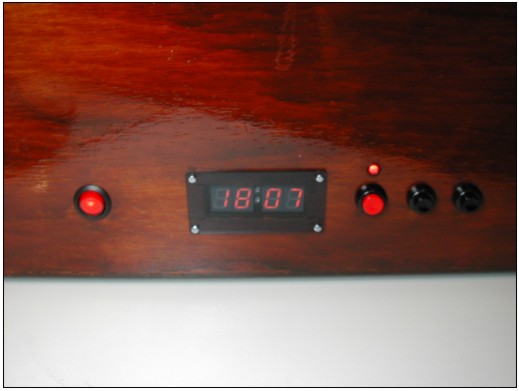
Photos of the Darkroom timer installed on the exposure unit
The system board, LCD board and switches installed
Notice the common ground for push buttons and bicolor led (JP2 Pin 6)
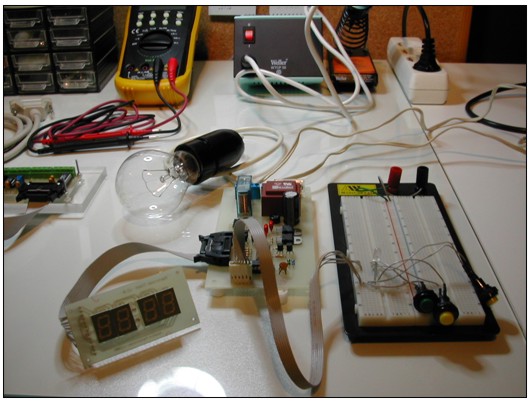
The darkroom timer during operation






superb project I like this.
I make this project work perfect Thank You Electronics-Lab for this superb project.
How can I add Buzzer?
THANK YOU VERY MUCH
You will need an PNP transistor, connected that way, that it will not conduct as long as there is voltage on pin4 of OK1 and will conduct when there is no voltage. This PNP transistor will be used to switch the buzzer ON when the time is over. For more details, please open a forum topic, so we can attach an image there.