

Wireless temperature and humidity monitor for baby’s room
- Raj Bhatt
- 11.402 Views
- medium
- Tested
- 0 Likes

This project describes a DIY wireless temperature and humidity monitor for kids’ or infant’s room using the Arduino platform, and inexpensive and easily available ASK transmitter/receiver modules. On the transmitting end, an Arduino nano senses the ambient room temperature and humidity using the DHT22 sensor and transmits the data to a receiving end Arduino over a 433 MHz ASK RF link. The receiving side Arduino decodes the received bytes and displays the information on a LCD screen. The indoor range of the RF transmission is about 100 ft, which is mostly sufficient for a decent size house.
Things you will need
You will need the following items to build this project.
- ASK transmitter/receiver pair
- Two Arduino boards. I am using an Arduino Nano on transmitting side and Arduino Uno on receiving end.
- One Nokia 5110 LCD for displaying data at the receiving side
- One DHT22 sensor for measuring temperature and humidity at the transmitting en
- Two LEDs and two 330Ω resistors
- Wires, breadboard, prototyping board, etc.
Few words on ASK RF kits
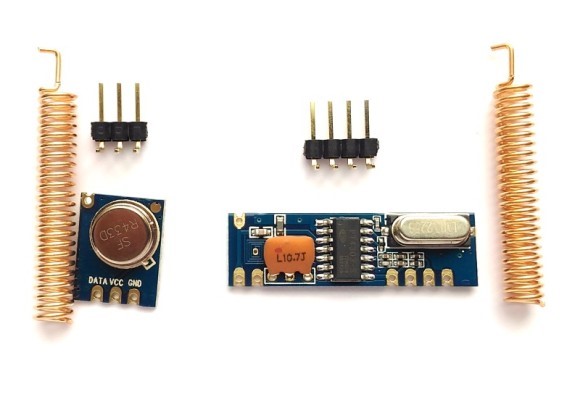
There are varieties ASK Tx/Rx modules available online in both domestic and international markets (specially China). Some of them come with spring antennas, and some don’t. With the ones without antennas, you can connect ~20cm wire to their antenna pin on circuit board. The figure below shows some of the ASK RF modules you can buy on eBay and Amazon.
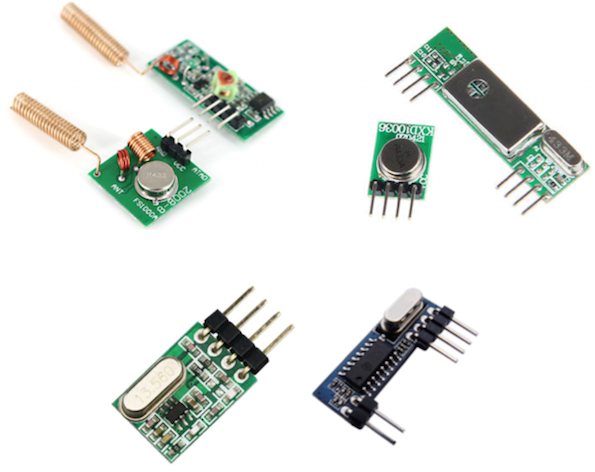
For this project, I used high quality ASK RF modules manufactured by NiceRF, a China-based company. You can also buy these modules directly from our Tindie store. The nice things about these modules are they are very compact, breadboard and PCB friendly, made of high-quality PCB, come with copper spring antennas and have a reasonable transmission range.
Hardware setup on transmitting end
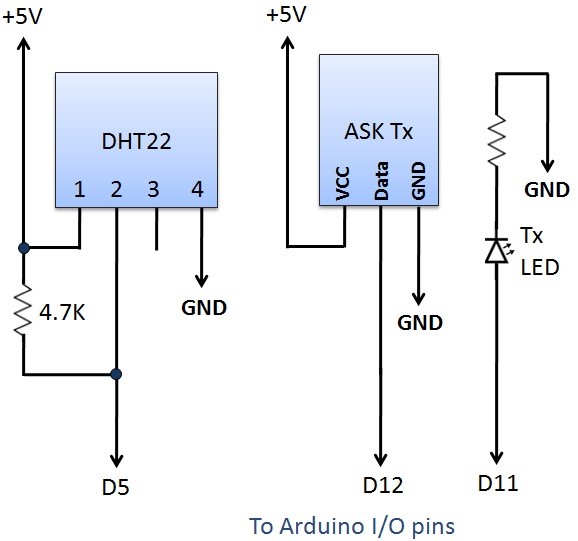
The ASK transmitter module has three pins: VCC, Data, and Gnd. They could be in different sequence depending upon the manufacturers. So, always read the pin labels carefully to identify the data and power supply pins on these modules. The VCC and Gnd pins are connected to +5V and Gnd pins of Arduino Nano, whereas the Data pin of the Tx module goes to digital I/O pin 12 of Arduino. An LED is also connected to I/O pin 11 along with a current limiting resistor in series. During data transmission, this LED is turned on.
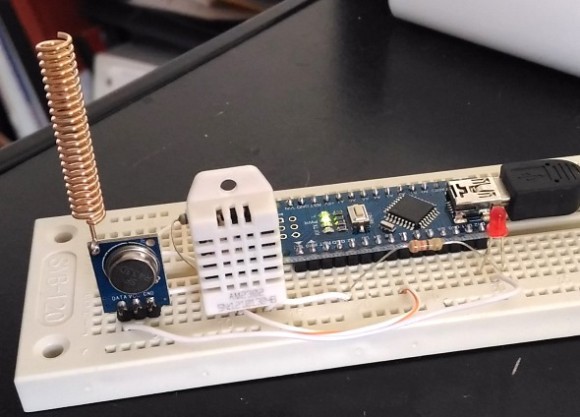
The above circuit is wired up on a breadboard as shown below.
Circuit setup: Rx End
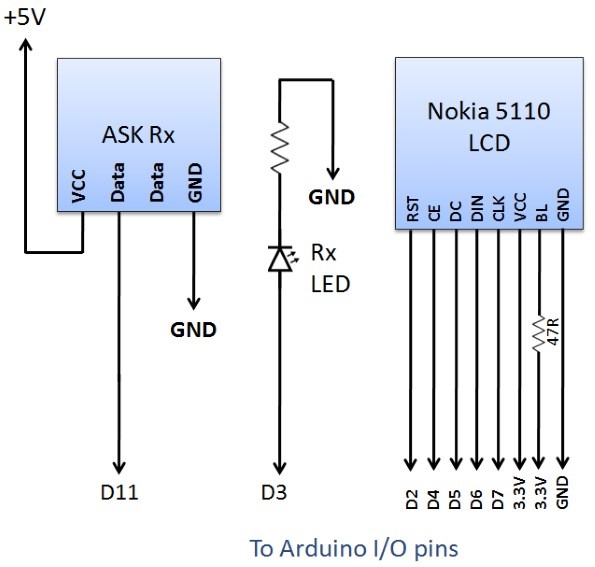
The Rx module also consists of VCC, Gnd, and Data pins. Some modules may have more than one Data pin. In such case, you can use any one of them as they are all connected together. On the receiving side, the Data pin of the Rx module output and is read by an Arduino pin. In our case, it is connected to the D11 pin of Arduino. Similar to the Tx end, an LED connected to D3 pin is an indicator of receiving the data sent by the transmitter. A Nokia 5110 LCD is also connected to the receiving side Arduino to display the temperature and humidity at the remote station. For this experiment, I am using Crowduino Uno (Arduino Uno clone) on the receiving side.
Please note that Nokia 5110 LCD operates at 3.3V. I am running my Crowduino Uno board at 3.3V so it does not matter in this case. If your Arduino board operates at 5.0V, you would need a voltage shifter in between the Arduino and the LCD. The following diagram shows the connections at the receiving end in more detail.
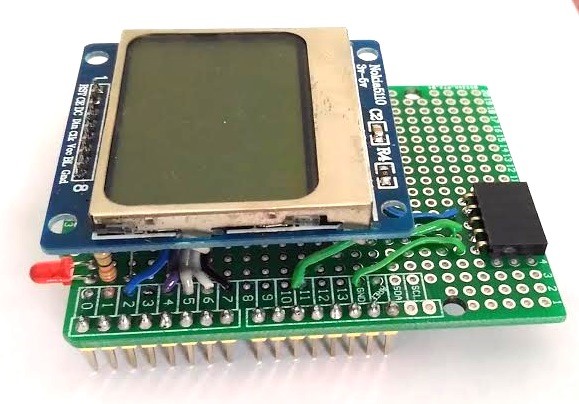
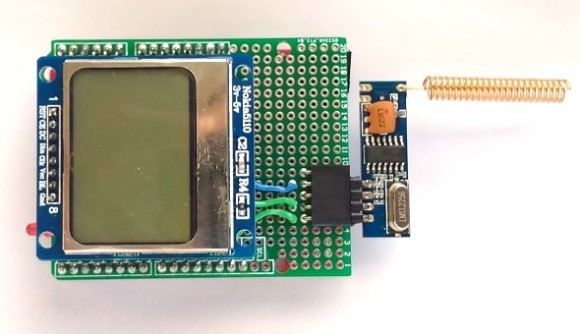
I used a general purpose Arduino proto-shield to build the above circuit. Following figure shows the assembled receiver circuit soldered on the Arduino proto-shield.
Software
This project uses the VirtualWire library for Arduino written by Mike McCauley. This library supports numerous low-cost RF transmitters and receivers available in the market and allows to send short messages through ASK modulation. In this project, the Arduino on Tx end reads temperature and humidity from the DHT22 sensor, combines the two readings into a character string, and send it over the RF link. On the receiving end, the Arduino extracts the two readings back from the received string and displays the data on the Nokia 5110 LCD. You can download the VirtualWire library and Arduino codes for Tx and Rx ends from the following links.
Download VirtualWire library
Download Arduino code for Tx end
Download Arduino code for Rx end
Output
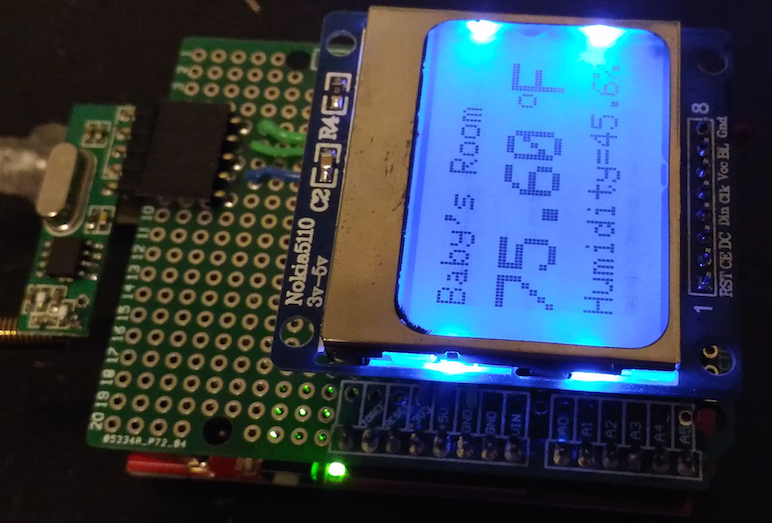
After uploading the firmware to two Arduino boards, the project is ready for testing. You can place the Tx module to the place where you would like to monitor the temperature and humidity remotely and place the Rx module within a 100ft range. You should see the measured values on the LCD screen as shown below:
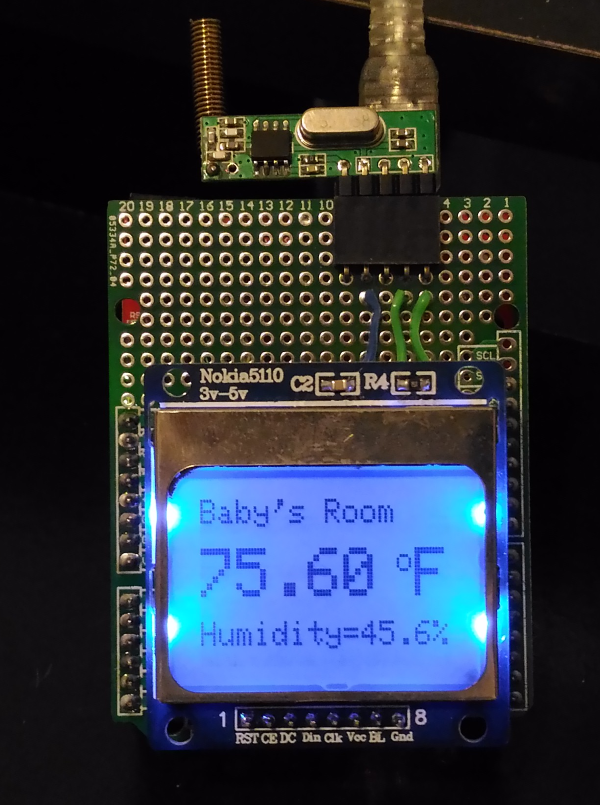
This project can be further expanded by adding a buzzer to the Rx end and programming the Arduino to alarm when the temperature and/or humidity falls outside preset limits.
I sell these Tx and Rx modules as a kit at our Tindie store. If you are interested to get one, click the following link:
Author: Raj Bhatt (electronics enthusiast, and hardware maker, and founder of Embedded Lab)
- Embedded Lab (http://www.embedded-lab.com)
- Visit my Tindie store (https://www.tindie.com/stores/rajbex/)


