

mixos
-
Posts
581 -
Joined
-
Last visited
Content Type
Profiles
Forums
Events
Everything posted by mixos
-
One way is to upload them at the upload Center an EDY already mentioned. You will find the upload center here: http://www.electronics-lab.com/action/pr_upload Make sure you zip every project (schematics, text etc) in one file. Then i will download them and i will add them to the projects section under the coresponding category with your name and mail if you want to. The other way is to send them directly to my mail: webmaster[a]electronics-lab.com (replace [a] with @) and i will add them to the projects section. Keep in mind that almost all projects are WELCOME! :D I would appreciate your action to send it to Electronics Lab I am waiting your circuits ;) !
-
The Original 2 Phone Link Design This is the updated version of the very first Link circuit that I designed for Silicon Chip magazine here in Oz, back in 1996. It was a bit hardware heavy, (nd therefore expensive for what it would do) having two heavy duty relays and two by two transistor oscillators, for ring tone and ring impulsing. These items have been replaced with optocouplers and an NE 556 dual timer chip, as per the rest of the Link cicuits. It provides for basic communications between two phones only, and there aren't even any numbers to dial. Project Link: http://www.electronics-lab.com/projects/telephone/016/index.html The Link Telephone Intercom This is the original version of the Link circuitry and it employs pulse dialling phones, a simple 2 chip circuita for producing service tones and counting dialled pulses. It uses a four wire circuit between each handset and the 'black box' switcher board, and employs 9 volt DC buzzers in place of the bellset, allowing for portability and battery operation. It would be a great introductory project for hobbyists and junior high school students studying the area of telephony and digital electronics. Project Link: http://www.electronics-lab.com/projects/telephone/013/index.html The Link A2B+1 Intercom This version is more advanced than the original Link design in that it employs DTMF dialling, a simple relay matrix for internal signalling and external connection to an outside Telco line. This version also uses a simple ring voltage generator that actually rings the electronic ringer inside each phone, and a true 'ring trip' circuit that trips the ring and halts the ringer when the called party's handset is lifted up off hook. Useful for light internal and external phone traffic. Project Link: http://www.electronics-lab.com/projects/telephone/014/index.html The Link 4+0 This version is similar to the link A2B+1, except that is is for internal intercom use only. The outside line access circuitry has been removed, and an extra two phone handsets have been added. It has one or two extra possibilities, in that remote control applications can be employed, whereas this would be impractical in the original four phone Link circuit. It uses DTMF dialling, and only uses a two wire circuit between phones and the black box switcher board. Project Link: http://www.electronics-lab.com/projects/telephone/015/index.html ------------------------- Austin Hellier 30 November 2003
-
Dear Mike, I've been tinkering with the Link A2B+1 design and have come up with another version, which might suite some folks, who just want an intercom. Similar to the original pulse dial version, except that it uses DTMF tones, has only a two wire circuitfor each phone and uses the RTC ring trip circuit. Just for internal use, with no outside line connected. In relation to the Link A2B design, the *Call feature (pronounced 'star Call') might trick some folks the way it is presented. If they have any trouble using it, then they can use the * key to ring the EBR, and then press the # key to release the relay, without causing problems to the outside caller (eg: losing the call altogether) Just thought I''d mention this as a quick fix in case anyone had any problems. Apart from that, it's all systems go down here, Downunder... Austin Hellier Project Link: http://www.electronics-lab.com/projects/telephone/015/index.html
-
There may not be a specific service manual availaible for this monitor. You can use otherwise this generic monitor service manual: http://repairfaq.ece.drexel.edu/sam/monfaq.htm
-
This is right.. Go ahead.. build it and post your comments. Be carefull when you build it...
-
You are right EDY :D !!
-
Here is a list of service manuals online: Notes on the Troubleshooting and Repair of Small Switchmode Power Supplies: http://repairfaq.ece.drexel.edu/sam/smpsfaq.htm Troubleshooting and Repair of Consumer Electronic Equipment: http://repairfaq.ece.drexel.edu/sam/tshoot.htm Small Household Appliances: http://repairfaq.ece.drexel.edu/sam/appfaq.htm Audio Equipment and Other Miscellaneous Stuff: http://repairfaq.ece.drexel.edu/sam/audiofaq.htm AC Adapters, Power Supplies, and Battery Packs: http://repairfaq.ece.drexel.edu/sam/aapsfaq.htm Compact Disc Players and CDROM Drives: http://repairfaq.ece.drexel.edu/sam/cdfaq.htm Optical Disc Players and Optical Data Storage Drives: http://repairfaq.ece.drexel.edu/sam/odfaq.htm Microwave Ovens: http://repairfaq.ece.drexel.edu/sam/micfaq.htm Computer and Video Monitors: http://repairfaq.ece.drexel.edu/sam/monfaq.htm Television Sets: http://repairfaq.ece.drexel.edu/sam/tvfaq.htm Video Cassette Recorders: http://repairfaq.ece.drexel.edu/sam/vcrfaq.htm Hand Held Remote Controls: http://repairfaq.ece.drexel.edu/sam/irrfaq.htm Electronic Flash Units and Strobe Lights: http://repairfaq.ece.drexel.edu/sam/strbfaq.htm Small Engines and Rotary Lawn Mowers: http://repairfaq.ece.drexel.edu/sam/lmfaq.htm Printers and Photocopiers: http://repairfaq.ece.drexel.edu/sam/printfaq.htm more here: http://repairfaq.ece.drexel.edu/REPAIR/F_Repair.html
-
Here is a great article about how to read capacitor codes... http://xtronics.com/kits/ccode.htm
-
A new photo gallery with electronics related photos launched. It resides under Action section. It consists of 6 categories: old Radio museum, Electronika 2003, exhibition, inside a CRT, general, wallpapers, your laboratory. I am waiting your photos to add them also. Visit Photo Gallery: http://www.electronics-lab.com/action/gallery
-
Check: http://electronics-lab.com/projects/models/003/index.html http://electronics-lab.com/projects/models/010/index.html
-
I added it to the links directory. You could add it yourself also by clicking "Submit Your site" and selecting the correct category. Submit there any good link you know. I will check them and then aprove them.
-
Right... the pin 3 that is indicated with +5V at schematic.
-
If you ground -5V pin, and apply +5V to the pin 3 then it will work nice :D for measuring positive voltages (i already tried it). I am not sure what will happen with negative voltages, i haven't tried it. Hope that helps a bit.
-
Here is what i found: SS495A Datasheet 1 SS495A Datasheet 2 There are not the same. Download them both. Where are you gonna use this sensor? I am just curious ;D
-
Even on the advanced spacecraft of the future, sooner or later things are bound to break. Space travelers on an extended mission to Mars, for example, would need to be ready to do small repairs just in case, soldering this, welding that ... more here: http://science.nasa.gov/headlines/y2003/10nov_solder.htm?list875305
-
Number 2: Already done I added a "more recent topics" link under the recent topics at the front page. Number 1: Sometime in future i will do that.
-
A new board created at the online Electronics Lab community :D Name: Circuit/General Requests Description: This is the ideal board to request projects, circuits, pages translations or anything else. Some posts from other places that requesting something will be moved here.
-
Hello Here it is: http://www.electronics-lab.com/projects/pc/012/index.html Hope you like it :D !
-
Hello Go here: http://electronickits.com/start.html?BID=1799&AID=11540 and check: POWER SUPPLIES -> DC Bench Power Supply Kit Output Voltage: 1) 1.5VDC - 15VDC @ 1Amp 2) -1.5VDC to -15VDC 3) 5VDC @ 3 Amps Input: 110VAC (line cord included). Includes full enclosure and knobs Features short circuit protection on all supplies Variable outputs can be stacked to get 3-30VDC @ 1Amp Price : 54.95$ (as kit) or 89.95$ (assembled)
-
constant current indication for power supply
mixos replied to eagle2003's topic in Electronic Projects Design/Ideas
Great!! :D Can u post here the exact circuit so we can see it and help you? -
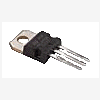
Charasteristics: 2N2222 FEATURES
-
Hello flood I translated this for you. You can find it here: http://www.electronics-lab.com/projects/misc/002/index.html Hope you like it ;) Mike
-
Copy-paste from TL081 datasheet: "The TL081 is pin compatible with the standard LM741 and uses the same offset voltage adjustment circuitry. This feature allows designers to immediately upgrade the overall performance of existing LM741 designs." Replacing TL081 with LM741 may drop the overall performance and quality of the power supply, but it will work as they are compatible. Otherwise TL081 is a very common opamp, so try to search it a little more.. it worths to do it. Don't forget to send feedback when you build it!
-
What screen resolution are you using? Is www.Electronics-Lab.com design resolution makes your life hard?
-
Here is BJT Transistor Review I found: http://www.electronics-lab.com/articles/files/BJT_Transistor_Review.doc More electronics articles here: http://www.electronics-lab.com/articles/index.html