In the realm of microcontrollers, the ESP32 and Arduino are two popular choices among electronics engineers and hobbyists. Both have their strengths and weaknesses, making them suitable for different types of projects. This project aims to provide a detailed comparison of the ESP32 and Arduino, focusing on their features, capabilities, and applications.
Overview of ESP32 and Arduino
ESP32:
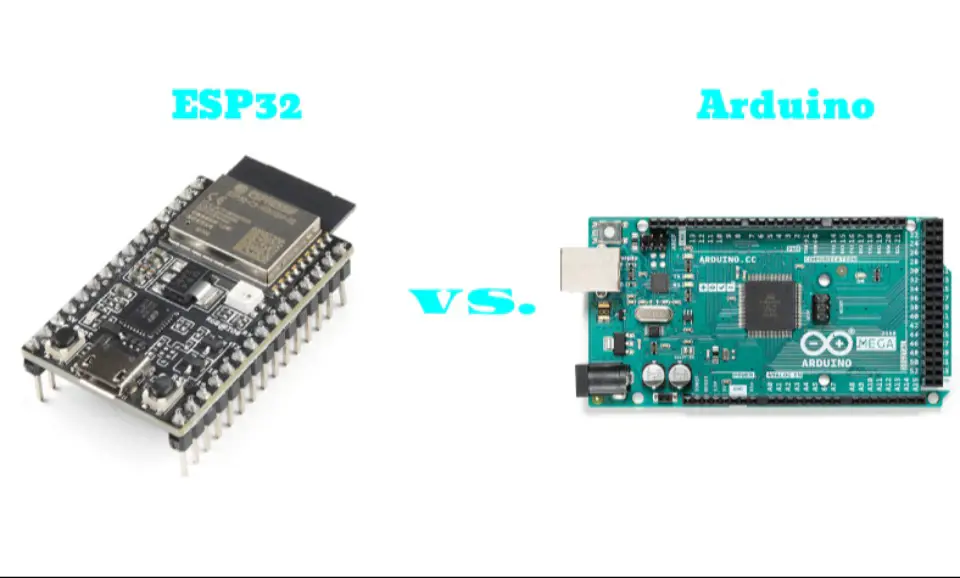
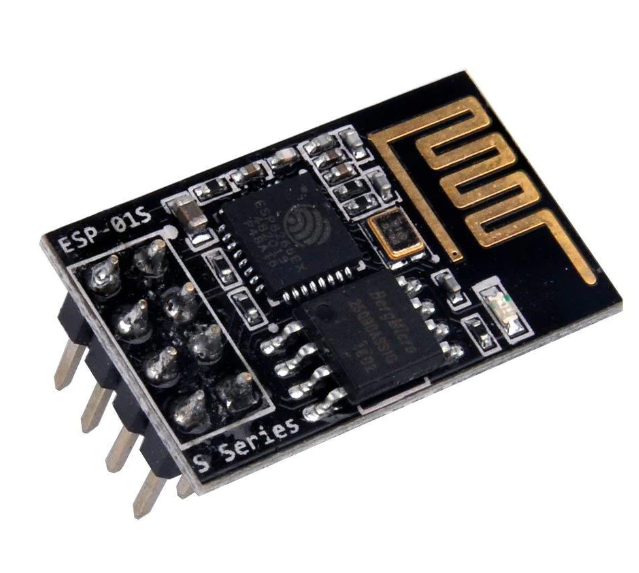
The ESP32, developed by Espressif Systems, is a powerful and versatile microcontroller known for its built-in Wi-Fi and Bluetooth capabilities. It is based on the Tensilica Xtensa LX6 microprocessor and is widely used in IoT projects due to its high performance and connectivity features.
Processor: Dual-core Tensilica Xtensa LX6
Clock Speed: Up to 240 MHz
RAM: 520 KB SRAM
Flash Memory: 4 MB (external)
Connectivity: Wi-Fi (802.11 b/g/n), Bluetooth 4.2 BLE
GPIO Pins: 34
Analog Pins: 18
Digital Pins: 34
Arduino:
Arduino is a well-known open-source electronics platform based on easy-to-use hardware and software. The most common Arduino boards are based on the ATmega328P microcontroller, such as the Arduino Uno, which is widely used for educational purposes, prototyping, and simple projects.
Processor: ATmega328P (Arduino Uno)
Clock Speed: 16 MHz
RAM: 2 KB SRAM
Flash Memory: 32 KB
Connectivity: None (Wi-Fi and Bluetooth can be added with shields)
GPIO Pins: 14 (Uno)
Analog Pins: 6
Digital Pins: 14
Detailed Comparison
1. Processing Power:
ESP32: The dual-core processor and higher clock speed make the ESP32 significantly more powerful than the Arduino. It is suitable for tasks that require higher computational power and multitasking.
Arduino: The ATmega328P processor is sufficient for simple tasks and projects. It is ideal for beginners and educational purposes.
2. Connectivity:
ESP32: Built-in Wi-Fi and Bluetooth make the ESP32 perfect for IoT applications. It can connect to the internet and communicate with other devices without additional hardware.
Arduino: Lacks built-in connectivity features. External shields are required for Wi-Fi and Bluetooth, adding to the cost and complexity.
3. GPIO and Peripherals:
ESP32: Offers more GPIO pins and peripherals compared to Arduino. It supports a wide range of peripherals such as I2C, SPI, UART, ADC, DAC, PWM, and capacitive touch sensors.
Arduino: Limited GPIO and peripheral support. Suitable for basic projects but may require additional components for more complex tasks.
4. Power Consumption:
ESP32: Generally consumes more power due to its advanced features and higher performance. It has various power-saving modes to reduce consumption in low-power applications.
Arduino: Lower power consumption, making it more suitable for battery-powered projects.
5. Development Environment:
ESP32: Can be programmed using the Arduino IDE, but also supports other environments like ESP-IDF, PlatformIO, and MicroPython. Offers more flexibility for advanced users.
Arduino: Uses the Arduino IDE, which is beginner-friendly and widely supported. Ideal for those new to programming microcontrollers.
Practical Applications
ESP32 Applications:
IoT devices and projects
Smart home automation
Wearable technology
Wireless sensor networks
Robotics with wireless control
Arduino Applications:
Educational projects
Basic robotics
Simple automation systems
DIY electronics projects
Prototyping and testing circuits
Conclusion
The choice between ESP32 and Arduino largely depends on the specific requirements of your project. If you need high processing power, built-in connectivity, and a wide range of peripherals, the ESP32 is the better choice. On the other hand, if you are looking for a simple, cost-effective solution for basic tasks and educational purposes, Arduino is more suitable.
By understanding the strengths and weaknesses of both platforms, you can make an informed decision that aligns with your project's needs and objectives.
")


 In the realm of microcontrollers, the ESP32 and Arduino are two popular choices among electronics engineers and hobbyists. Both have their strengths and weaknesses, making them suitable for different types of projects. This project aims to provide a detailed comparison of the ESP32 and Arduino, focusing on their features, capabilities, and applications. Overview of ESP32 and Arduino ESP32: The ESP32, developed by Espressif Systems, is a powerful and versatile microcontroller known for its built-in Wi-Fi and Bluetooth capabilities. It is based on the Tensilica Xtensa LX6 microprocessor and is widely used in IoT projects due to its high performance and connectivity features. Processor: Dual-core Tensilica Xtensa LX6 Clock Speed: Up to 240 MHz RAM: 520 KB SRAM Flash Memory: 4 MB (external) Connectivity: Wi-Fi (802.11 b/g/n), Bluetooth 4.2 BLE GPIO Pins: 34 Analog Pins: 18 Digital Pins: 34 Arduino: Arduino is a well-known open-source electronics platform based on easy-to-use hardware and software. The most common Arduino boards are based on the ATmega328P microcontroller, such as the Arduino Uno, which is widely used for educational purposes, prototyping, and simple projects. Processor: ATmega328P (Arduino Uno) Clock Speed: 16 MHz RAM: 2 KB SRAM Flash Memory: 32 KB Connectivity: None (Wi-Fi and Bluetooth can be added with shields) GPIO Pins: 14 (Uno) Analog Pins: 6 Digital Pins: 14 Detailed Comparison 1. Processing Power: ESP32: The dual-core processor and higher clock speed make the ESP32 significantly more powerful than the Arduino. It is suitable for tasks that require higher computational power and multitasking. Arduino: The ATmega328P processor is sufficient for simple tasks and projects. It is ideal for beginners and educational purposes. 2. Connectivity: ESP32: Built-in Wi-Fi and Bluetooth make the ESP32 perfect for IoT applications. It can connect to the internet and communicate with other devices without additional hardware. Arduino: Lacks built-in connectivity features. External shields are required for Wi-Fi and Bluetooth, adding to the cost and complexity. 3. GPIO and Peripherals: ESP32: Offers more GPIO pins and peripherals compared to Arduino. It supports a wide range of peripherals such as I2C, SPI, UART, ADC, DAC, PWM, and capacitive touch sensors. Arduino: Limited GPIO and peripheral support. Suitable for basic projects but may require additional components for more complex tasks. 4. Power Consumption: ESP32: Generally consumes more power due to its advanced features and higher performance. It has various power-saving modes to reduce consumption in low-power applications. Arduino: Lower power consumption, making it more suitable for battery-powered projects. 5. Development Environment: ESP32: Can be programmed using the Arduino IDE, but also supports other environments like ESP-IDF, PlatformIO, and MicroPython. Offers more flexibility for advanced users. Arduino: Uses the Arduino IDE, which is beginner-friendly and widely supported. Ideal for those new to programming microcontrollers. Practical Applications ESP32 Applications: IoT devices and projects Smart home automation Wearable technology Wireless sensor networks Robotics with wireless control Arduino Applications: Educational projects Basic robotics Simple automation systems DIY electronics projects Prototyping and testing circuits Conclusion The choice between ESP32 and Arduino largely depends on the specific requirements of your project. If you need high processing power, built-in connectivity, and a wide range of peripherals, the ESP32 is the better choice. On the other hand, if you are looking for a simple, cost-effective solution for basic tasks and educational purposes, Arduino is more suitable. By understanding the strengths and weaknesses of both platforms, you can make an informed decision that aligns with your project's needs and objectives.