Jump to content
Electronics-Lab.com Community

Search the Community

Showing results for tags 'arm'.

  • Search By Tags

    Type tags separated by commas.
  • Search By Author

Content Type


Forums

  • Electronics Forums
    • Projects Q/A
    • Datasheet/Parts requests
    • Electronic Projects Design/Ideas
    • Power Electronics
    • Service Manuals
    • Theory articles
    • Electronics chit chat
    • Microelectronics
    • Electronic Resources
  • Related to Electronics
    • Spice Simulation - PCB design
    • Inventive/New Ideas
    • Mechanical constructions/Hardware
    • Sell/Buy electronics - Job offer/requests
    • Components trade
    • High Voltage Stuff
    • Electronic Gadgets
  • General
    • Announcements
    • Feedback/Comments
    • General
  • Salvage Area

Find results in...

Find results that contain...


Date Created

  • Start

    End


Last Updated

  • Start

    End


Filter by number of...

Joined

  • Start

    End


Group


Website URL


Yahoo


Skype


Location


Interests

Found 8 results

  1. Installing Linux on an ARM development board can be complex, but this detailed guide will walk you through each step from preparation to booting Linux. 1. Preparation Before you start, gather the following tools and software: A computer running Linux An ARM-based development board A USB-to-serial adapter A Micro USB cable An SD card reader A blank SD card A USB keyboard and mouse (optional) An HDMI monitor (optional) Download Linux Kernel and Root Filesystem Download the appropriate Linux kernel and root filesystem for your ARM board from the official site (Neardi offers download links). Save them in a temporary folder on your computer. Create Bootable SD Card You will use the SD card as the boot medium. Insert the SD card into the reader and connect it to your computer. Open a terminal and run: $ sudo fdisk -l This lists all disk devices. Identify the device node for your SD card (e.g., /dev/sdb). 2. Unmount all partitions on the SD card: $ sudo umount /dev/sdb* 3.Create a new partition table and partition: $ sudo fdisk /dev/sdb Use the n command to create a new partition, set it to Linux filesystem type using the t command, and save with the w command. 4. Format the partition: $ sudo mkfs.ext4 /dev/sdb1 5. Create a mount point and mount the partition: $ sudo mkdir /mnt/sdcard $ sudo mount /dev/sdb1 /mnt/sdcard 6. Extract the root filesystem to the SD card: $ sudo tar zxvf rootfs.tar.gz -C /mnt/sdcard Install and Configure the Bootloader Remove the SD card from your computer and insert it into the development board. Connect the board to your computer using the USB-to-serial adapter. Open a terminal and use a serial tool (like minicom or picocom) to connect: $ sudo minicom -D /dev/ttyUSB0 Press Enter to access the command line. 3. Find the device node of the boot SD card: $ fdisk -l Note the path for later use. 4. Install the bootloader to the SD card: $ sudo dd if=u-boot-sunxi-with-spl.bin of=/dev/sdX bs=1024 seek=8 Replace u-boot-sunxi-with-spl.bin with your bootloader file path and /dev/sdX with your SD card’s device node. Then, reinsert the SD card into the board. 5. Copy the kernel image to the boot SD card: $ sudo cp zImage /mnt/sdcard/boot Replace zImage with your actual kernel image file path. 6. Copy the device tree file: $ sudo cp sun8i-h3-orangepi-one.dtb /mnt/sdcard/boot Replace with your device tree file path. 7. Create a boot.cmd file in the /mnt/sdcard/boot directory and add: setenv bootargs console=ttyS0,115200 root=/dev/mmcblk0p1 rootwait panic=10 fatload mmc 0:1 0x4000000 zImage fatload mmc 0:1 0x42000000 sun8i-h3-orangepi-one.dtb bootz 0x4000000 - 0x42000000 Save and close the file. 8. Compile boot.cmd into a binary: $ sudo mkimage -C none -A arm -T script -d boot.cmd boot.scr Then copy it to the boot directory: $ sudo cp boot.scr /mnt/sdcard/boot Unmount the SD card and insert it into the development board. Boot the Development Board Connect the USB keyboard and mouse (if available) and an HDMI monitor. Power on the board. During the boot process, you should see Linux startup messages on the HDMI display. If successful, you’ll reach a login prompt. Enter the default username and password, or the credentials you set, to access the Linux command line.
  2. In the rapidly evolving world of electronics and embedded systems, terms like development boards, microcontrollers, and ARM frequently surface. While they are interconnected in the realm of hardware design and programming, each serves distinct purposes and possesses unique characteristics. This article delves into the fundamental differences between these components, providing clarity for enthusiasts, developers, and professionals alike. 1. Microcontrollers: The Heart of Embedded Systems What is a Microcontroller? A microcontroller is a compact integrated circuit designed to govern specific operations in embedded systems. It typically includes a processor core, memory (both RAM and flash), and input/output (I/O) peripherals on a single chip. Microcontrollers are engineered to perform dedicated tasks, making them indispensable in applications ranging from household appliances to automotive systems. Key Features: Processor Core: Executes instructions and processes data. Memory: Stores program code and temporary data. I/O Peripherals: Interfaces for sensors, actuators, and communication modules. Power Efficiency: Optimized for low power consumption, essential for battery-operated devices. Common Uses: Consumer Electronics: Washing machines, microwaves, and remote controls. Automotive Systems: Engine control units, airbag systems, and infotainment. Industrial Automation: Robotics, sensor networks, and machinery control. Medical Devices: Blood glucose monitors, pacemakers, and diagnostic equipment. Popular Microcontroller Families: Atmel AVR: Used in Arduino boards. PIC Microcontrollers: Widely adopted in industrial applications. Microchip's PIC32 and dsPIC: Known for high-performance tasks. STMicroelectronics' STM32: Offers a range of performance levels and features. 2. ARM: A Pioneering Processor Architecture What is ARM? ARM (Advanced RISC Machines) refers to a family of RISC (Reduced Instruction Set Computing) architectures for computer processors. Unlike microcontrollers, ARM primarily defines the processor architecture, licensing its designs to various manufacturers who integrate them into a wide array of devices. ARM processors are renowned for their high performance and energy efficiency, making them the backbone of modern mobile devices and increasingly prevalent in other sectors. Key Features: RISC Architecture: Simplified instruction set enhances speed and efficiency. Scalability: Suitable for a broad spectrum of applications, from low-power devices to high-performance systems. Energy Efficiency: Optimized for minimal power consumption without compromising performance. Wide Ecosystem: Extensive support from software and hardware vendors. Common Uses: Smartphones and Tablets: Dominant in mobile computing. Embedded Systems: IoT devices, wearables, and smart home appliances. Computing Platforms: Single-board computers like the Raspberry Pi. Automotive and Industrial: Increasingly used in advanced driver-assistance systems (ADAS) and industrial automation. Popular ARM Architectures: Cortex-M Series: Designed for microcontrollers and deeply embedded applications. Cortex-A Series: Targeted at applications requiring high performance, such as smartphones and tablets. Cortex-R Series: Optimized for real-time and safety-critical applications. 3. Development Boards: Bridging Hardware and Software Innovation What is a Development Board? A development board is a printed circuit board (PCB) that includes a microcontroller or processor along with additional components to facilitate the development, testing, and prototyping of electronic projects. These boards provide a user-friendly platform for developers to experiment with hardware and software without designing circuits from scratch. Key Features: Integrated Components: Power regulation, communication interfaces (USB, Ethernet), and peripheral connectors. Programmable: Equipped with bootloaders or programming interfaces to upload custom firmware. Expandable: Support for shields, modules, and external sensors to enhance functionality. Community Support: Extensive documentation, tutorials, and community-driven projects. Common Types of Development Boards: Arduino: Based on Atmel AVR microcontrollers, ideal for beginners and rapid prototyping. Raspberry Pi: A single-board computer using ARM processors, suitable for more complex applications requiring an operating system. STM32 Nucleo Boards: Based on STM32 microcontrollers, offering high performance and versatility. ESP32 Development Boards: Featuring Wi-Fi and Bluetooth capabilities, perfect for IoT projects. Popular Development Boards and Their Features: Arduino Uno: Microcontroller: ATmega328P. I/O Pins: Digital and analog. Connectivity: USB for programming and power. Ideal For: Basic electronics projects, learning programming. Raspberry Pi 4: Processor: Quad-core ARM Cortex-A72. Memory: Up to 8GB RAM. Connectivity: HDMI, USB 3.0, Ethernet, Wi-Fi. Ideal For: Media centers, small servers, learning Linux, complex IoT applications. ESP32 DevKitC: Microcontroller: ESP32. Connectivity: Built-in Wi-Fi and Bluetooth. I/O Pins: Multiple GPIOs for sensors and actuators. Ideal For: IoT applications, wireless projects, smart devices. 4. Comparing Development Boards, Microcontrollers, and ARM Scope and Functionality: Microcontrollers: Serve as the core processing units within embedded systems, handling specific tasks with efficiency. ARM: Defines the processor architecture that can be implemented in both microcontrollers (e.g., Cortex-M series) and more powerful processors (e.g., Cortex-A series) found in single-board computers. Development Boards: Provide an accessible platform integrating microcontrollers or ARM-based processors with additional hardware to streamline development and prototyping. Use Cases: Microcontrollers: Ideal for dedicated, low-power applications where specific tasks need to be executed reliably. ARM Processors: Suited for applications requiring higher computational power, multitasking, and advanced features. Development Boards: Perfect for experimenting, learning, and developing prototypes before finalizing hardware designs. Performance and Power Consumption: Microcontrollers: Generally lower in performance but highly efficient in power usage, suitable for battery-powered devices. ARM-based Processors: Offer higher performance with varying power consumption profiles depending on the specific architecture and implementation. Development Boards: Their performance and power consumption are determined by the embedded microcontroller or processor and the additional components onboard. Flexibility and Expandability: Microcontrollers: Limited to the capabilities of the specific chip but can be paired with external modules for added functionality. ARM Processors: Highly flexible, especially in multi-core and high-performance configurations, supporting complex operating systems and applications. Development Boards: Highly expandable through shields, modules, and external peripherals, enabling a wide range of project possibilities. 5. Choosing the Right Component for Your Project Selecting between a development board, a microcontroller, or an ARM-based processor depends on the specific requirements of your project: For Beginners and Rapid Prototyping: Arduino Uno or similar boards offer simplicity and a vast community for support. For IoT and Wireless Projects: ESP32 Development Boards provide built-in Wi-Fi and Bluetooth, facilitating connectivity. For High-Performance Applications: Raspberry Pi or ARM Cortex-A based boards are ideal for projects requiring multitasking, multimedia processing, or running full operating systems. For Dedicated Embedded Systems: Selecting a microcontroller from families like STM32 or PIC ensures efficiency and reliability for specific tasks. Understanding the distinctions between development boards, microcontrollers, and ARM architectures is crucial for designing effective and efficient electronic systems. Microcontrollers form the backbone of embedded applications, ARM provides versatile and powerful processor architectures, and development boards bridge the gap between concept and implementation, enabling developers to innovate and prototype with ease. By evaluating the needs of your project against the strengths of each component, you can make informed decisions that lead to successful outcomes in the dynamic field of electronics and embedded systems.
  3. 3 ways of playing games on ARM devices. Arcanum, Desciples II, Ceasar III, Fallout, Heroes and more in the article Gaming on Raspberry Pi (the guide works for any ARM device)
  4. Machine Learning and TensorFlow Lite for Microcontrollers(TFL4M) While TensorFlow Lite (TFL) for Microcontrollers is designed to run machine learning models on microcontrollers and other devices with only a few kilobytes of memory. The core runtime just fits in 16 KB on an Arm Cortex M3 and can run many basic models. It doesn't require operating system support, nor any standard C or C++ libraries, not even dynamic memory allocation. Ameba and TFL4M Ameba is an easy-to-program hardware platform for developing all kinds of IoT applications. AmebaD is equipped with various peripheral interfaces, including WiFi, GPIO INT, I2C, UART, SPI, PWM, ADC. Through these interfaces, AmebaD can connect with electronic components such as LED, switches, manometer, hygrometer, PM2.5 dust sensors, …etc. What's best? Ameba can be programmed using Arduino IDE, MicroPython and standard C SDK which are all open-source! TFL for Microcontrollers--Hello World Hello World is by far the easiest ML model that can be demo, you only need a LED,or not at all. Here is how we run TFL4M with Hello World, Materials • Ameba D [RTL8722 CSM/DM] x 1 • LED x 1 Example Download the Ameba customized version of TensorFlow Lite for Microcontrollers library at https://github.com/ambiot/ambd_arduino/tree/master/Arduino_zip_libraries. Follow the instructions at https://www.arduino.cc/en/guide/libraries to install it. Ensure that the patch files found at https://github.com/ambiot/ambd_arduino/tree/master/Ameba_misc/ are also installed. Open the example, “Files” -> “Examples” -> “TensorFlowLite_Ameba” -> “hello_world”. Upload the code and press the reset button on Ameba once the upload is finished. Connect the LED to digital pin 10 and ground, ensuring that the polarity is correct. You should see the LED fade in and out rapidly. In the Arduino serial plotter, you can see the output value of the Tensorflow model plotted as a graph, it should resemble a sine wave. Need more resources to get started with Ameba? Check out the 1. Ameba Official website at https://bit.ly/AmebaOfficialWebsite 2. Ameba Forum at https://bit.ly/AmebaForum 3. Ameba Facebook at https://bit.ly/AmebaFB
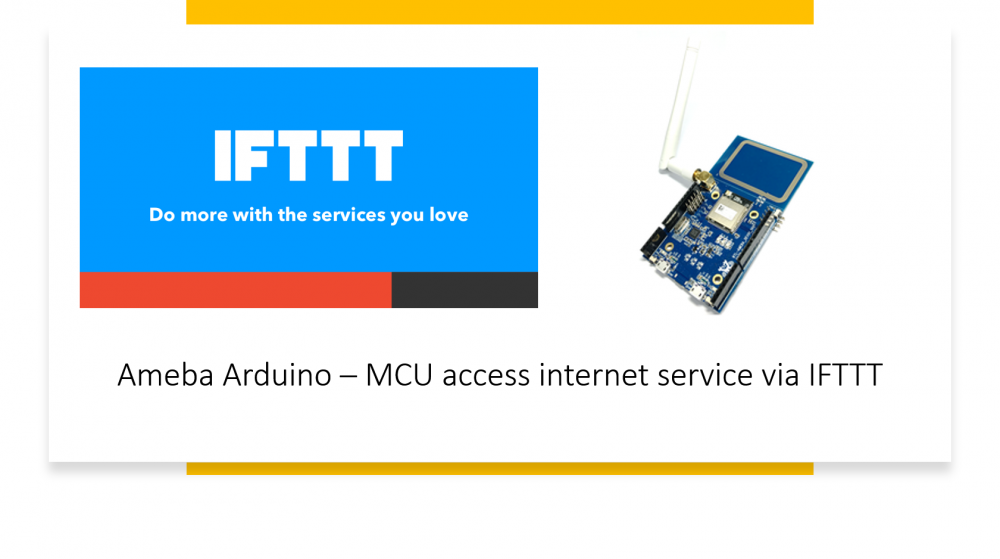
  5. Accessing internet service is an easy job for a smart device like an android phone, tablet or a PC, but not so easy on microcontrollers since it usually requires better connectivity and processing power. However, we may offload the heavy part of the job to IFTTT to help us accomplish a great variety of internet service with ease. This tutorial will show you how to make use of IFTTT to do just that. Introduction to IFTTT IFTTT, known as If This Then That, is a website and mobile app and free web-based service to create the applets, or the chains of simple conditional statements. The applet is triggered by changes that occur within other web services such as Gmail, Facebook, Telegram, Instagram, Pinterest etc. Preparation Ameba x 1 An account from https://ifttt.com/ , in order to access IFTTT service* For detailed step-by-step guide, you may refer to link below, https://www.amebaiot.com/en/ifttt-via-ameba/
  6. To emulate any type of software on any ARM development boards like Raspberry Pi a Virtualbox software is usually used. Learn the Virtualbox alternative for RPI (or any other ARM) with greater performance.
  7. What if Windows can be started on ARM devices? Do you really need to reach your goals? The answers are in the article: Windows 7 on Raspberry Pi
  8. Some developers really need MS .NET Framework for some reason on their ARM devices (mainly on Raspberry Pi). So, basing on their requests, I have made a short tutorial on how to setup .NET on Raspberry Pi.
×
  • Create New...