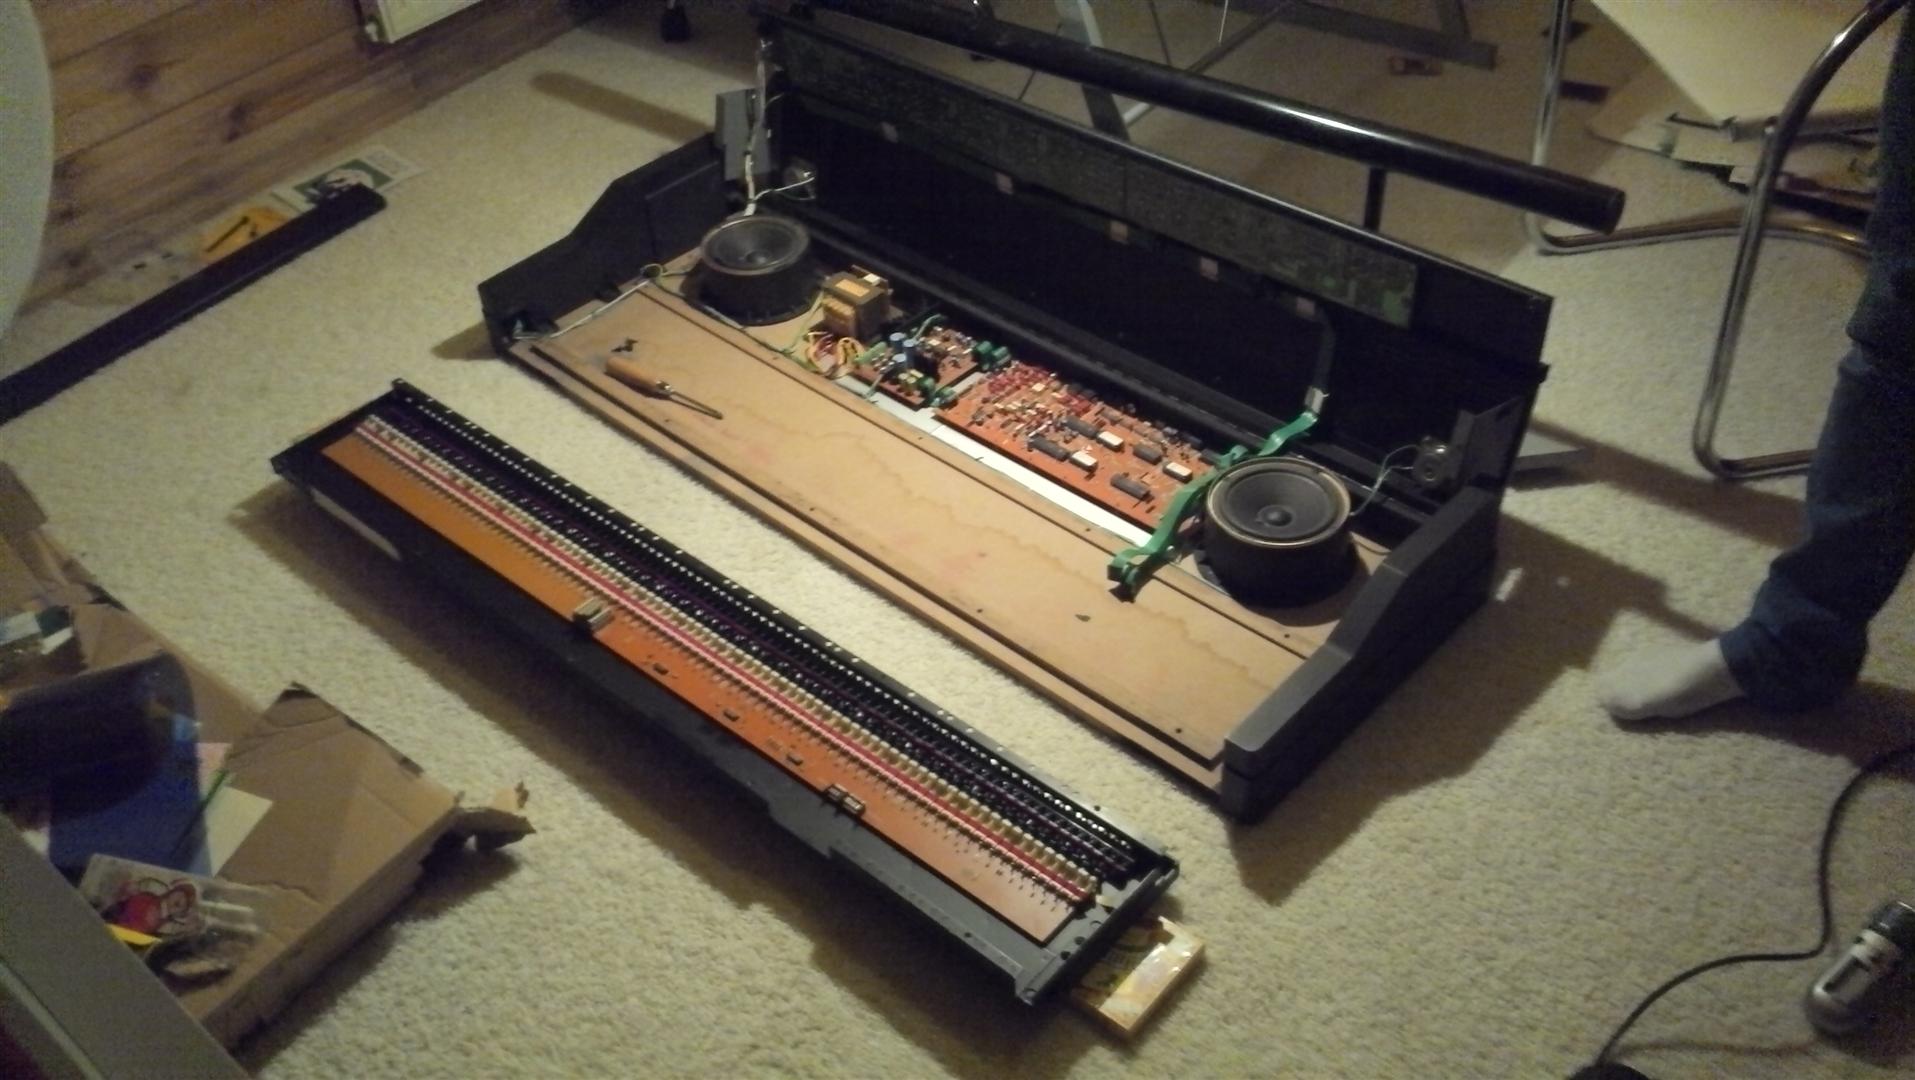
Last night I collected a fairly sad looking (mostly dusty) electronic piano and I set about repairing it. Most of the keys worked, but some were quiet, and some didn't react properly if pressed and released quickly several times.
I looks a lot like this:

I Googled for any useful documentation, but found nothing.
Just in case anyone else ever needs to repair one of these, here is some information you may find useful:
1) leave it on its stand while you work on it as it provides better access (I didn't and I wish I had). Remove the power while you have it open -- There are live connections inside that you really don't want to touch.
2) Nine screws under the front "lip" allow the front section to come off. It sort of pivots up before being removed in a downward direction as it is clipped in behind the keyboard. Mine had a nice collection of gunk and a coin in here. There are adjustments for the "feel" of the keyboard here (I think). Electrically speaking, there is no need to adjust them. But there's probably a great need to vacuum!
3) There are two loooong bolts underneath (with hexagonal heads), and two more short bolts (with phillips heads) directly in line toward the rear of the unit. When removed these allow you to tilt up and back the top cover. Beware that the piano hinge will be under some significant stress if you leave this dangling. I'd place it against a wall or something so that it can't go much past 90 degrees.
4) In the body of the piano is the main board and the amplifier/power supply board, and a mode selection board is up under the cover. There are 3 fuses which are clearly marked. The boards are pretty well protected and were clean on my unit. However there are 2 "vents" above each set of speakers and it is more than likely that stuff has found it's way into the piano near the speakers. More work for the vacuum. Mine also had a nice sprinkling of glitter. The switches and the volume pot are a bit odd and finding replacements would be difficult. I have one non-functional momentary NO switch that I didn't bother to try to replace.
5) There are 10 bolts in 2 rows under the keyboard that need to be removed to remove the keyboard. Once you have removed these, and disconnected the earth connection, and the 2 cables connecting the keyboard to the main board, you can lift it straight up and remove it. You will need to find something to support the 2 ends of it while it is inverted so that the keys are not forcibly pressed by its weight. Under the keyboard you'll want to vacuum again.
6) Inspect the contacts. The keys have a NO and NC contact. Pressing the key moves a spring which rests against one wire and makes it connect to another wire. I presume that the delay between break and make determines the loudness of the sound produced. In my case, many of these wires (and also the springs) were tarnished or coated with something and were black. It was obvious that the connections being made were not very good. In one case a key didn't work at all. I used a cotton bud (actually *many* cotton buds -- q-tips for the Americans) dipped in isopropyl alcohol to clean the contacts and the springs. There is not much room, and the springs are quite delicate.
7) Inspect the pedals. The pedals are 2 NC contacts that open when the pedal is depressed. They connect via two 6.5mm mono jacks to the back of the piano. You need to invert the piano or remove it from the stand before you can get at these. In my case they were full of spider and insect gunk and were thoroughly vacuumed. The pivot is a solid metal shaft, and both of mine had slipped out somewhat. You need to hold the pedal in place and tap the end of the shaft gently with a hammer to get it positioned correctly again.
If some interest is the fact that it's mostly 74HC and mine had a ROM dated 1988. This unit has a heap of midi goodness that I could not evaluate or test.
I think my unit had been offered a drink and could not refuse. Liquid had entered through one vent and had made a bit of a mess on the top of one speaker, but didn't really do any damage. However I think it had also run into the keyboard and it is from there that I think it managed to get onto the key contacts.
If you're not a piano player, the "damper" connection should connect to the right pedal, which has the red connector on my unit. When the pedal is pressed the keys continue to sound for a long time after they are released. When up, the sound dies away quickly as the key is released.
The left pedal must therefore be the "soft" pedal. I can't hear what it does on this unit, but I can't hear what it does on our piano either -- I'm not the piano player. This has a black jack, and the socket is black too (and looks different to all the others). On my unit, this jack had fallen apart.
There are several more bolts underneath that you should check for tightness. Most of these hold the speakers in place, but one set hold the power transformer and you don't want that rattling around. You may need to have the unit open while you tighten any really loose ones of these as they have free nuts.
Oh, and remember to reconnect the earth to the keyboard when you put it back in!
Internally there is a "tune" trimpot, but there is also access to another trimpot near the pedal connections that allows you to adjust from slightly sharp to slightly flat.
A great weekend project. Thanks to Freecycle (where it was given away), Samantha (who gave it to me), my wife (who let me pick it up), and her niece (who will be taking it away soon)
I looks a lot like this:
I Googled for any useful documentation, but found nothing.
Just in case anyone else ever needs to repair one of these, here is some information you may find useful:
1) leave it on its stand while you work on it as it provides better access (I didn't and I wish I had). Remove the power while you have it open -- There are live connections inside that you really don't want to touch.
2) Nine screws under the front "lip" allow the front section to come off. It sort of pivots up before being removed in a downward direction as it is clipped in behind the keyboard. Mine had a nice collection of gunk and a coin in here. There are adjustments for the "feel" of the keyboard here (I think). Electrically speaking, there is no need to adjust them. But there's probably a great need to vacuum!
3) There are two loooong bolts underneath (with hexagonal heads), and two more short bolts (with phillips heads) directly in line toward the rear of the unit. When removed these allow you to tilt up and back the top cover. Beware that the piano hinge will be under some significant stress if you leave this dangling. I'd place it against a wall or something so that it can't go much past 90 degrees.
4) In the body of the piano is the main board and the amplifier/power supply board, and a mode selection board is up under the cover. There are 3 fuses which are clearly marked. The boards are pretty well protected and were clean on my unit. However there are 2 "vents" above each set of speakers and it is more than likely that stuff has found it's way into the piano near the speakers. More work for the vacuum. Mine also had a nice sprinkling of glitter. The switches and the volume pot are a bit odd and finding replacements would be difficult. I have one non-functional momentary NO switch that I didn't bother to try to replace.
5) There are 10 bolts in 2 rows under the keyboard that need to be removed to remove the keyboard. Once you have removed these, and disconnected the earth connection, and the 2 cables connecting the keyboard to the main board, you can lift it straight up and remove it. You will need to find something to support the 2 ends of it while it is inverted so that the keys are not forcibly pressed by its weight. Under the keyboard you'll want to vacuum again.
6) Inspect the contacts. The keys have a NO and NC contact. Pressing the key moves a spring which rests against one wire and makes it connect to another wire. I presume that the delay between break and make determines the loudness of the sound produced. In my case, many of these wires (and also the springs) were tarnished or coated with something and were black. It was obvious that the connections being made were not very good. In one case a key didn't work at all. I used a cotton bud (actually *many* cotton buds -- q-tips for the Americans) dipped in isopropyl alcohol to clean the contacts and the springs. There is not much room, and the springs are quite delicate.
7) Inspect the pedals. The pedals are 2 NC contacts that open when the pedal is depressed. They connect via two 6.5mm mono jacks to the back of the piano. You need to invert the piano or remove it from the stand before you can get at these. In my case they were full of spider and insect gunk and were thoroughly vacuumed. The pivot is a solid metal shaft, and both of mine had slipped out somewhat. You need to hold the pedal in place and tap the end of the shaft gently with a hammer to get it positioned correctly again.
If some interest is the fact that it's mostly 74HC and mine had a ROM dated 1988. This unit has a heap of midi goodness that I could not evaluate or test.
I think my unit had been offered a drink and could not refuse. Liquid had entered through one vent and had made a bit of a mess on the top of one speaker, but didn't really do any damage. However I think it had also run into the keyboard and it is from there that I think it managed to get onto the key contacts.
If you're not a piano player, the "damper" connection should connect to the right pedal, which has the red connector on my unit. When the pedal is pressed the keys continue to sound for a long time after they are released. When up, the sound dies away quickly as the key is released.
The left pedal must therefore be the "soft" pedal. I can't hear what it does on this unit, but I can't hear what it does on our piano either -- I'm not the piano player. This has a black jack, and the socket is black too (and looks different to all the others). On my unit, this jack had fallen apart.
There are several more bolts underneath that you should check for tightness. Most of these hold the speakers in place, but one set hold the power transformer and you don't want that rattling around. You may need to have the unit open while you tighten any really loose ones of these as they have free nuts.
Oh, and remember to reconnect the earth to the keyboard when you put it back in!
Internally there is a "tune" trimpot, but there is also access to another trimpot near the pedal connections that allows you to adjust from slightly sharp to slightly flat.
A great weekend project. Thanks to Freecycle (where it was given away), Samantha (who gave it to me), my wife (who let me pick it up), and her niece (who will be taking it away soon)