LCDduino – Arduino Compatible 16×2 LCD module
- Rajkumar Sharma
- 2.080 Views
- moderate
- Tested
- SKU: EL106039
- Quote Now
- 0 Likes

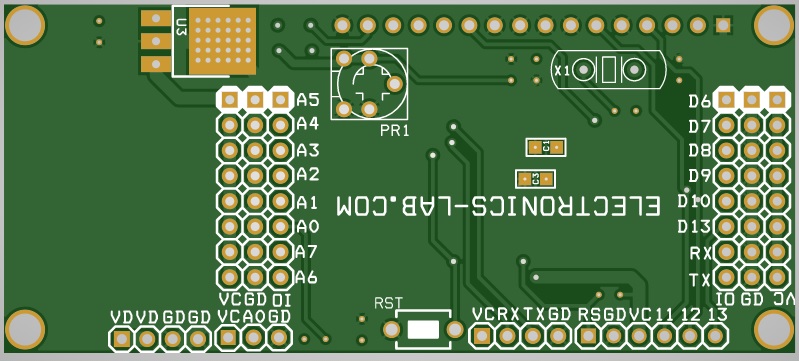
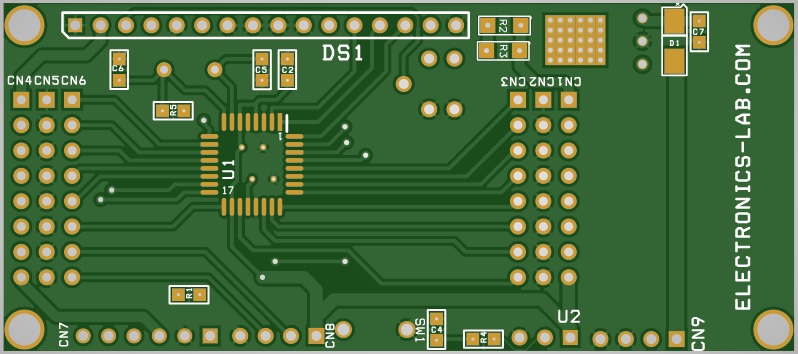
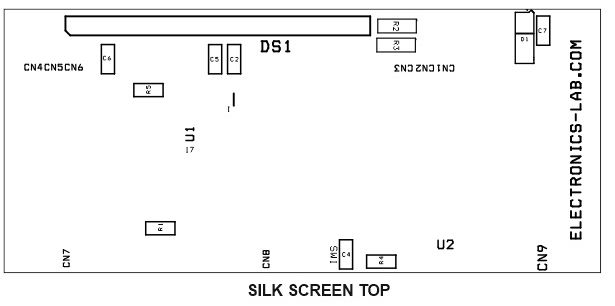
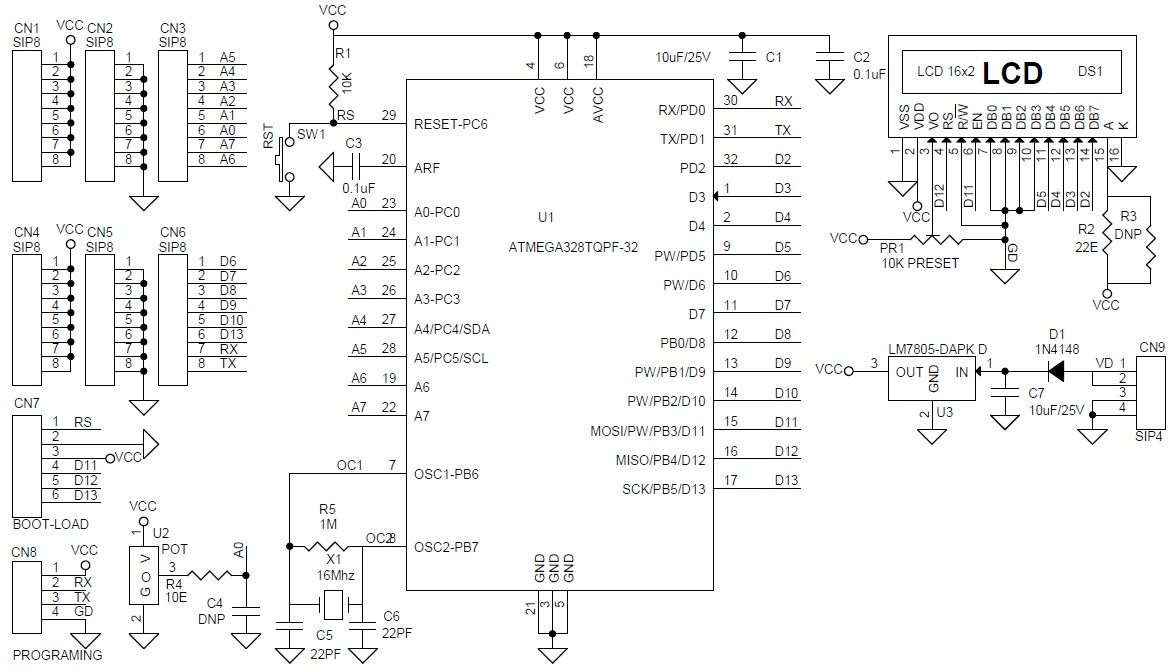
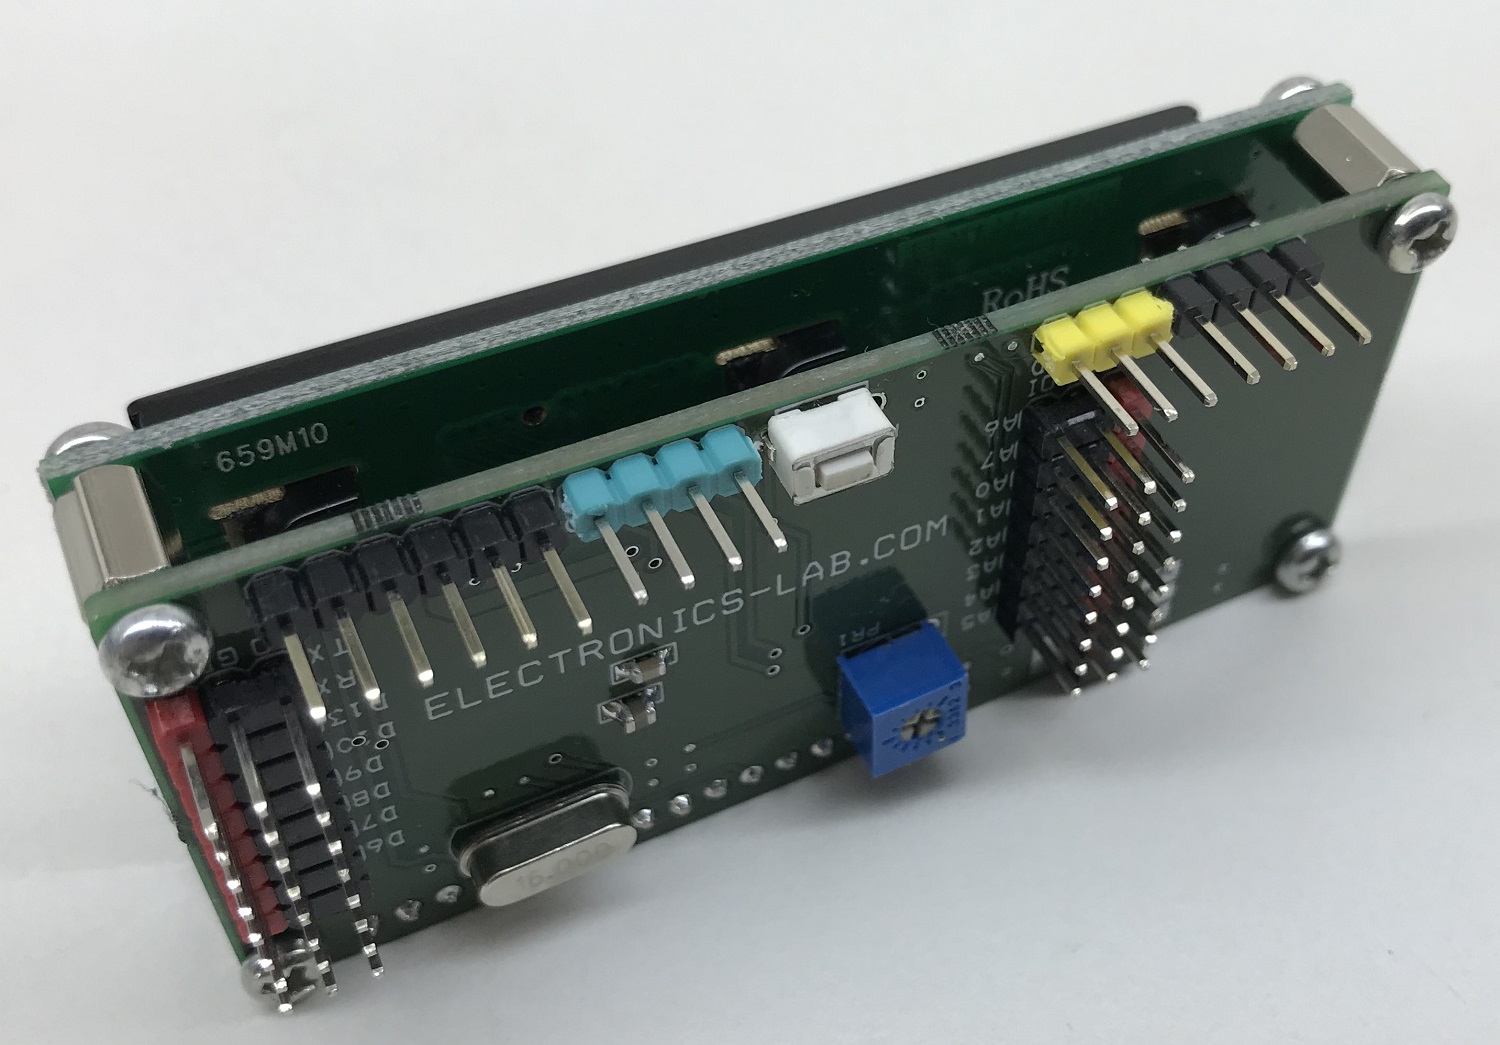
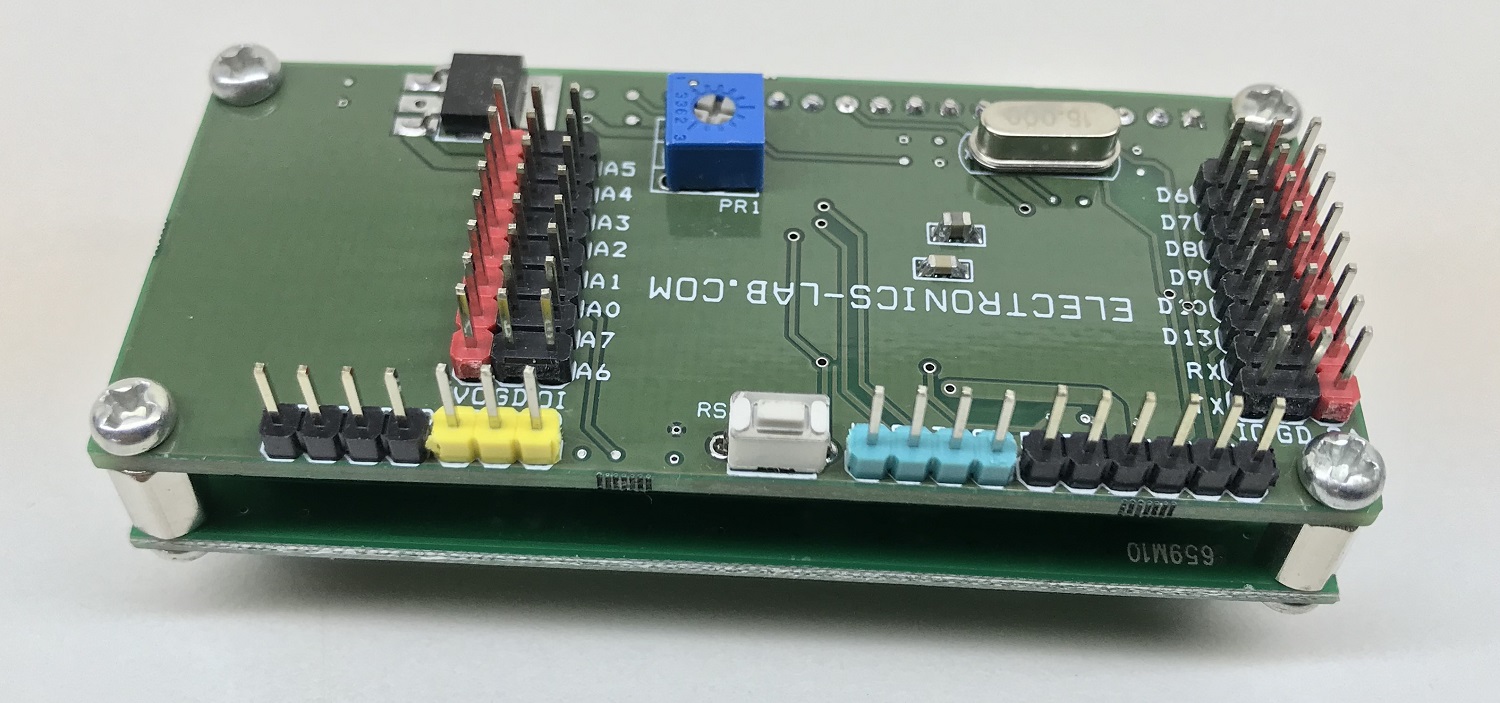
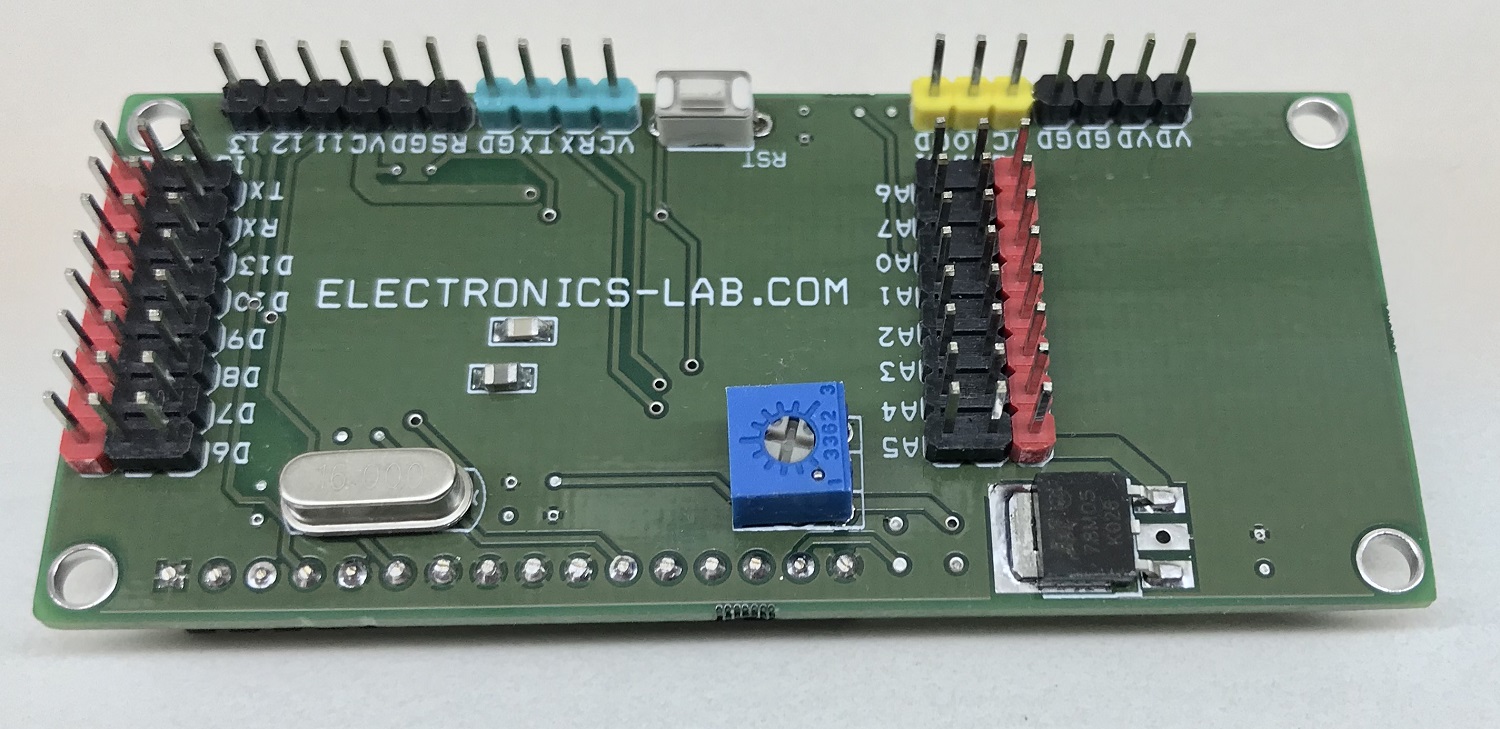
The LCDduino board enables users to create many applications/projects that require a 16×2 LCD display and Arduino. The board has the exact size of 16×2 LCD and can be installed on the backside of the LCD. This is a low-cost solution that has onboard Arduino + LCD so no extra Arduino Nano or Arduino board is required. The Arduino compatible hardware includes onboard programming and boot-loader connectors, Atmega328 microcontroller, and 16×2 LCD interface. Each Arduino I/O Pin including the VCC and GND is exposed to the connectors for easy connection with sensors and other devices. The board enables the easy interface of many devices and sensors. The operating power supply is 7 to 15V DC.
Key features:
- Arduino Compatible Hardware
- Operating Power Supply 7 to 15V DC (VDD-GND Pins) or 5V DC (VCC-GND Pins)
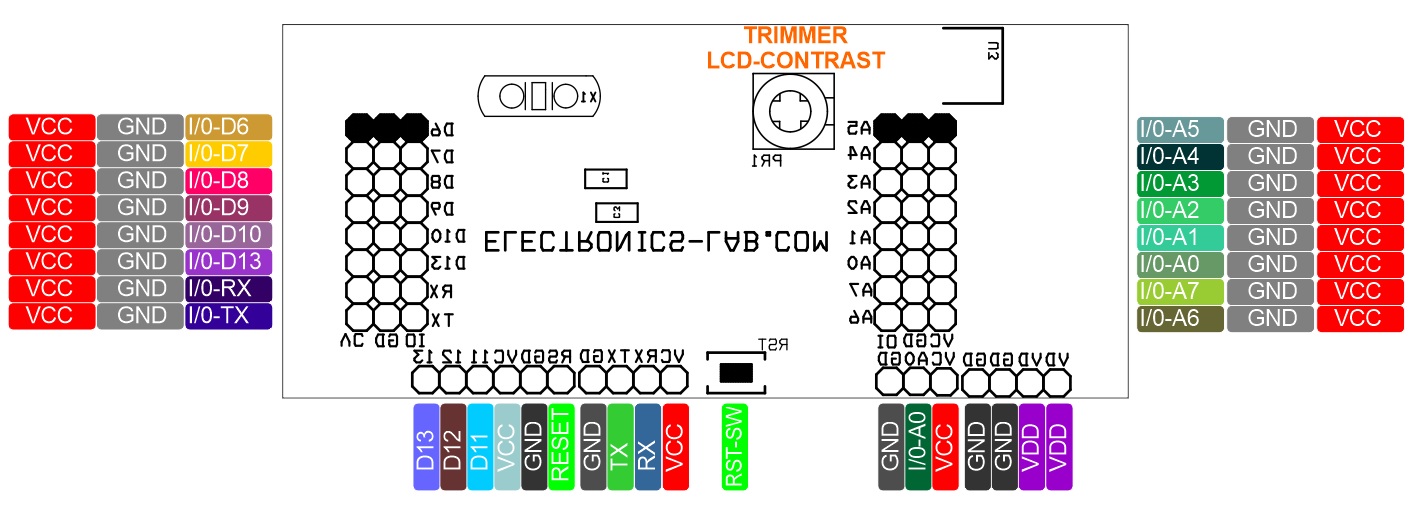
- Arduino Digital Pin D2, D3, D4, D5, D11, D12 connected to 16×2 LCD
- Arduino Digital Pin D6, D7, D8, D9, D10, D13, D0, D1 I/O Pins are available for external Interface
- Arduino Analog Pin A0, A1, A2, A3, A4, A5, A6, A7 Pins are available for external interface
- Each Digital and Analog Pin includes VCC and GND for easy interface to external sensor and device
- On-Board 5V Regulator
- On-Board Trimmer Potentiometer to set the Contrast of LCD
- On-Board Current Limiting Resistor R2/R3 for LCD Back Light
- On-Board Reset Switch
- On-Board Bootloader Burning Connector for New ATmega328 Micro-controller (D10, D11, D12, D13, VCC and GND Pins)
- On-Board Arduino IDE Programming Connector (RX, TX, Reset, VCC and GND Pins)
- 4 x Mounting Holes 3.2mm Diameters
- PCB Dimensions 80 x 35.72 mm
Programming the Atmega328
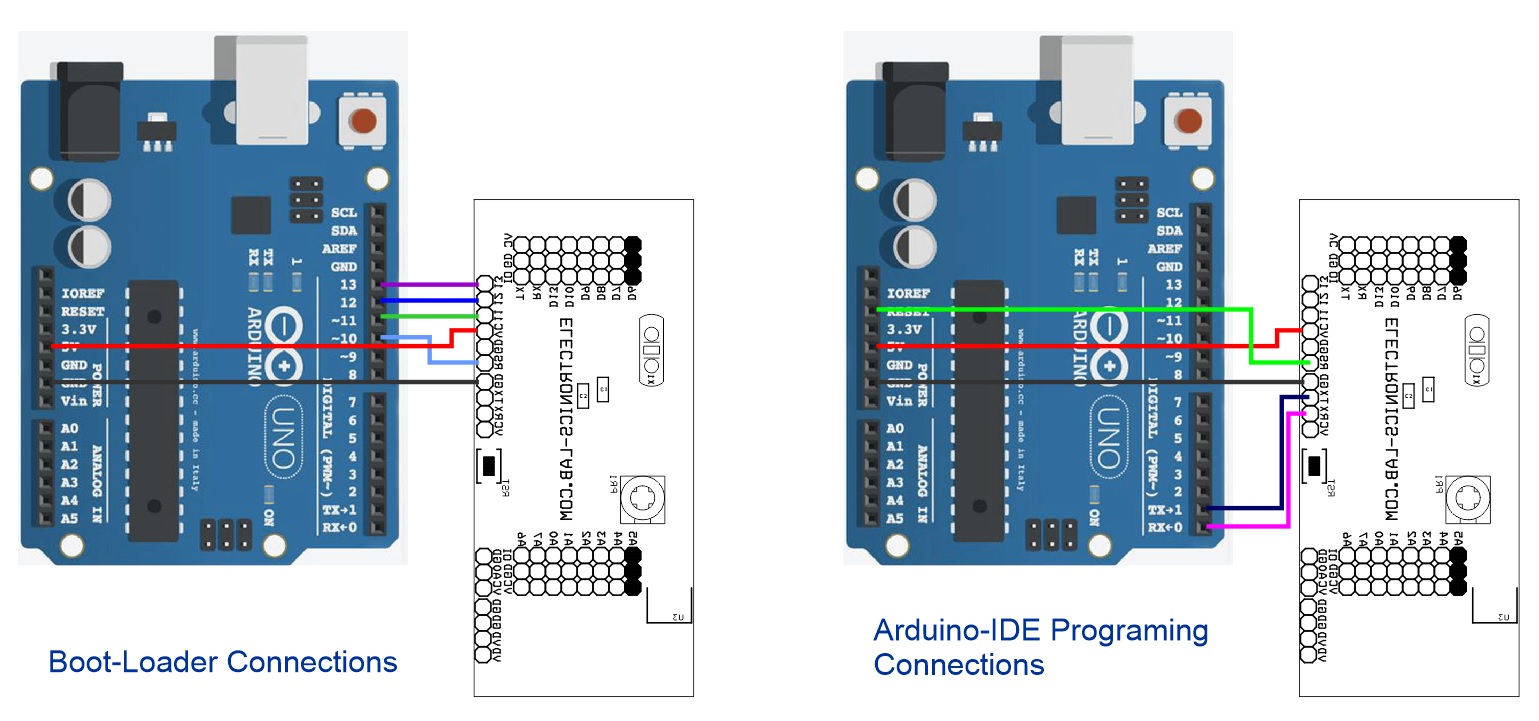
After the board assembly, the brand new Atmega328 microcontroller requires burning the bootloader before it can be programmed using Arduino IDE. Refer to the connection diagram and follow the links below to learn more about bootloader and Arduino IDE programming.
- From Arduino to a Microcontroller on a Breadboard – https://www.arduino.cc/en/Tutorial/BuiltInExamples/ArduinoToBreadboard
- How to burn the bootloader in an Arduino Nano using an Arduino UNO – https://support.arduino.cc/hc/en-us/articles/360012048100-How-to-burn-the-bootloader-in-an-Arduino-Nano-using-an-Arduino-UNO
Arduino example code is provided below to test the project. This code will help you to convert this board into a 0 to 5V Voltmeter. Just connect the DC source at analog in A0 to measure the DC voltage.
- More Info on 16X2 LCD – https://www.adafruit.com/product/181
- Download 16X2 LCD Data Sheet – https://www.sparkfun.com/datasheets/LCD/ADM1602K-NSW-FBS-3.3v.pdf
Schematic
Parts List
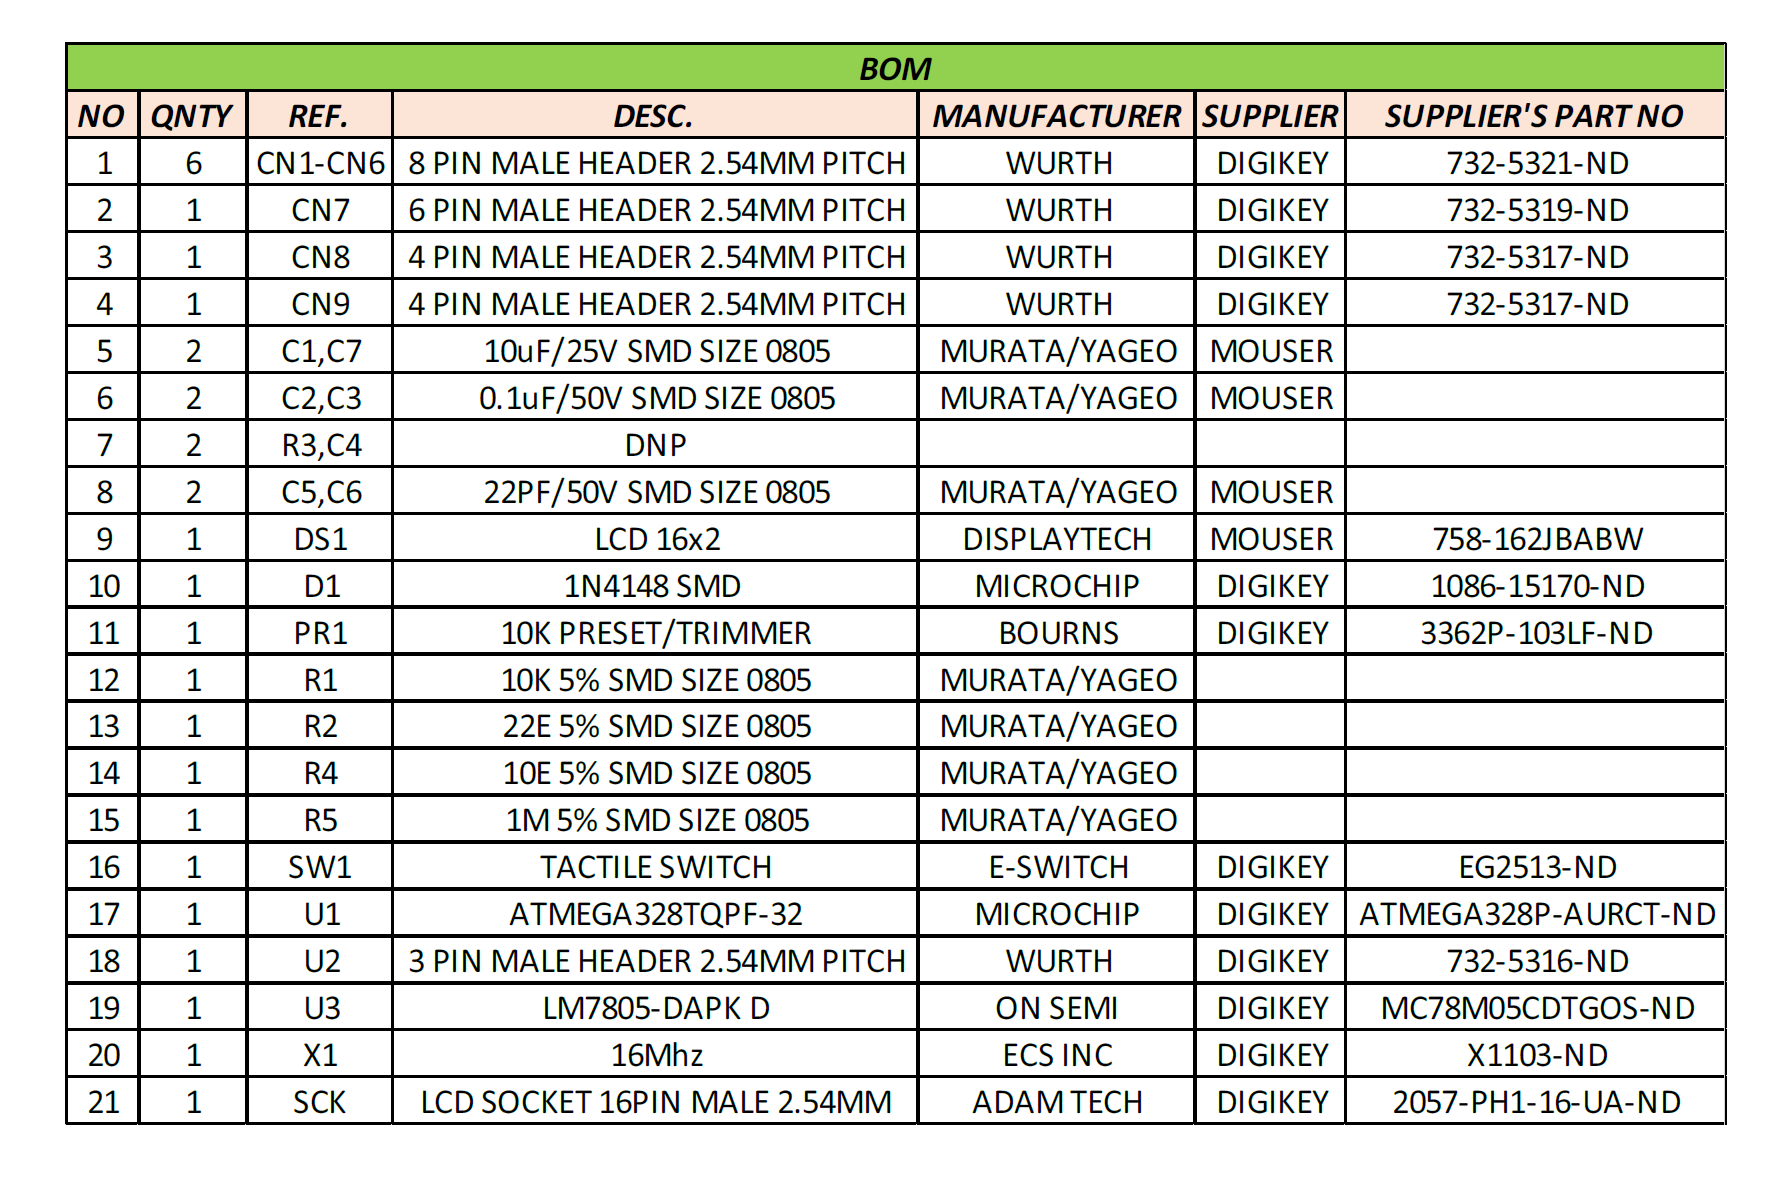
| NO | QNTY | REF. | DESC. | MANUFACTURER | SUPPLIER | SUPPLIER'S PART NO |
|---|---|---|---|---|---|---|
| 1 | 6 | CN1-CN6 | 8 PIN MALE HEADER 2.54MM PITCH | WURTH | DIGIKEY | 732-5321-ND |
| 2 | 1 | CN7 | 6 PIN MALE HEADER 2.54MM PITCH | WURTH | DIGIKEY | 732-5319-ND |
| 3 | 1 | CN8 | 4 PIN MALE HEADER 2.54MM PITCH | WURTH | DIGIKEY | 732-5317-ND |
| 4 | 1 | CN9 | 4 PIN MALE HEADER 2.54MM PITCH | WURTH | DIGIKEY | 732-5317-ND |
| 5 | 2 | C1,C7 | 10uF/25V SMD SIZE 0805 | MURATA/YAGEO | MOUSER | |
| 6 | 2 | C2,C3 | 0.1uF/50V SMD SIZE 0805 | MURATA/YAGEO | MOUSER | |
| 7 | 2 | R3,C4 | DNP | |||
| 8 | 2 | C5,C6 | 22PF/50V SMD SIZE 0805 | MURATA/YAGEO | MOUSER | |
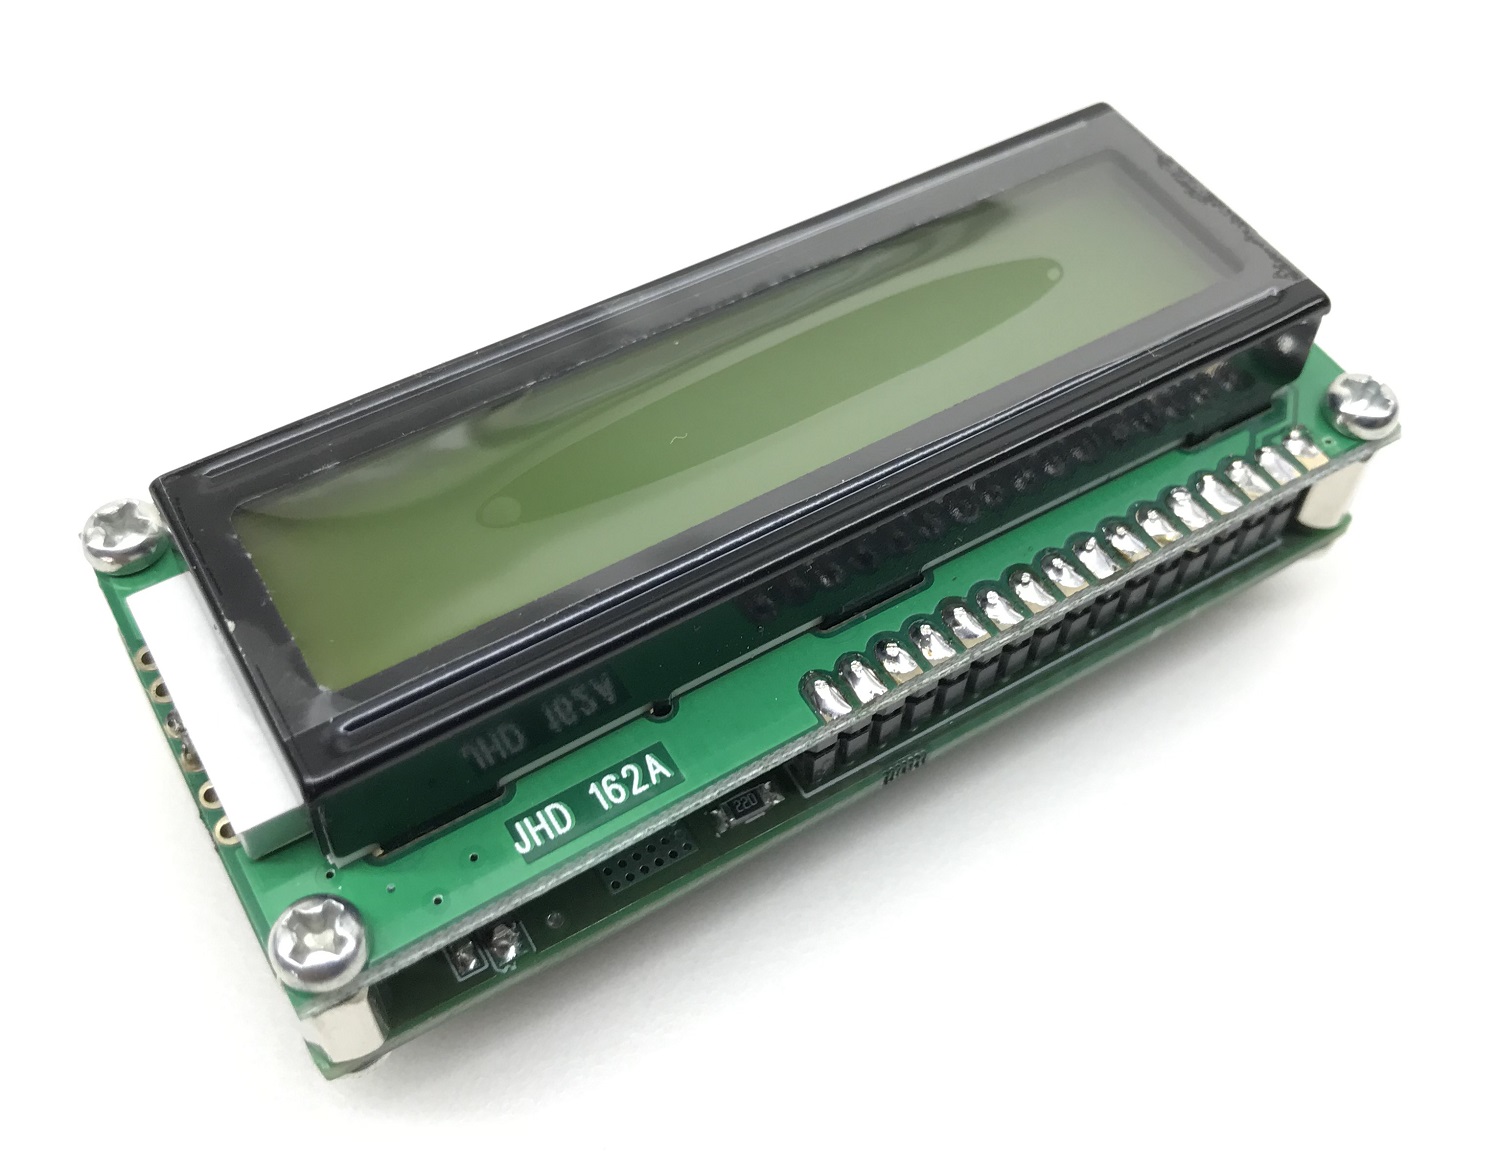
| 9 | 1 | DS1 | LCD 16x2 | DISPLAYTECH | MOUSER | 758-162JBABW |
| 10 | 1 | D1 | 1N4148 SMD | MICROCHIP | DIGIKEY | 1086-15170-ND |
| 11 | 1 | PR1 | 10K PRESET/TRIMMER | BOURNS | DIGIKEY | 3362P-103LF-ND |
| 12 | 1 | R1 | 10K 5% SMD SIZE 0805 | MURATA/YAGEO | ||
| 13 | 1 | R2 | 22E 5% SMD SIZE 0805 | MURATA/YAGEO | ||
| 14 | 1 | R4 | 10E 5% SMD SIZE 0805 | MURATA/YAGEO | ||
| 15 | 1 | R5 | 1M 5% SMD SIZE 0805 | MURATA/YAGEO | ||
| 16 | 1 | SW1 | TACTILE SWITCH | E-SWITCH | DIGIKEY | EG2513-ND |
| 17 | 1 | U1 | ATMEGA328TQPF-32 | MICROCHIP | DIGIKEY | ATMEGA328P-AURCT-ND |
| 18 | 1 | U2 | 3 PIN MALE HEADER 2.54MM PITCH | WURTH | DIGIKEY | 732-5316-ND |
| 19 | 1 | U3 | LM7805-DAPK D | ON SEMI | DIGIKEY | MC78M05CDTGOS-ND |
| 20 | 1 | X1 | 16Mhz | ECS INC | DIGIKEY | X1103-ND |
| 21 | 1 | SCK | LCD SOCKET 16PIN MALE 2.54MM | ADAM TECH | DIGIKEY | 2057-PH1-16-UA-ND |
Connections
Gerber View
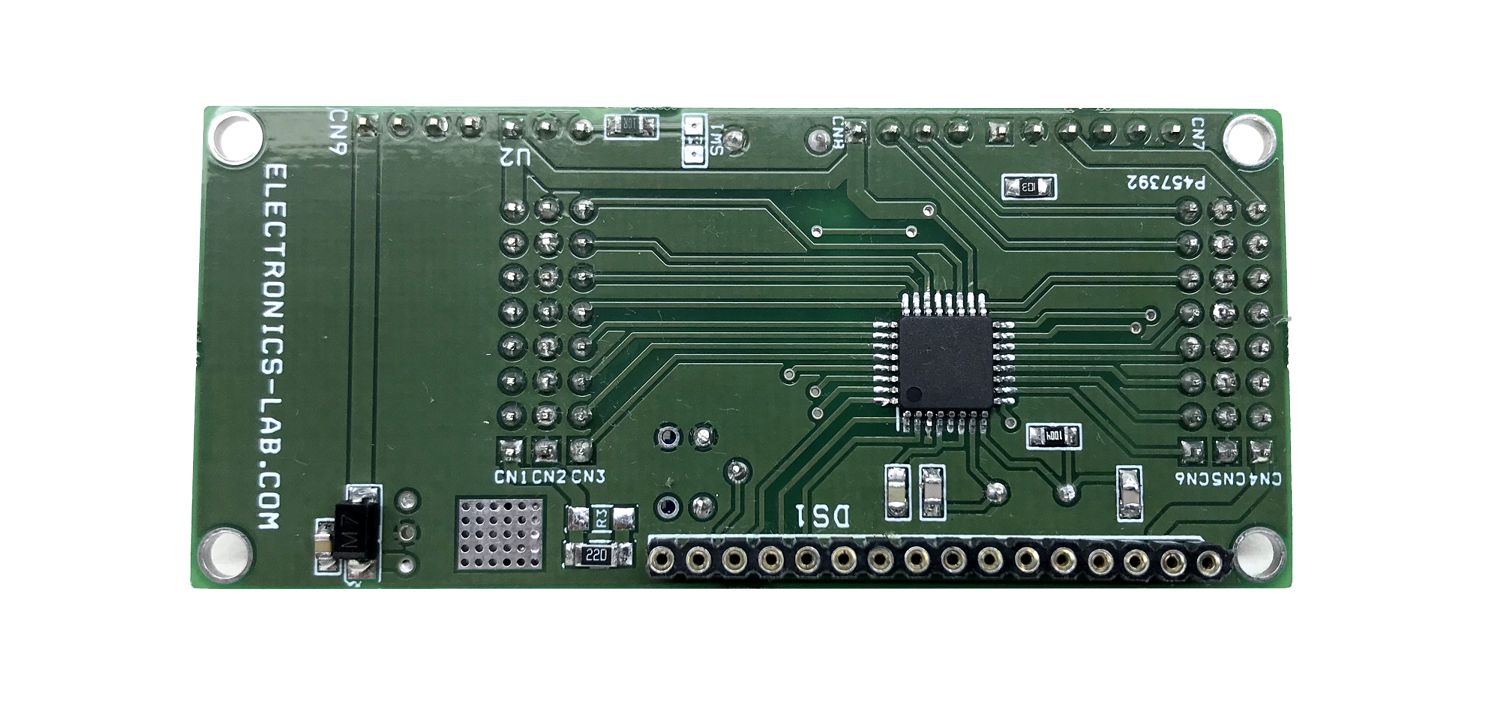
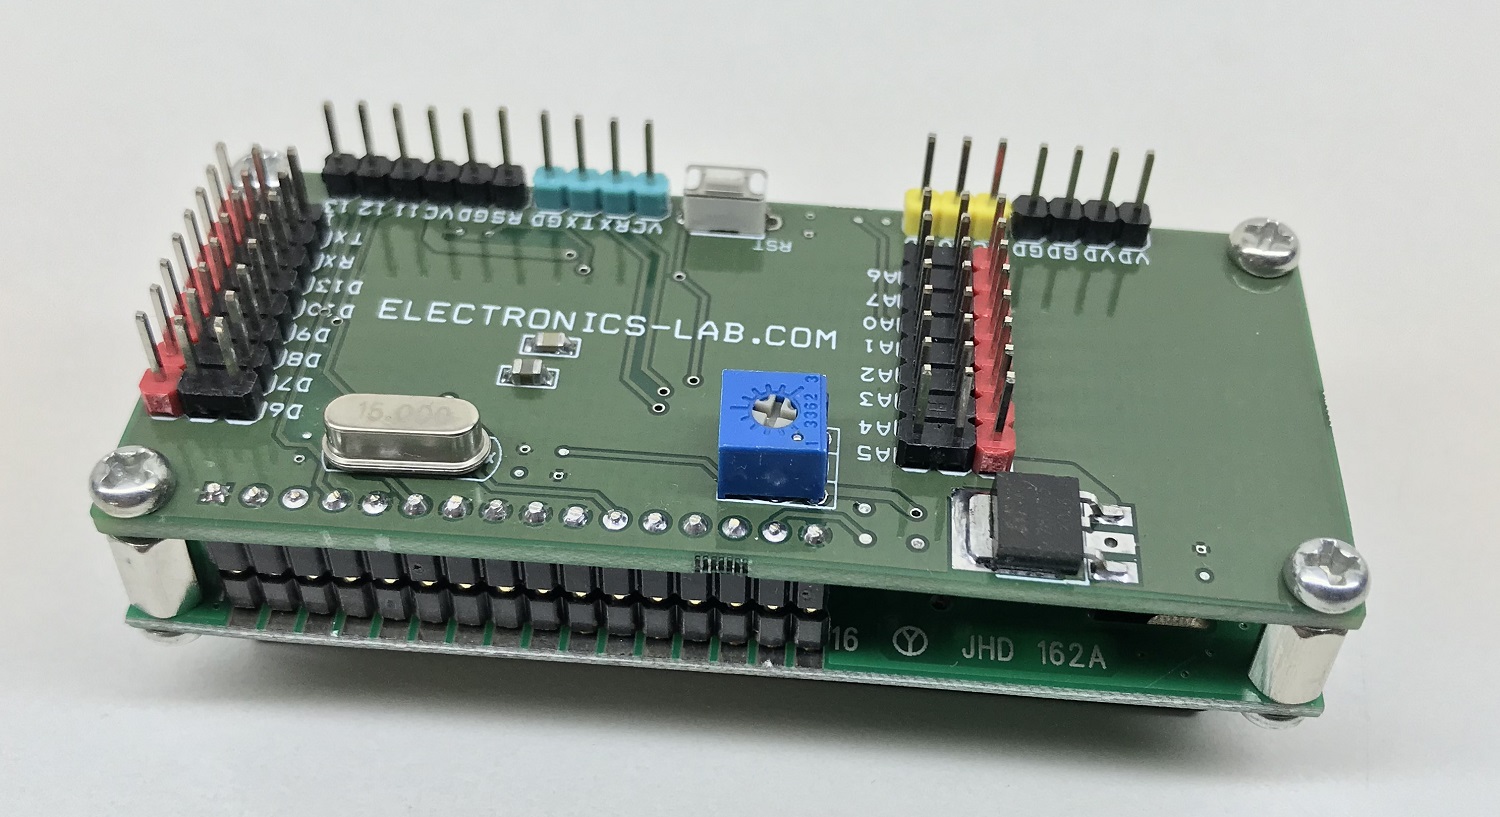
Photos
Video
ATMEGA328 Datasheet
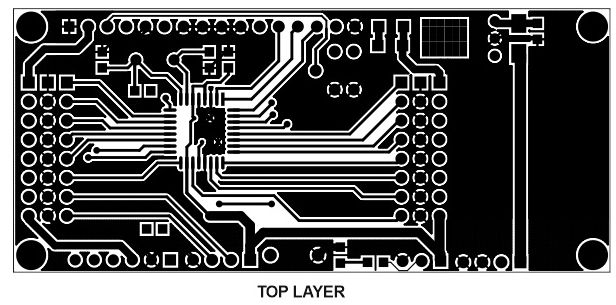
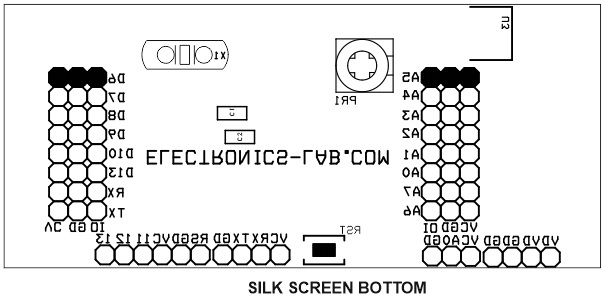
PCB