How to prevent mistakes that delay your PCB assembly (and could cost you)
Many designers can’t get their board fast enough after sending their PCB design files to their PCB assembly vendors. But the surprising thing is some customers do not provide sufficient and necessary information to their contract manufacturers (CM) – causing problems, delays, and increased cost.
![]()
Many designers can’t get their board fast enough after sending their PCB design files to their PCB assembly vendors.
But the surprising thing is some customers do not provide sufficient and necessary information to their contract manufacturers (CM) – causing problems, delays, and increased cost.
By focusing on 5 simple steps, you can ensure a smooth PCB assembly process and help your CM deliver your boards to you on-time and on-budget.
Let’s walk through these action items:
- Panelize your PCBs Correctly
- Make Sure Silkscreen is Legible
- Indicate Component Polarity
- Include PCB Fabrication and PCB Assembly Drawings
- Send a Complete BOM that includes Manufacturers’ Part Numbers
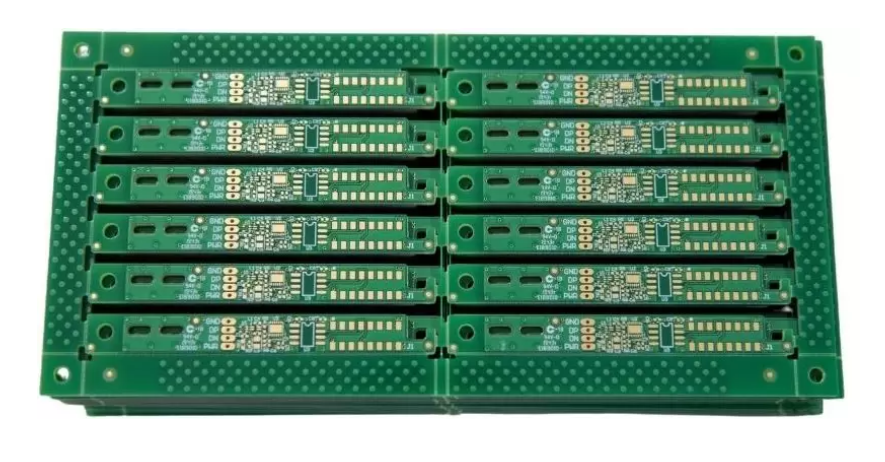
1. Panelize Your PCBs Correctly
Panelization is the placement of smaller boards into multi-board arrays to gain manufacturing efficiency.Panelization plays a vital role in the PCB assembly process. And to progress through the PCB assembly process without complications requires using correctly panelized PCBs.
Generally, it is best to leave the PCB panel design to your PCB manufacturer since they know all the requirements and how to implement them. However, should you decide to do the PCB panelization yourself, make sure you follow the design guidelines. Particularly, if your PCB has overhanging components, there needs to be enough spacing between the individual PCBs in the panel so that overhanging components do not overlap adjacent PCBs.
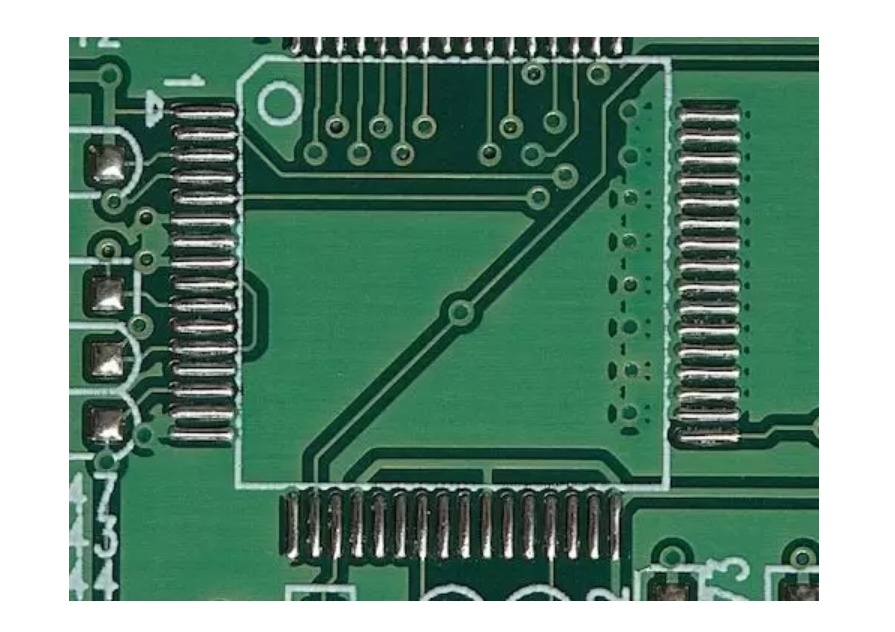
2. Make Sure Your PCB Silkscreen is Legible
The silkscreen resides on the top layer of a PCB, and it displays useful and necessary information for anyone assembling, testing, or troubleshooting a circuit board. Silkscreen markings are used to indicate component placement locations, component values, reference designators, warning symbols, component polarity, test points, board name & revision, and more. It follows that the non-readability of the silkscreen could create bumps in the assembly process and sabotage the completion date. So, what is a good size for the silkscreen text? In many cases, a line width of about 0.2 mm works well.
3. Indicate Component Polarity
A polarized component is one that is electrically non-symmetrical. (Large Capacitors, Diodes, ICs, and Transistors are always polarized. Resistors are non-polarized). So, there is a right and wrong way of placing it on a PCB. Overlooking component polarity could cause damage to components, the board or result in a non-functioning circuit board and delay the PCB assembly process. So, polarized components need to have polarity indicators marked on the silkscreen space outside the component board’s installation location.

4. Include PCB Fabrication and PCB Assembly Drawings
Make sure that your PCB manufacturer receives all details. The more specific you are in communicating your requirements, the less chance for errors, assumptions, costly mistakes, and delays. So, informing your vendors of your needs using PCB fabrication and PCB assembly drawings is an excellent idea. The fabrication drawing contains specifications for your bare board that the PCB manufacturer must know, and it should include the following:
- Drill locations
- Hole chart
- Board layer stack-up
- Dimensions
- Notes such as:
- PCB Material & thickness
- Copper Weight
- Tolerances
- Surface Finish
- Any special requirements
Just imagine the consequences of your CM receiving PCBs that are not built to your design specifications!
The assembly drawing contains assembly instructions for your board that the CM must know, and it should include the following:
- Board outline
- Part shapes
- Parts list
- Mechanical parts
- Assembly notes
- Additional views
- Expanded cut-away views
- Identification label locations
When you provide clear and complete information to your CM, you cut down or eliminate production delays due to clarifications or instructions required.
5. Send a Complete BOM that includes Manufacturers’ Part Numbers
Sending a parts list or a BOM without the correct and complete manufacturer’s part number, description, and reference designator is mumbling information to your CM. And it could put the brakes on going forward with the assembly in anticipation of clarification from you.
Why are the manufacturer’s part number (MPN) important?
- Parts are purchased using the MPNs
- If your CM is buying parts for you, then MPNs will help them find the right substitute parts (if required)
- Your CM can quickly find information or datasheet to resolve issues like a part footprint, tolerance, etc.
In Sum
Remember that your PCB design is familiar to you but not to your CM. Equipping them with the data they need at the start of your order will allow them to do their job properly and not spend time requesting and waiting on your response resulting in completion delays.


