Using Waveshare 4.3″ E-paper Display with Arduino
Screen technologies have evolved over the years since the cathode ray tube was first demonstrated in 1897, we have moved from plasma to LCDs, followed by LEDs, OLEDs, and more recently e-paper which is what we will look into today. Electronic paper/e-paper displays are display devices which were created to mimic the appearance of ink on a common paper.
Screen technologies have evolved over the years since the cathode ray tube was first demonstrated in 1897, we have moved from plasma to LCDs, followed by LEDs, OLEDs, and more recently e-paper which is what we will look into today. Electronic paper/e-paper displays are display devices which were created to mimic the appearance of ink on a common paper. Unlike the other kind of displays which emit light, e-paper displays reflect light just like an ordinary paper. This gives e-paper displays a wider viewing angle, ensure they consume less power and makes looking at them easier as it gives the same feel as looking at an ordinary paper without the glare that comes from looking at a screen. The coolest feature of this display is its ability to display the last text or graphics uploaded to it even when it is not connected to power. This helps save a lot of power and is the key feature for most applications for which e-paper displays are deployed.
The popularity of e-paper displays is on the rise (used in Amazon’s Kindle) due to the unique features mentioned above, that’s why, for this tutorial, we will look at how to use e-paper displays in Arduino projects, to give the projects an extra layer of sophistication and coolness.
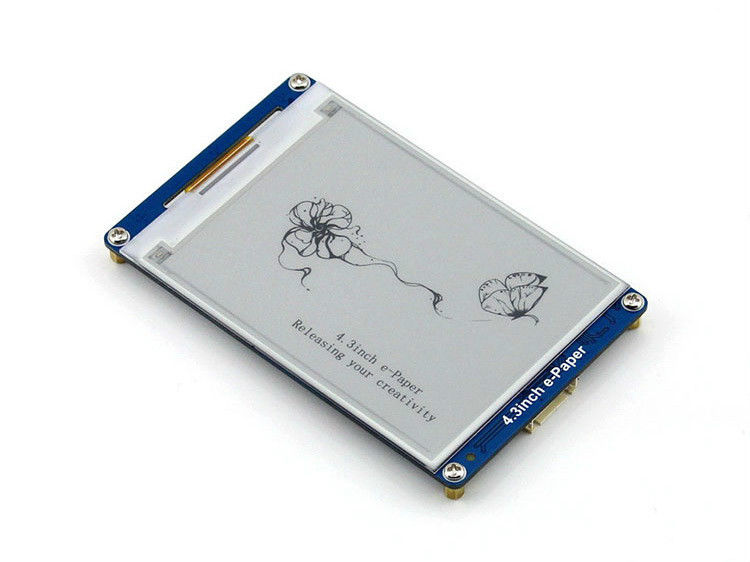
E-paper displays come in different sizes like every other kind of display, but for this tutorial, we will use the Waveshare 4.3″ e-paper display. Some of the features of this display are listed below.
- Easy to use, display any content via one serial interface, including geometric graphics, texts, and images
- Embedded font libraries, supports 32, 48 and 64 dot matrix GBK Chinese fonts and English fonts
- Built-in 128MB NandFlash, allows the font/image data to be stored in either an external TF card or the internal NandFlash
- 4 grey level displaying, 800×600 resolution
- Adjustable serial interface baud rate, 115200 by default when power up
- Powered from 3.3V to 5V, compatible with 3.3v/5v logic level.
- Ultra low power consumption, sleeping current lower than 5mA
Our basic goal with this project will be to display basic text and graphics on the e-paper display, by doing this, we will be able to cover the functions that may be needed for you to use the e-paper display in your own custom projects.
Required Components
The following components are required to build this project;
- Arduino Uno
- E-Paper display
- Jumper wires
- Breadboard
As usual, the exact version of the components used for this tutorial can be bought via the links attached to each of them. The link attached to the e-paper display above takes you to the page where you can acquire the 4.3″ e-paper display but any other display size can be used for this tutorial.
Schematics
E-paper display generally uses UART protocol for communication with microcontrollers. The display has five pins including;
- VCC
- GND
- Din (data in pin)
- Do (data out pin)
- Wake up pin
Connect the display to the Arduino as shown in the schematics below. Depending on the accessories that come with your own display, you may need to use a breadboard or not.
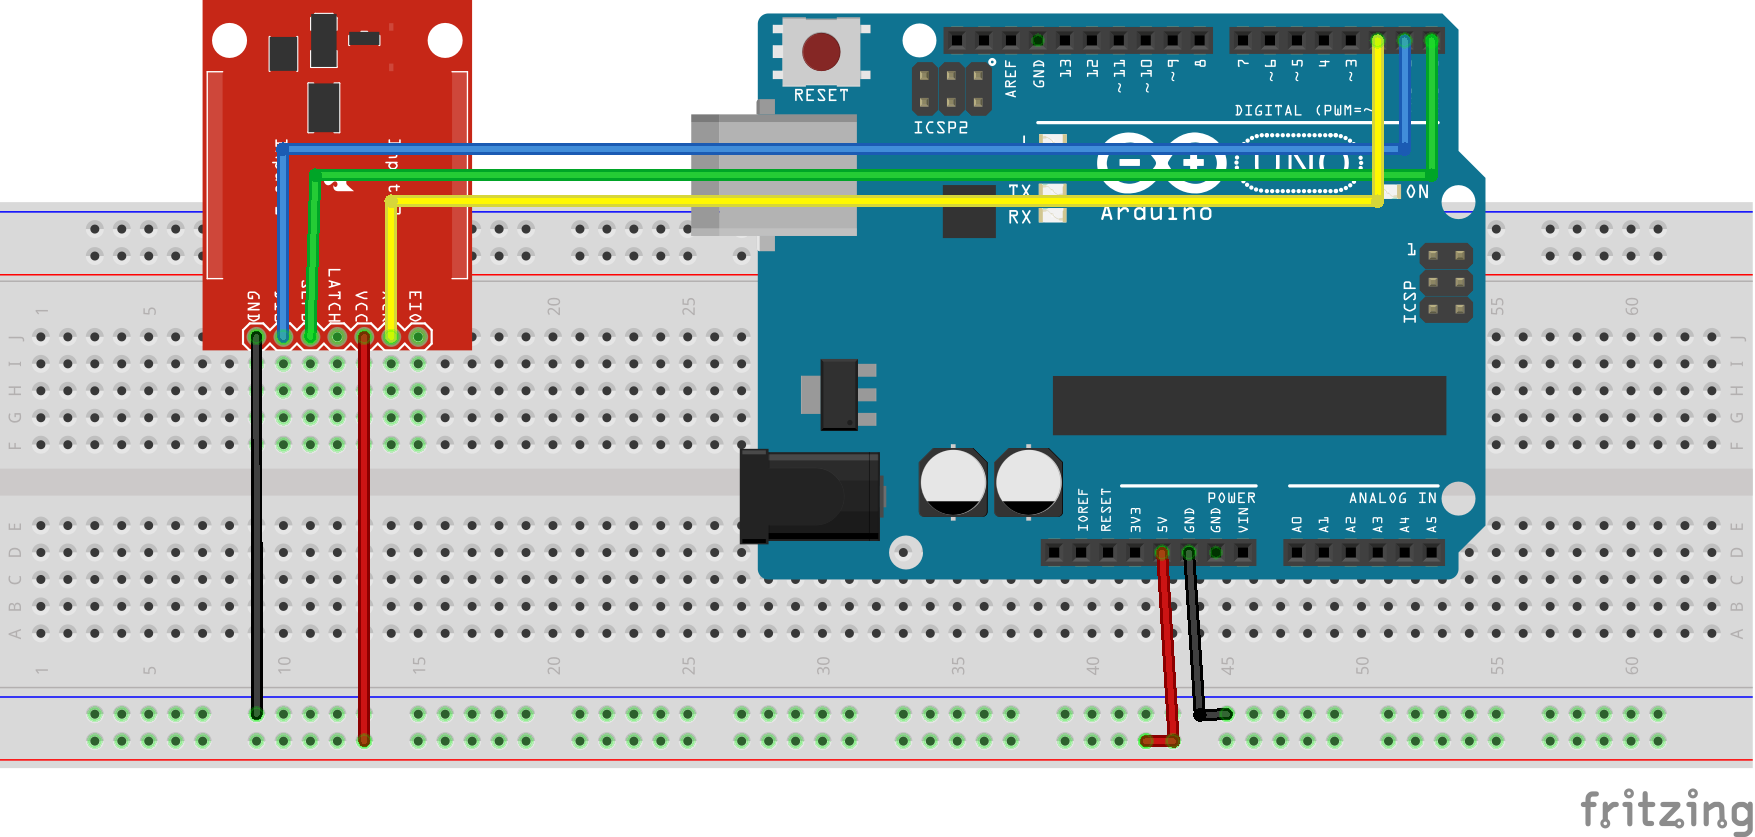
To make the connections easier to follow, the pin connection between the Arduino and the e-paper display is further described below.
Display – Arduino
VCC - 5v
GND - GND
DIN - RX(D0)
DOUT - TX(D1)
Wake - D2
Code
Just like the schematics, the code for this project is equally easy. For this project, we will use the e-paper display library provided by Waveshare. The library can be downloaded from the download section towards the end of this post. To demonstrate the abilities of the e-paper display, we will use the demo code provided along with the library. The demo code provides commands needed to display images and text on the e-paper display. Due to the low refresh rate of this particular e-paper display, it cannot be used to display animations, but this may be possible with other e-paper displays which have better refresh rates.
To briefly explain the demo code, as usual, we start by including the libraries that will be used in the code, in this case, the epd.h library to enable easy communication with the e-paper display.
#include <epd.h>
Next is the base_draw function which contains the functions to draw a different kind of shapes from lines to the rectangle,
void base_draw(void)
{
  int i, j;

  /*
  draw pixel
  */
  epd_clear();
  for (j = 0; j < 600; j += 50)
  {
    for (i = 0; i < 800; i += 50)
    {
      epd_draw_pixel(i, j);
      epd_draw_pixel(i, j + 1);
      epd_draw_pixel(i + 1, j);
      epd_draw_pixel(i + 1, j + 1);
    }
  }
  epd_udpate();
  delay(3000);

  /*
  draw line
  */
  epd_clear();
  for (i = 0; i < 800; i += 100)
  {
    epd_draw_line(0, 0, i, 599);
    epd_draw_line(799, 0, i, 599);
  }
  epd_udpate();
  delay(3000);

  /*
  fill rect
  */
  epd_clear();
  epd_set_color(BLACK, WHITE);
  epd_fill_rect(10, 10, 100, 100);

  epd_set_color(DARK_GRAY, WHITE);
  epd_fill_rect(110, 10, 200, 100);

  epd_set_color(GRAY, WHITE);
  epd_fill_rect(210, 10, 300, 100);

  epd_udpate();
  delay(3000);

  /*
  draw circle
  */
  epd_set_color(BLACK, WHITE);
  epd_clear();
  for (i = 0; i < 300; i += 40)
  {
    epd_draw_circle(399, 299, i);
  }
  epd_udpate();
  delay(3000);

  /*
  fill circle
  */
  epd_clear();
  for (j = 0; j < 6; j++)
  {
    for (i = 0; i < 8; i++)
    {
      epd_fill_circle(50 + i * 100, 50 + j * 100, 50);
    }
  }
  epd_udpate();
  delay(3000);

  /*
  draw triangle
  */
  epd_clear();
  for (i = 1; i < 5; i++)
  {
    epd_draw_triangle(399, 249 - i * 50, 349 - i * 50, 349 + i * 50, 449 + i * 50, 349 + i * 50);
  }
  epd_udpate();
  delay(3000);
}
The next function is the draw text function. Like the base_draw() function, this function has all that is needed to display different text formats.
void draw_text_demo(void)
{
  char buff[] = {'G', 'B', 'K', '3', '2', ':', ' ', 0xc4, 0xe3, 0xba, 0xc3, 0xca, 0xc0, 0xbd, 0xe7, 0};
  epd_set_color(BLACK, WHITE);
  epd_clear();
  epd_set_ch_font(GBK32);
  epd_set_en_font(ASCII32);
  epd_disp_string(buff, 0, 50);
  epd_disp_string("ASCII32: Hello, World!", 0, 300);

  epd_set_ch_font(GBK48);
  epd_set_en_font(ASCII48);
  buff[3] = '4';
  buff[4] = '8';
  epd_disp_string(buff, 0, 100);
  epd_disp_string("ASCII48: Hello, World!", 0, 350);

  epd_set_ch_font(GBK64);
  epd_set_en_font(ASCII64);
  buff[3] = '6';
  buff[4] = '4';
  epd_disp_string(buff, 0, 160);
  epd_disp_string("ASCII64: Hello, World!", 0, 450);


  epd_udpate();
  delay(3000);
}
The next function is the draw_bitmap function. Just like most of the other displays we have worked with on this website, to display an image on the e-paper display, the image has to be in a bitmap format. The draw_bitmap function contains the commands to be used for displaying images on the e-paper display.
void draw_bitmap_demo(void)
{
  epd_clear();
  epd_disp_bitmap("PIC4.BMP", 0, 0);
  epd_udpate();
  delay(5000);

  epd_clear();
  epd_disp_bitmap("PIC2.BMP", 0, 100);
  epd_disp_bitmap("PIC3.BMP", 400, 100);
  epd_udpate();
  delay(5000);

  epd_clear();
  epd_disp_bitmap("PIC7.BMP", 0, 0);
  epd_udpate();
}
Next, is the setup function. We start the function by declaring the led connected to pin 13 on the Arduino. This led is used as a user initialize LED to confirm communication between the Arduino and the display. With this done, we then initialize the display, activate the wakeup… and set the memory which we want the display to use. The display can either use the onboard NAND memory or an SD card.
void setup(void)
{
  /*
  user led init
  */
  pinMode(led, OUTPUT);
  digitalWrite(led, LOW);

  epd_init();
  epd_wakeup();
  epd_set_memory(MEM_NAND);
}
The tasks being performed by the void loop function are simple. All it does is to call the functions that were created above one after the other.
void loop(void)
{
  char flag = 0;

  base_draw();

  /*
  Draw text demo
  */
  draw_text_demo();

  /*
  Draw bitmap
  */
  draw_bitmap_demo();

  epd_enter_stopmode();
  while (1)
  {
    if(flag)
    {
      flag = 0;
      digitalWrite(led, LOW);
    }
    else
    {
      flag = 1;
      digitalWrite(led, HIGH);
    }
    delay(500);
  }
}
The complete code can be downloaded alongside the library from the download section of this tutorial.
Demo
Before uploading the code for this project, disconnect the Din and Dout pins of the display from pins D0 and D1 of the Arduino. This is to allow a smooth upload of the code as those particular pins will also be used by the Arduino to communicate with the computer. Connect the pins back after uploading the code to the Arduino, and wait a few secomds. You should see the display come up with different images and text.

That’s it for this tutorial guys, what cool thing will you build with this display, feel free to share ideas under the comment section below.
The youtube version of this tutorial can be watched here.
Can this code be used for 2.7 inch waveshare display?
I’m getting an error called “edp_update was not declared in the scope”