Control Your IR Devices With Your Smartphone Bluetooth
Managing some of house devices with its IR remotes may be annoying if you are out of its line of sight. You will have to interrupt the work you are doing, move to another room, turn down the volume of your Hi-Fi for example, then go back and resume your work.
Managing some of house devices with its IR remotes may be annoying if you are out of its line of sight. You will have to interrupt the work you are doing, move to another room, turn down the volume of your Hi-Fi for example, then go back and resume your work. Assume you can use bluetooth instead of this process, it will be a time saver and it will maintain your focus.
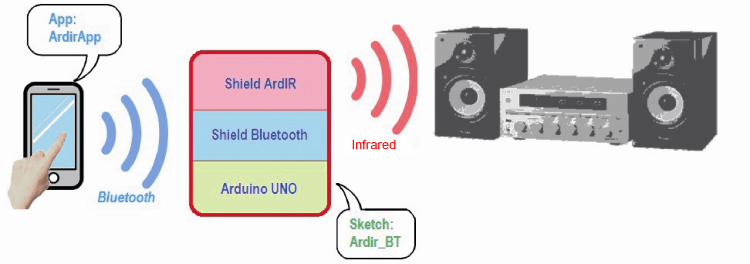
Using an Arduino UNO with IR and Bluetooth shields, you can create your own bluetooth-controlled general purpose remote control. Bluetooth is a good choice because it doesn’t need any active network to connect with a mobile device. Connection between them is direct (point-to-point) and is suitable for small areas. However, by using a wireless shield you will be able to control the devices through the internet.
A project by Open Electronics demonstrates how to build and program such a device. Its hardware side consists of an Arduino with two shields, and the software side is an Android application. The tutorial shows in details how each shield will work, and also how to setup and prepare the mobile application.
Parts needed for the project:
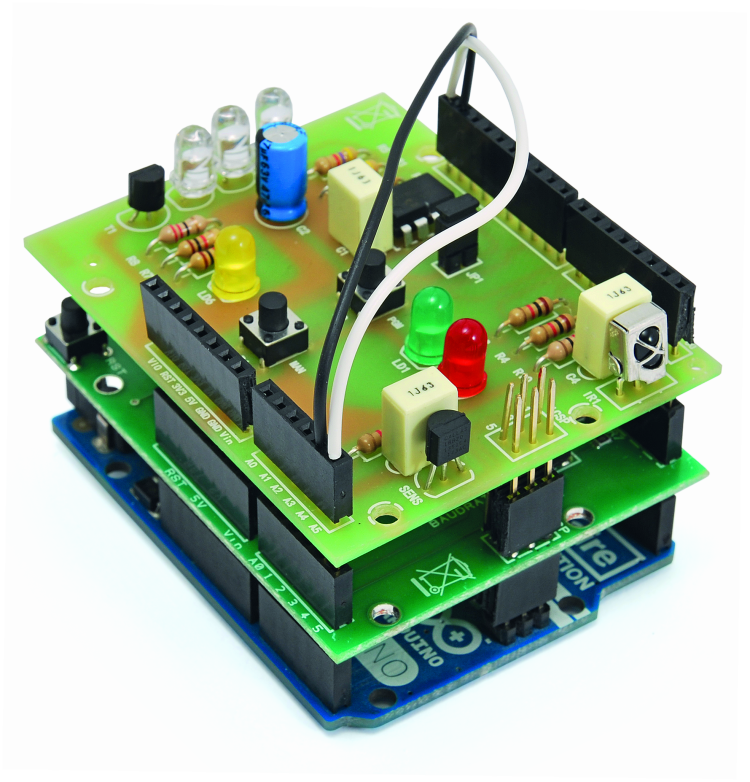
- An Arduino Uno board or equivalent (e.g. Fishino Uno);
- An ArdIR shield:An Arduino shield that allows creating a programmable infrared universal remote manageable from the Internet. It simulates the remote control of TVs, home appliances and air conditioners, by transmitting the same data to the desired.
- A Bluetooth shield:
A shield for Arduino based on the RN-42 module. It also has a dip switch that allows you to set up the modes of operation of the module RN-42. - A smartphone or tablet with Android OS (version 4.1 or higher), of course complete with a Bluetooth interface.
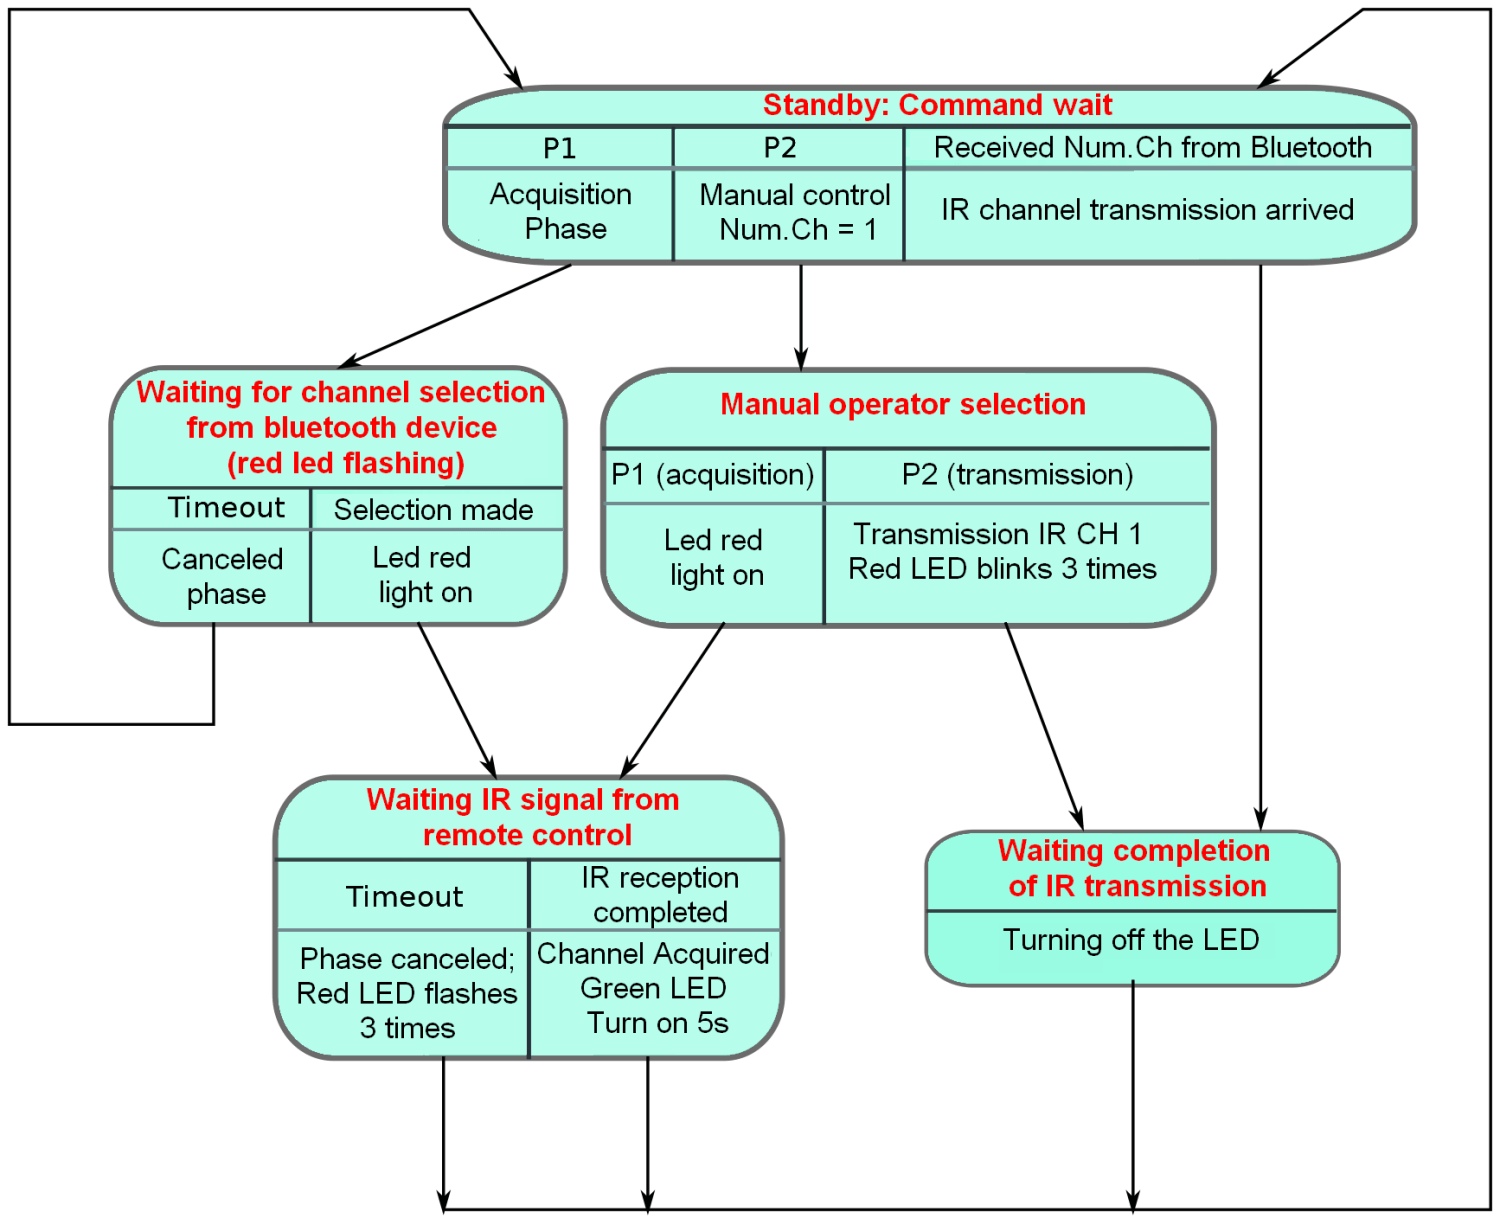
The mobile application is compatible with Android OS devices of version 4.1 (jellybean) and higher. It needs two phases to be handled:
- Research and connection to the target Bluetooth device.
- Selection and activating one of the channels, for transmitting the code to the shield.
Once the connection with the Bluetooth shield is established and the channel is selected, the program will be ready to handle a subsequent command by the user and will be listening to possible result messages returned by the remote Bluetooth device.
There is no need for additional hardware parts and work, you only have to assemble both shields on the Arduino board. But before that, you have to upload a sketch to Arduino for handling the ArdIR shield and managing the communication with the Bluetooth shield.
For more information about how the project works, the structure of the application and source files, you can read the original guide.


