Ruideng DPS5020 – 50V 20A Power Supply Module Review
The DPS5020 is a constant voltage/current programmable control power supply module, that integrates analog and digital control in one device. Th e module is a 0-50V/0-20A Lab PSU module that comes in 2 parts, the main controller and a front panel.
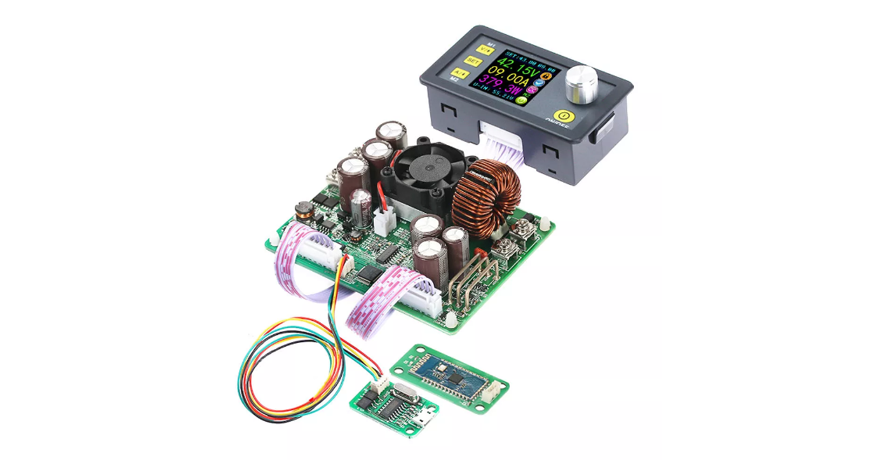
The DPS5020 is a constant voltage/current programmable control power supply module, that integrates analog and digital control in one device. Th e module is a 0-50V/0-20A Lab PSU module that comes in 2 parts, the main controller and a front panel. The main board has connections for input/output voltage as well as connection headers for Bluetooth and USB to Serial converter.
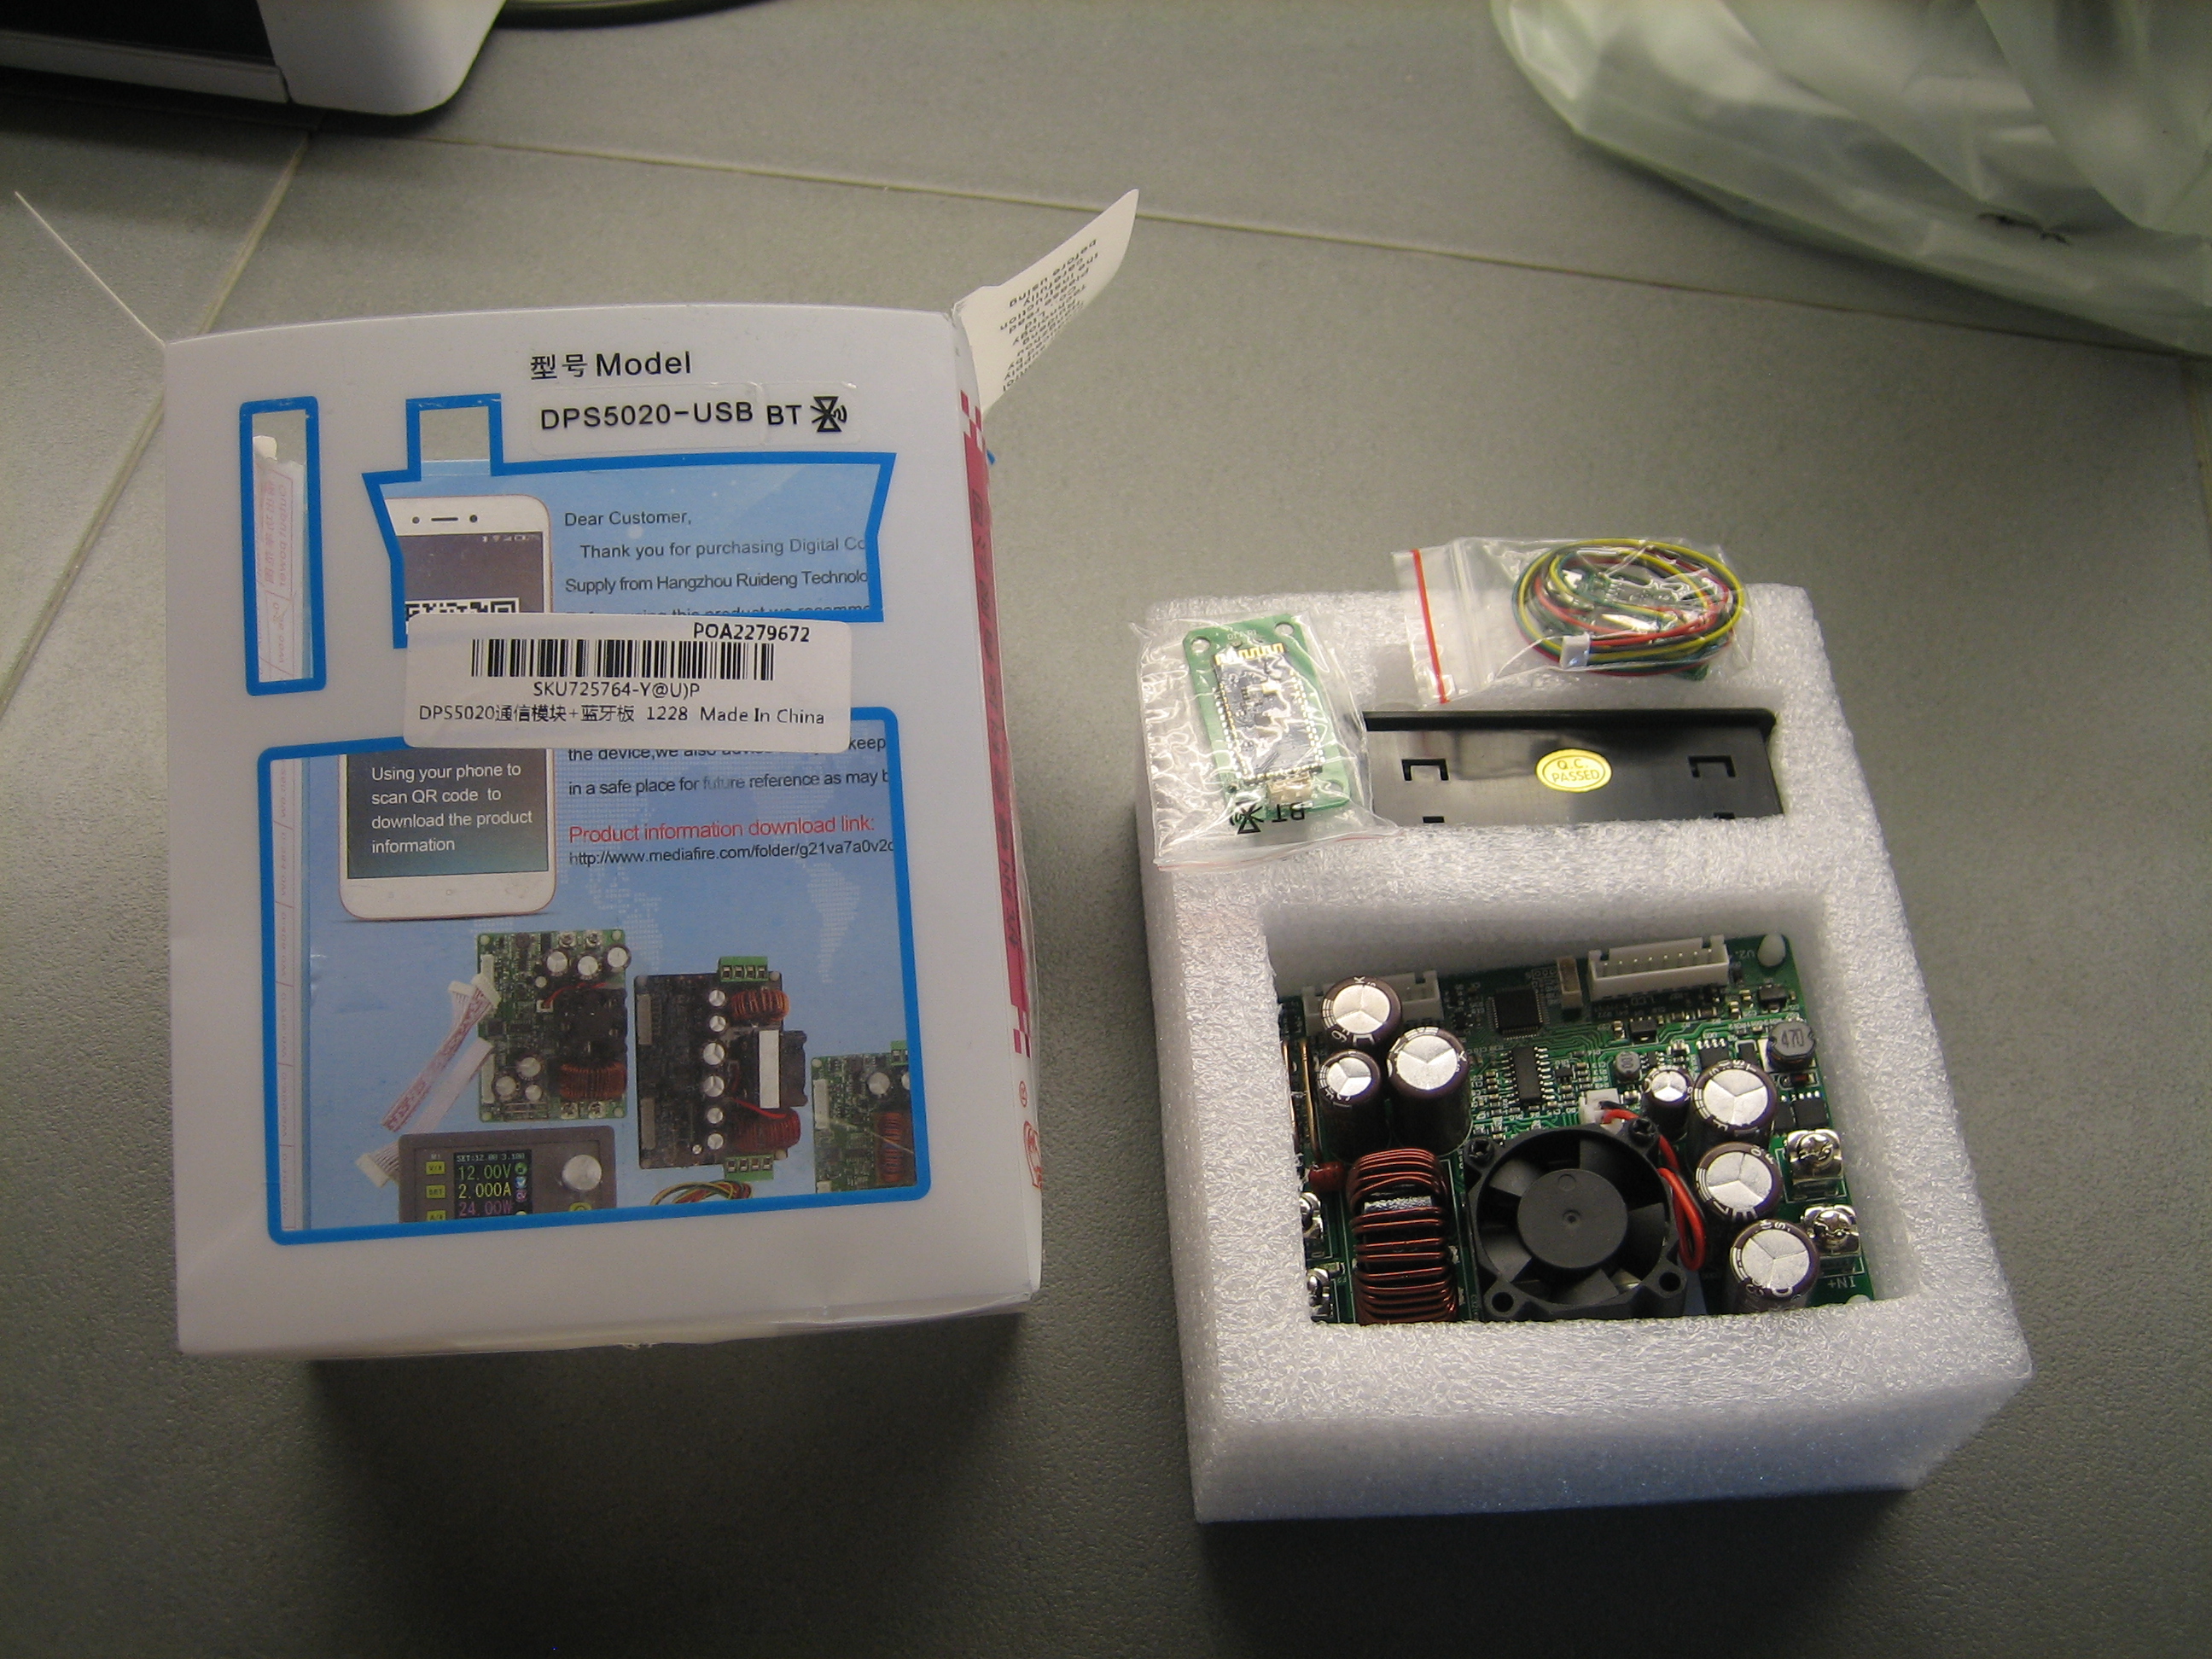
The front panel module has buttons and a control knob to set the desired voltage/current and an OLED display to show actual readings and set points. The DPS5020 can store up to 10 preset group values which are preserved during power off. You can also quickly set two stored group values. In comparison with traditional analog power supplies, it is more convenient to quickly set the voltage or current required. Using the provided instructions, assembling and switching on the device is straight forward. Along with the package, you will receive a small user manual, cables, and the two main modules.
USB and Bluetooth Connection
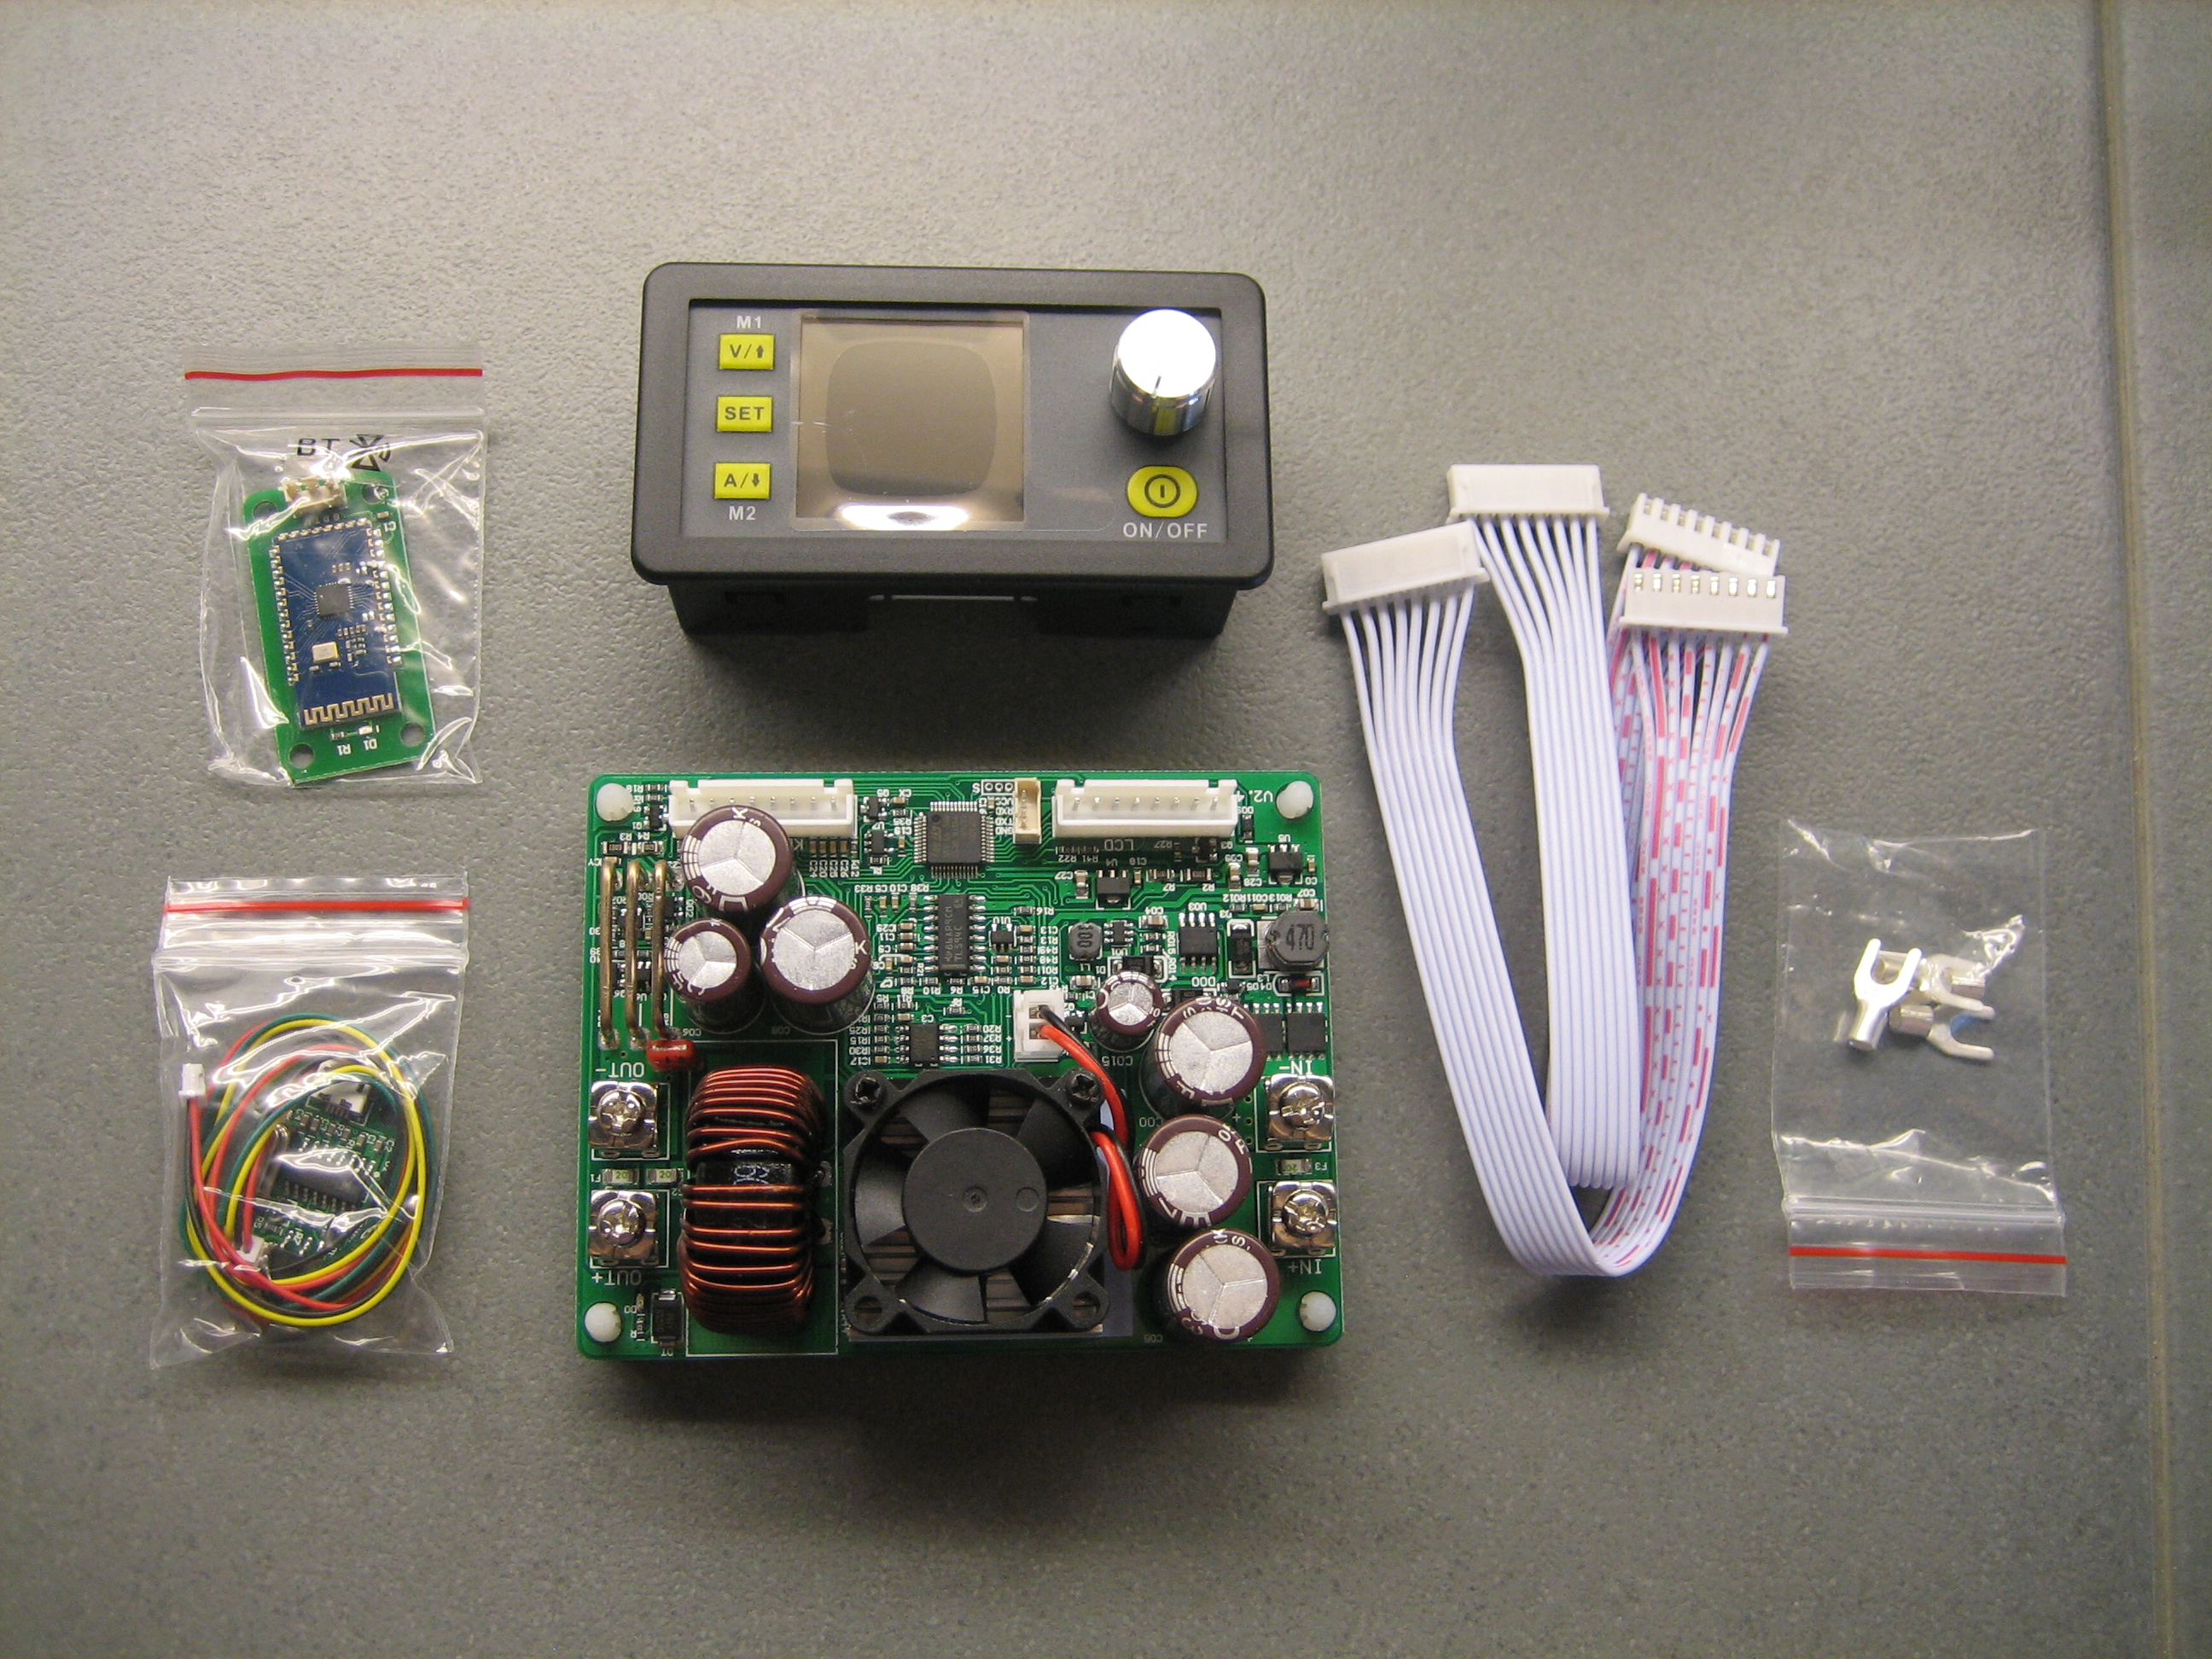
In the box, there’s is also a FTDI – i.e. UART to USB converter and a Bluetooth module (with pass: 1234, which just looks like a wireless UART COM port). You can use the available software to make a serial connection (wired or wireless) to the module, by downloading the PC software accordingly. Once the software is loaded, and the serial connector is connected to the board and PC, you are able to control the board from the onscreen menus. When the maximum current is set to 1A, voltage is set to 5V and connect a 2-ohm load, the voltage immediately drops to ensure no more than 1A flows through the load. This is the current limiting feature.
When the current limit is removed, the same load draws 2.4A and that’s a total of 12w of power, which follows Ohms Law. In this case the output voltage stays rock solid at 5v and the supply itself remains cold enough. To test another scenario, you can set the output to 20mA, attach a small LED to the output – and turn the unit on.
User Interface
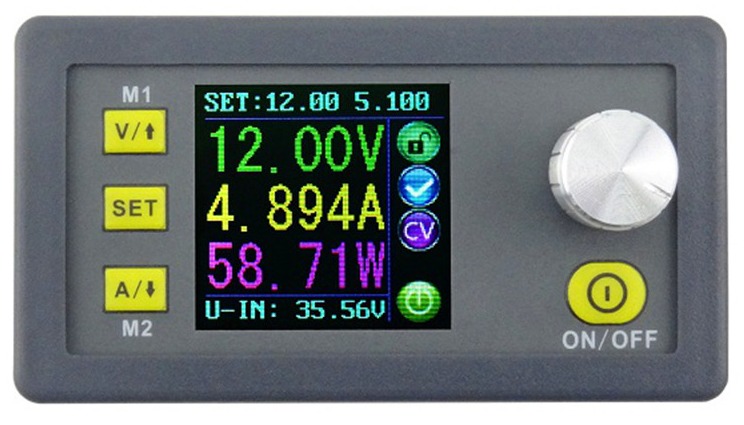
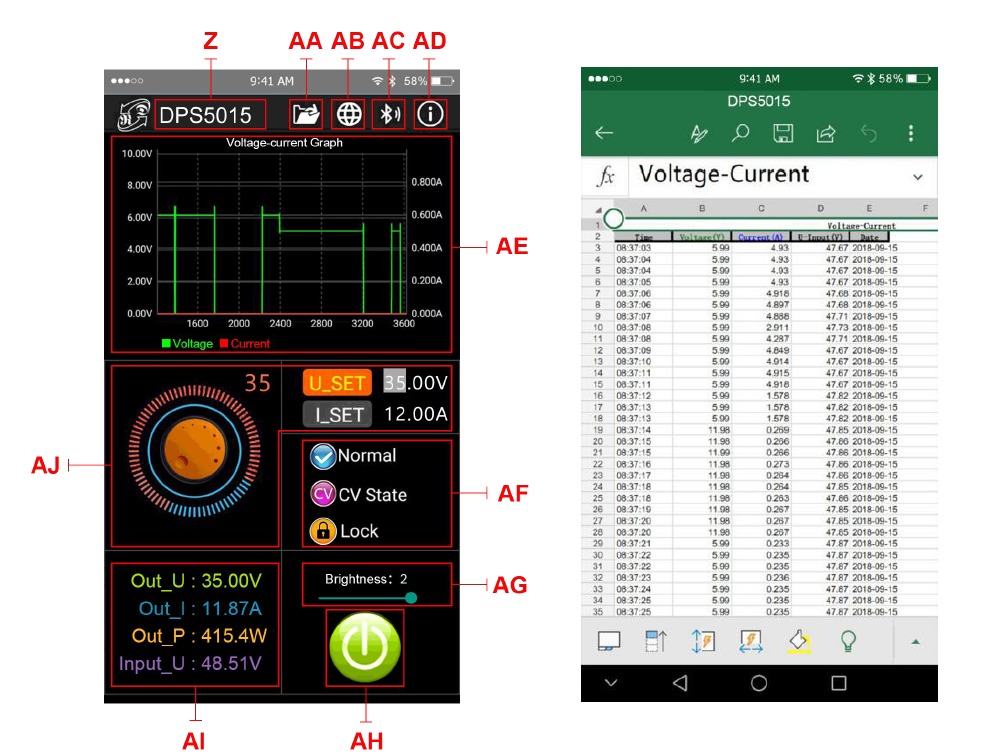
The photo above shows the HMI in use. The Green/Yellow/Purple text in the middle indicates actual output. On the bottom (cyan), you see voltage in, on top (cyan) you see Voltage and Current setting. You can notice that Voltage reading shows actual output voltage, not the set point. It is possible you will actually see a +/- 0.01 offset in this reading, which is normal. Operation of the module is straight forward. Just press V and turn the knob to set Voltage, Press A and turn the knob to set Current limit. When you are done, press Set and you see the confirmation screen. After that, by pressing ON/OFF button, output is enabled.
This is interesting because it is not just about turning the knob to change voltage – you have to press V button first. This is a nice feature because it is nice to know that your PSU output won’t change by accident. You can also adjust the voltage both on-line and off-line this way. The second feature is the ability to adjust setting before you enable the output. The knob is a standard rotary encoder that features a push switch, which is used to change the digit you adjust. After some minutes of use you will be able to familiarize with the interface.
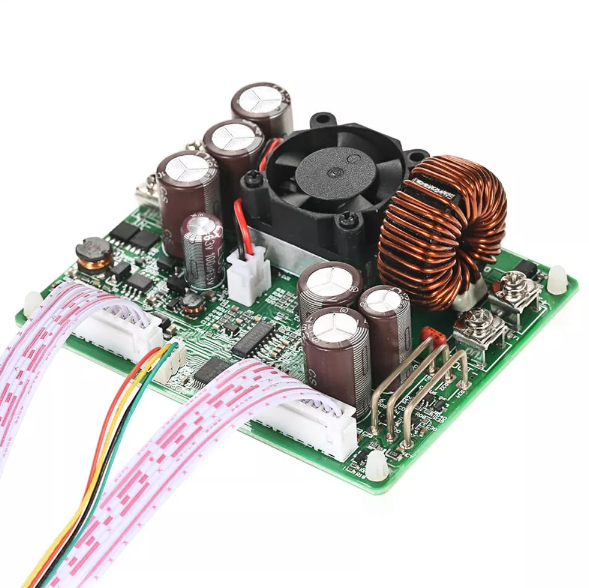
The image above shows the PSU module. Input is on the left and output on the right. At the front, you see an LQFP48 holding an STM32F100C8. The USB is a familiar CH340G IC operating on a UART. You can also see the small 4 pin connector next to the MCU. Using that connector you can remotely connect to the module using USB, Bluetooth or simply hacking the UART.
Software
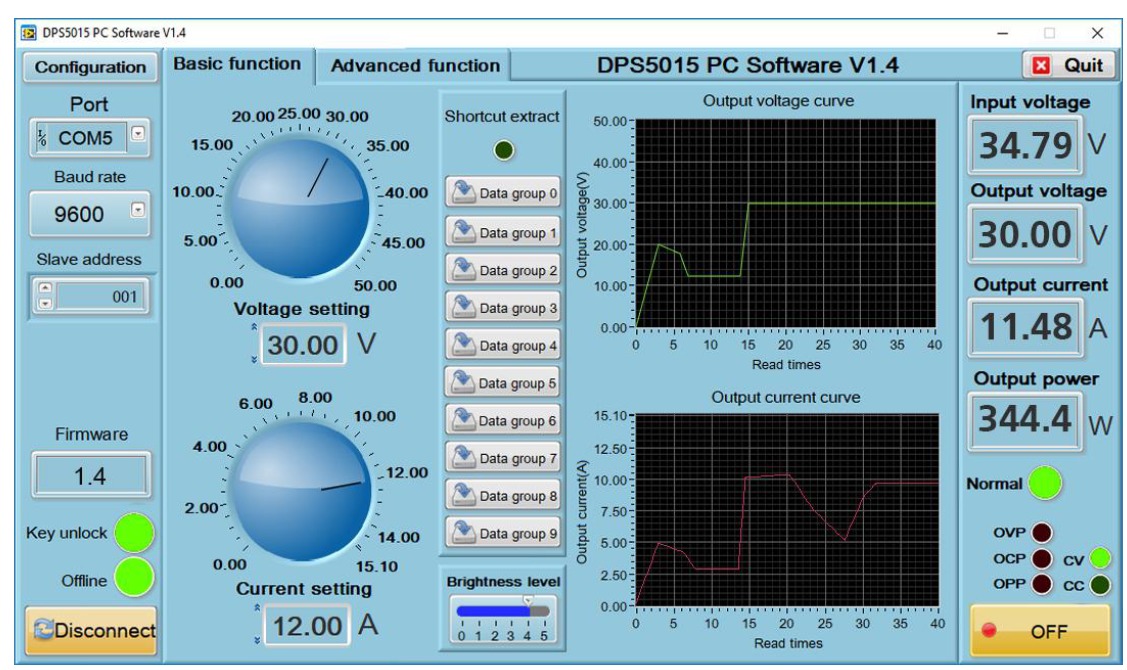
The image above shows the top-side HMI that can be used to operate the module from a PC. You can hack the UART and connect a Graph display on the PSU + adding Ethernet/Wifi capabilities etc. For $45 with shipping included, it’s not a bad deal. The module has many advantages, with advanced functions, good visual interface, high precision, being used independently, being insert into your own box and been widely applied.

Testing
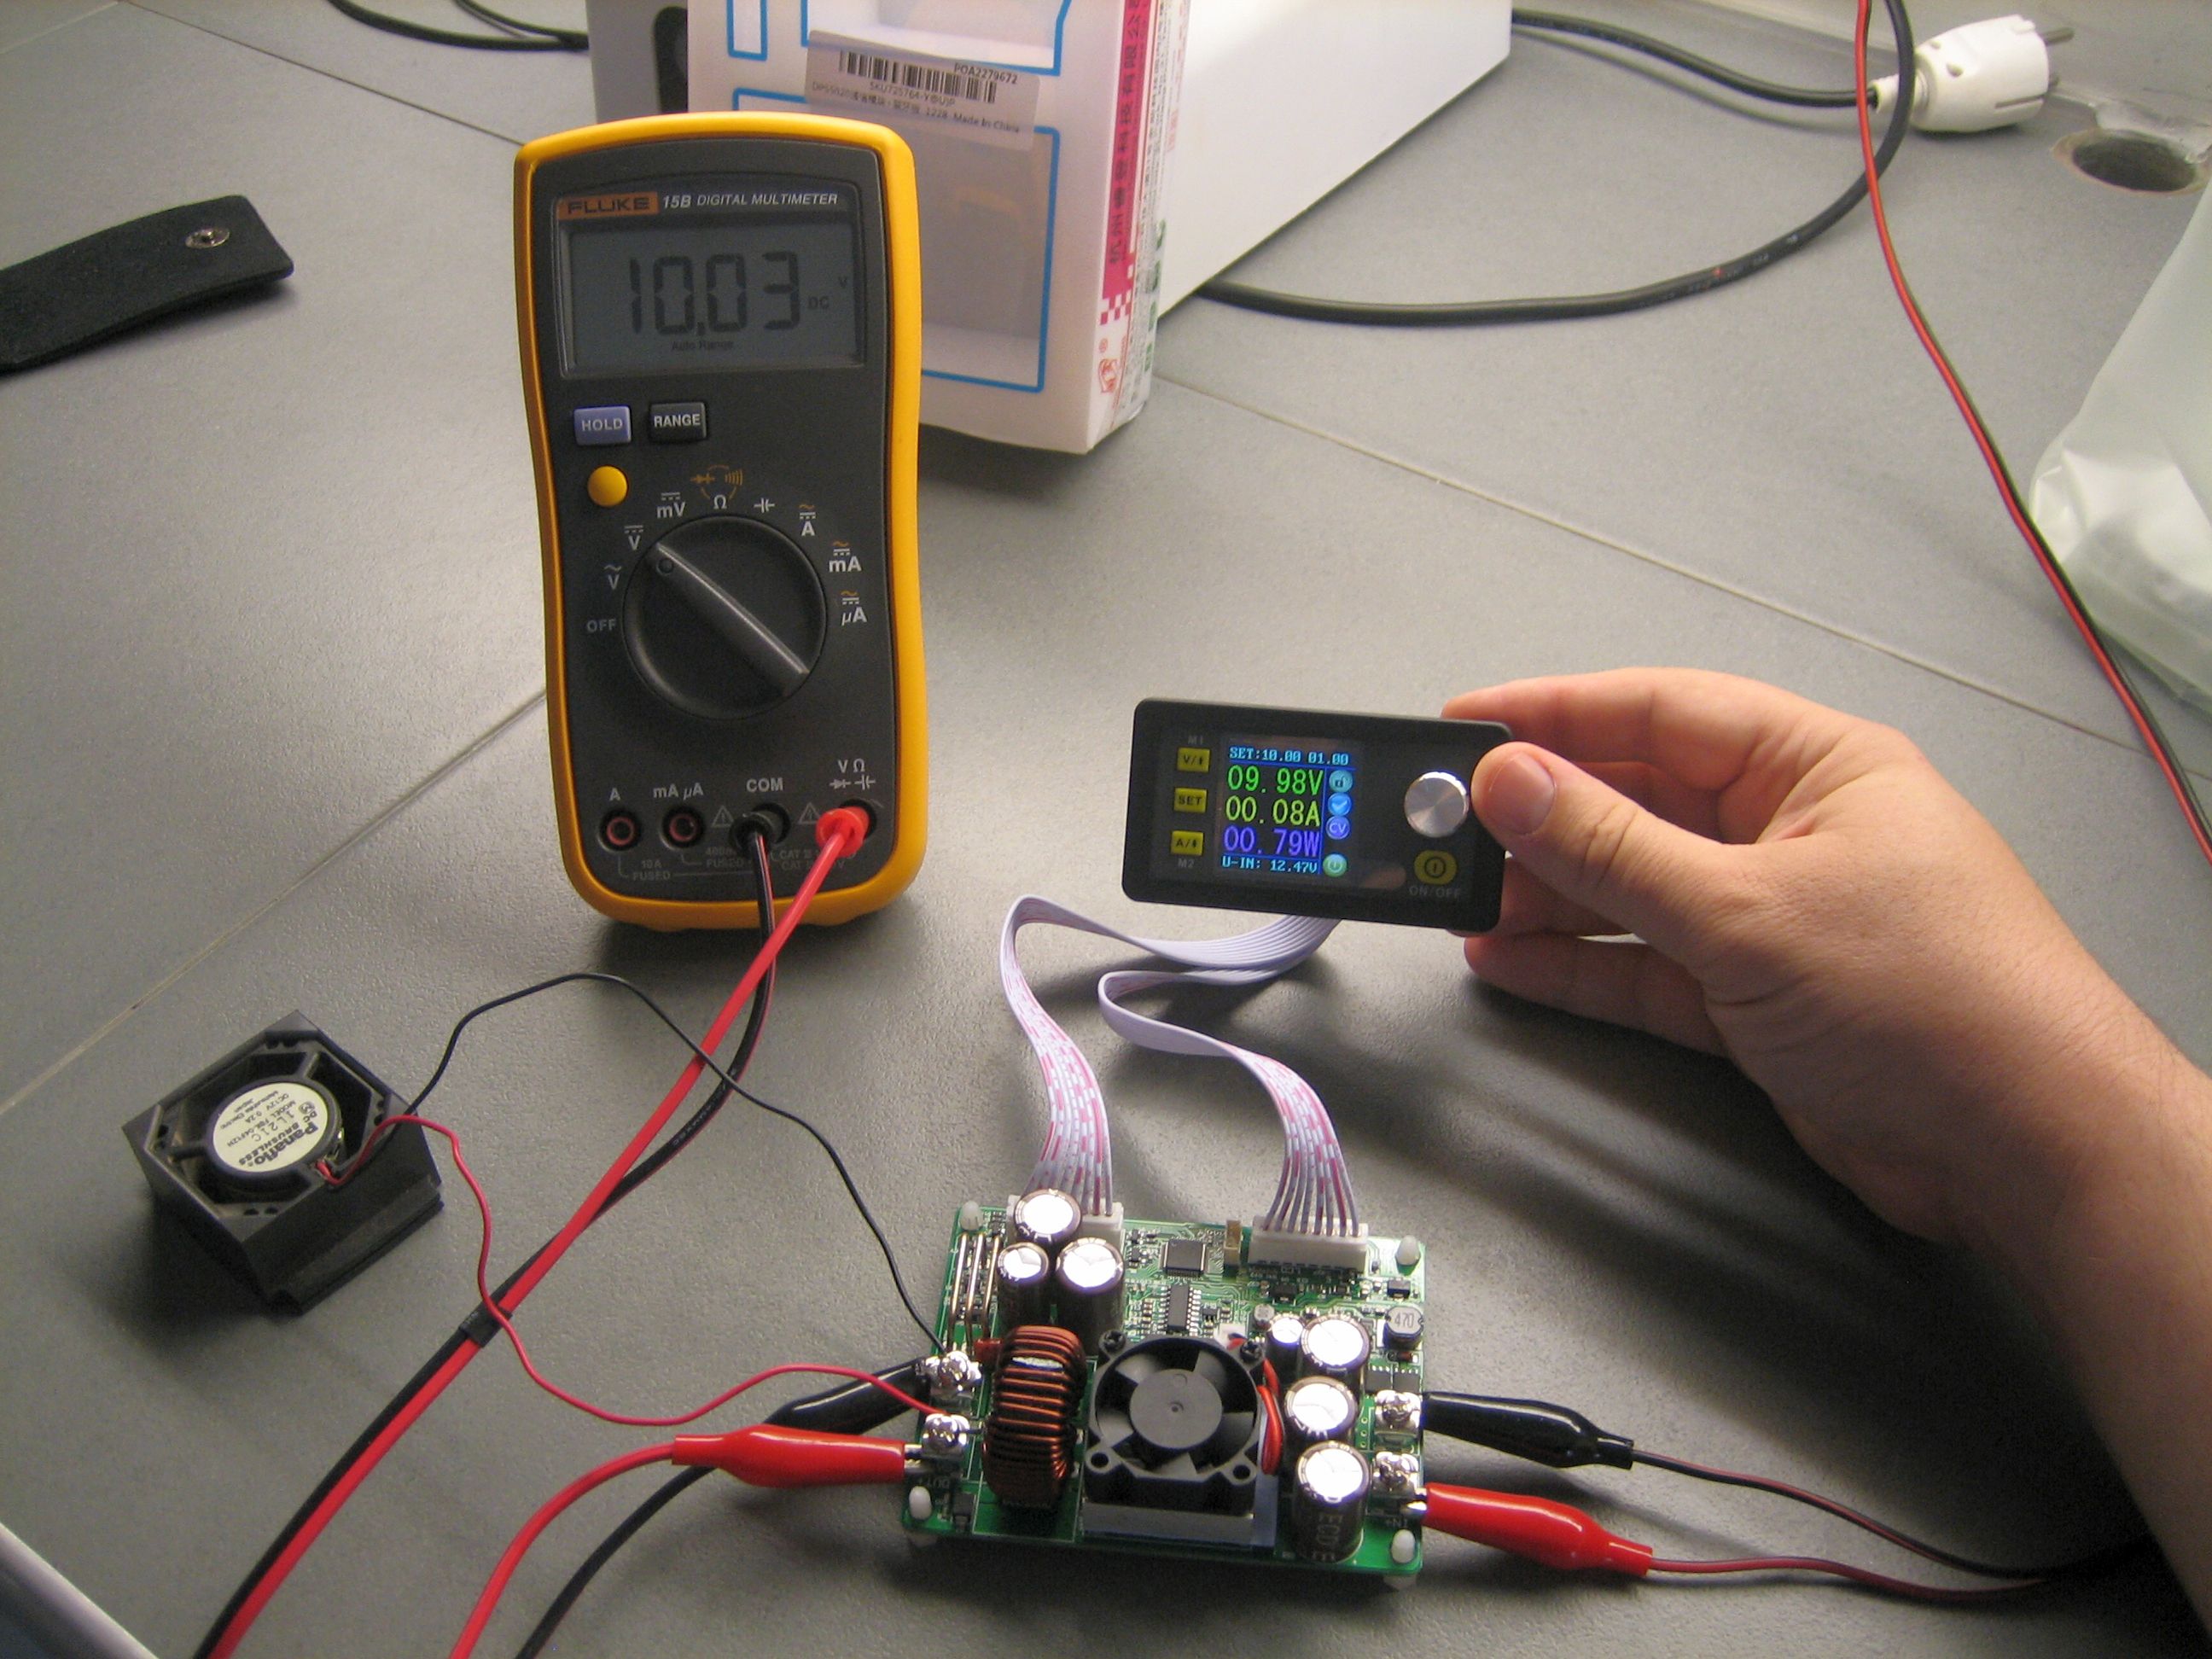
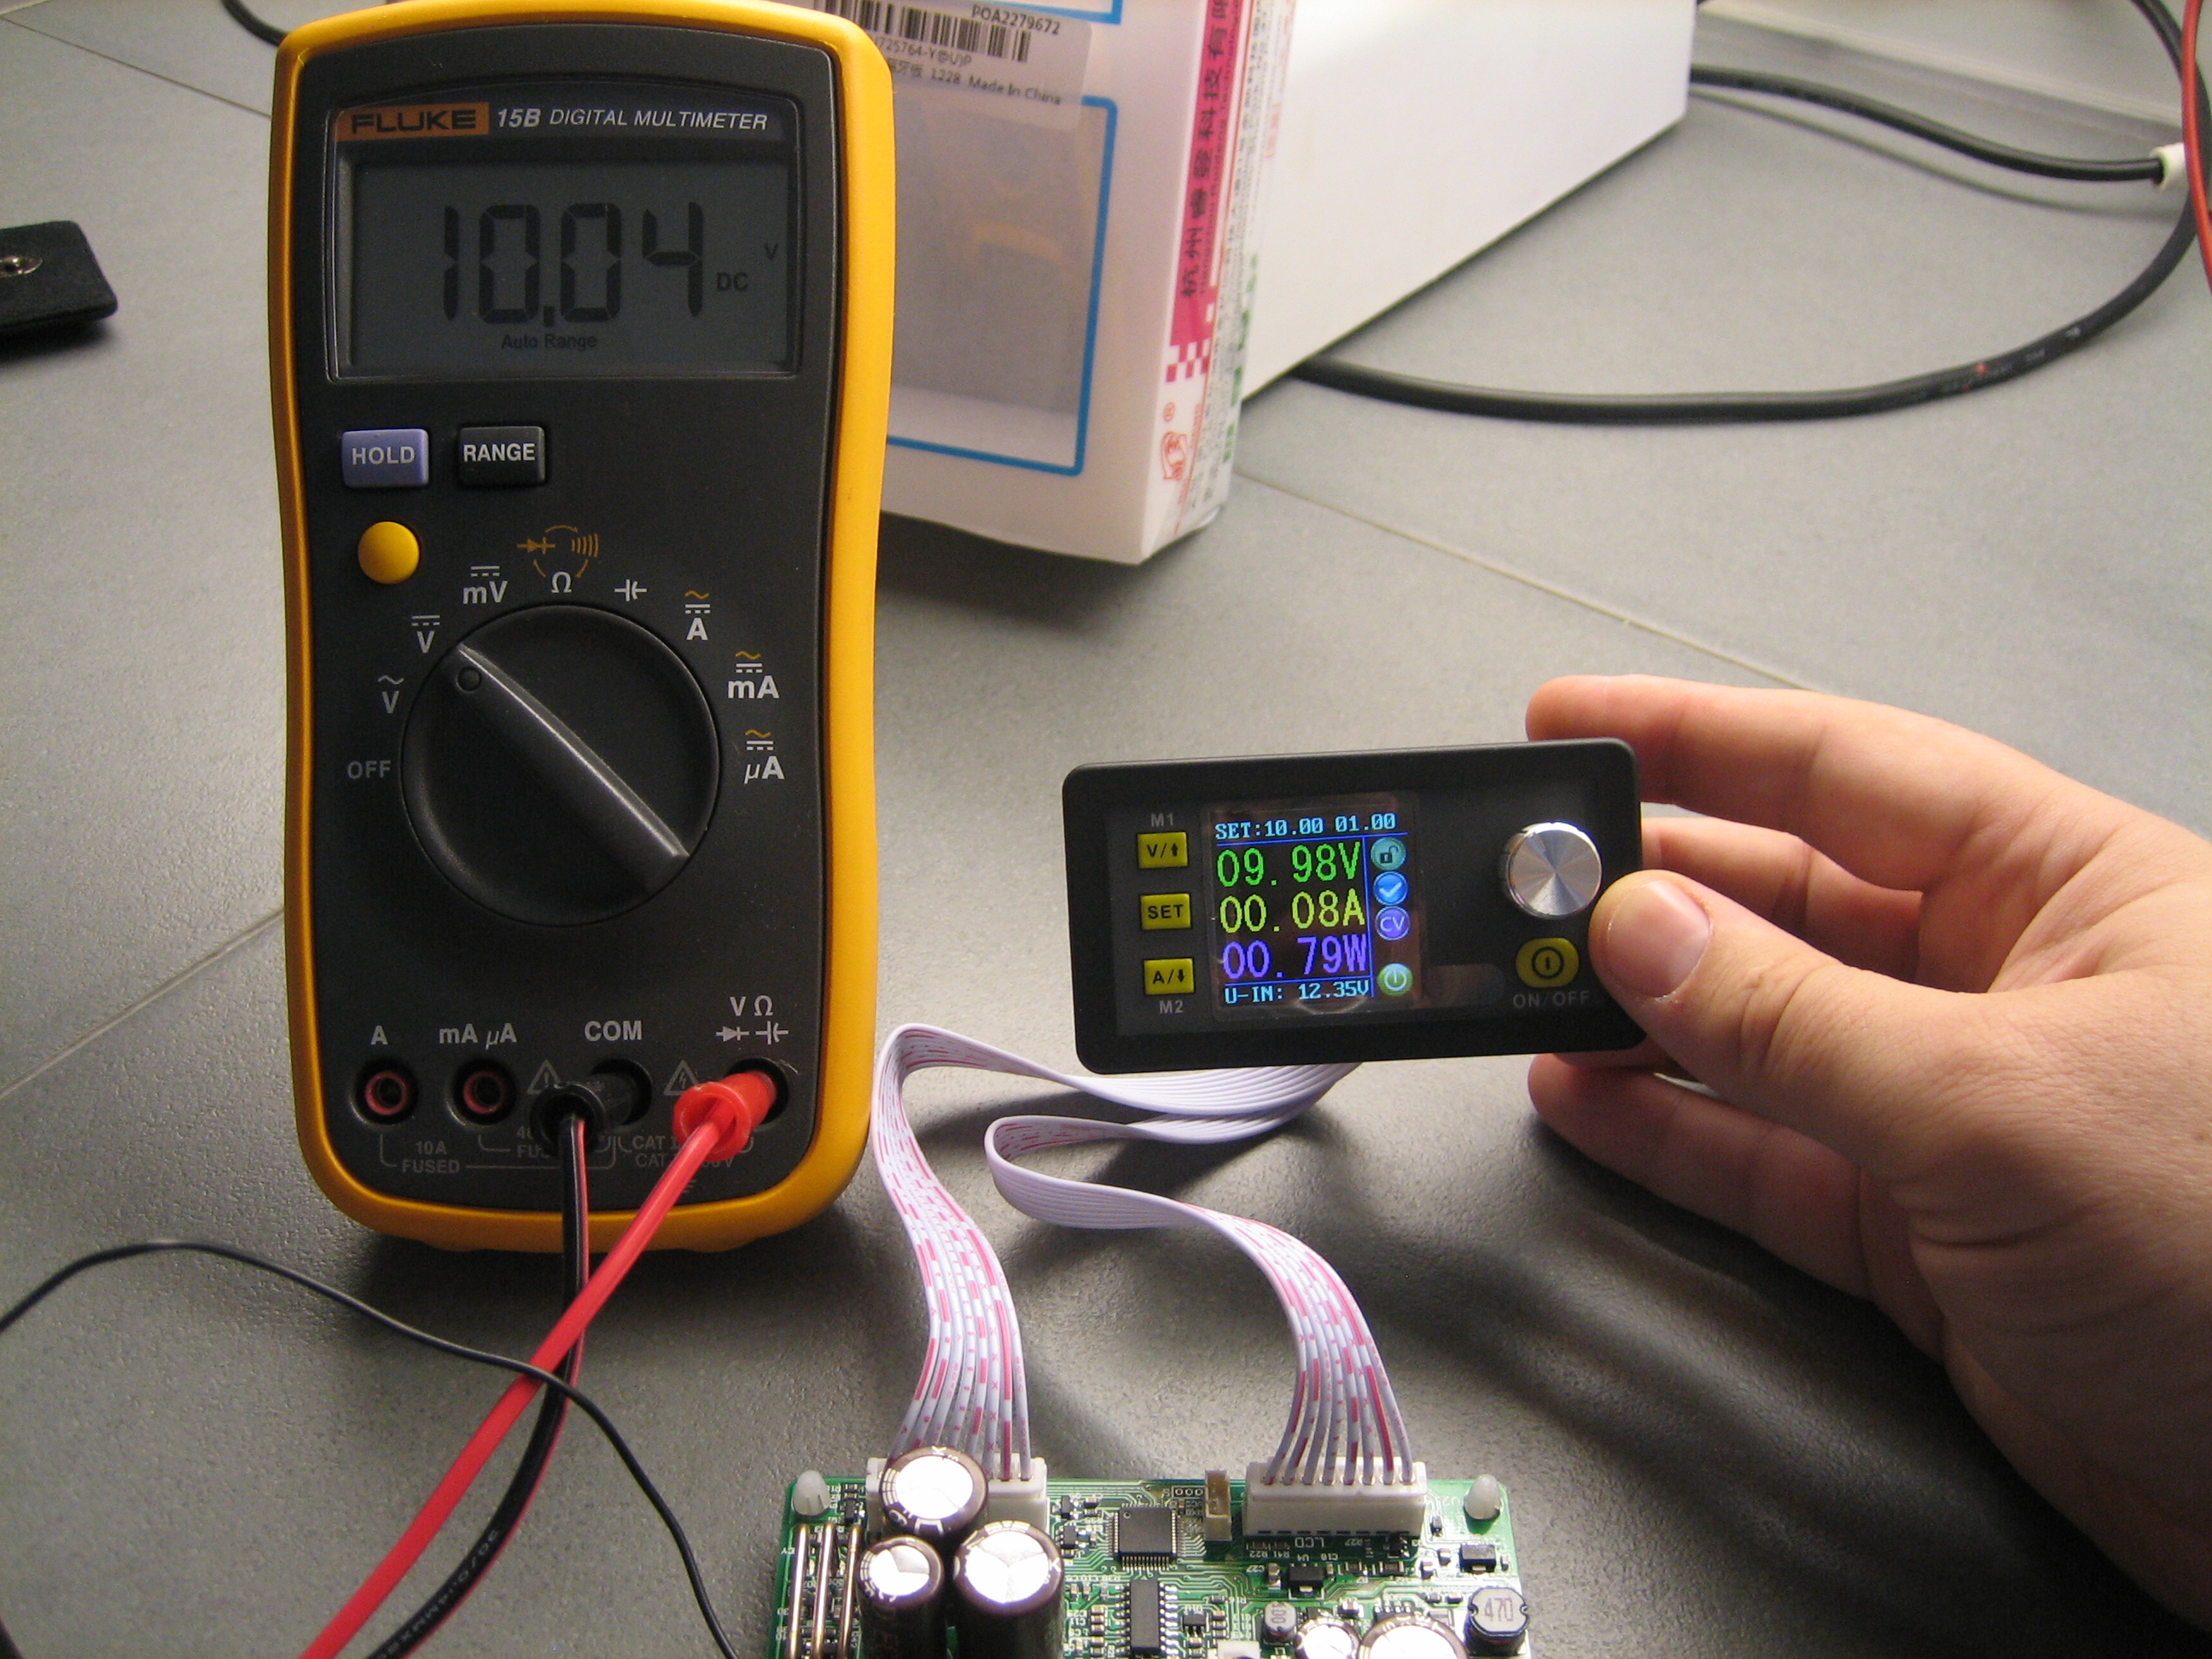
We tested the module by connecting 12Vdc input and a small DC fan on the output. We set the voltage to 10Vdc and current limit to 1A. As you can see output voltage is off by only a few mV for this low power load.
Video
Specifications
- Input voltage range: 6.00-60.00V Output voltage range: 0V-50.00V
- Output current: 0-20.00A Output power range: 0-1000W
- Product Weight: about 222g Display module size: 79*43*41(mm) (L*W*H)
- Open size: 71mm*39mm Power module size: 93*71*41(mm) (L*W*H)
- Length of connecting line: 200mm Fixed hole center distance: 86mm, 64mm
- Output voltage resolution: 0.01V Output current resolution: 0.01A
- Output Voltage Accuracy: ± (0.5% + 1 digit) Output Current accuracy: ± (0.5% + 2 digits)
Notes
- You must make sure that the input voltage is 1.1 times higher than the output voltage. Under large current circumstances, pay attention to heat dissipation.
- The connection between the display module and the power module should be according to the corresponding instructions. Otherwise, it will not work.
- Input voltage range is DC 6-60V and 60v is the limit voltage; please leave a room to use, or else it will be burnt. The input must be DC Votlage input, not AC 220V, or else it will be burnt too.
Ruideng, also designs a range of power supplies and one of its smaller ones is particularly interesting. If the 5020 unit sounds a little over the top, there is also a little stand-alone version that fits all components in the front panel unit and this one comes from Banggood as well. This unit has a maximum of 20V @ 3 Amps. It is called DPS3003. It is very handy and needs just 20v DC input. No serial or Bluetooth is available, but it is also cheaper as it does not have a separate control board (it is all in the front panel) and would fit in a much smaller box.
You can buy the DPS5020 module from the attached (Banggood) link for 54.99 USD.


What type of psu do you recommend to power this? Thanks
You can use any 6-60V power supply with output current more than the desired current and below the max limit. A suitable one would be: https://www.banggood.com/AC110VAC220V-To-DC-48V-20A-1000W-Switch-Power-Supply-Driver-Transformer-Adapter-p-1264650.html but this goes up to 48V.
what do you mean with hacking the uart? does that mean it holds the original rx and tx signals from the rs232?
Hi, in the article you mentioned hacking the uart? I assume this means changing the color schema for the GUI. If so can you point me in the right direction as to how this might be accomplished?
I got one of these several years ago. I was using it to charge a 50 amp hour LFP battery I built. It was set up for constant voltage constant current and seemed to charge the battery. Then when it reached full charge and the controller shut off, the fan of the buck unit kept running seemingly powered by the battery.
Then I needed to check out some laser diodes and I set it up at 5.7 volts, the forward voltage of the diode and 4.5 amps which is what the driver would usually be set at. However, the buck controller would not deliver more than 1.22 amps! I have no idea what went wrong with it. It is unusable. (I have an adequate power supply for it. I tried several with the same result.)