How to Get Started With The Raspberry Pi
The Raspberry Pi is a low cost, credit-card sized computer that plugs into a computer monitor or TV and uses a standard keyboard and mouse. It is a capable device that enables people of all ages to explore computing and learn how to program in languages like Scratch and Python.
The Raspberry Pi is a low cost, credit-card sized computer that plugs into a computer monitor or TV and uses a standard keyboard and mouse. It is a capable device that enables people of all ages to explore computing and learn how to program in languages like Scratch and Python. It’s also capable of doing most things you’d expect a desktop computer to do, from browsing the internet and playing high-definition video, to making spreadsheets, word-documents as well as playing games. In this how-to, you will learn how to get the Raspberry Pi up and running!
What You Can Do With A Raspberry Pi
The raspberry pi can be used to build many projects from DIY applications to real-life applications. Some of the applications of the raspberry pi are seen below:
- A weather station
- A Photo Booth
- A Home Surveillance System
- Arcade Stick
- A portable, digital eBook library
- A wearable camera
- A wireless hotspot
- A retro gaming console
- A computer system
- And so much more…
What You Will Need
To get started as a beginner, you will need the following items:
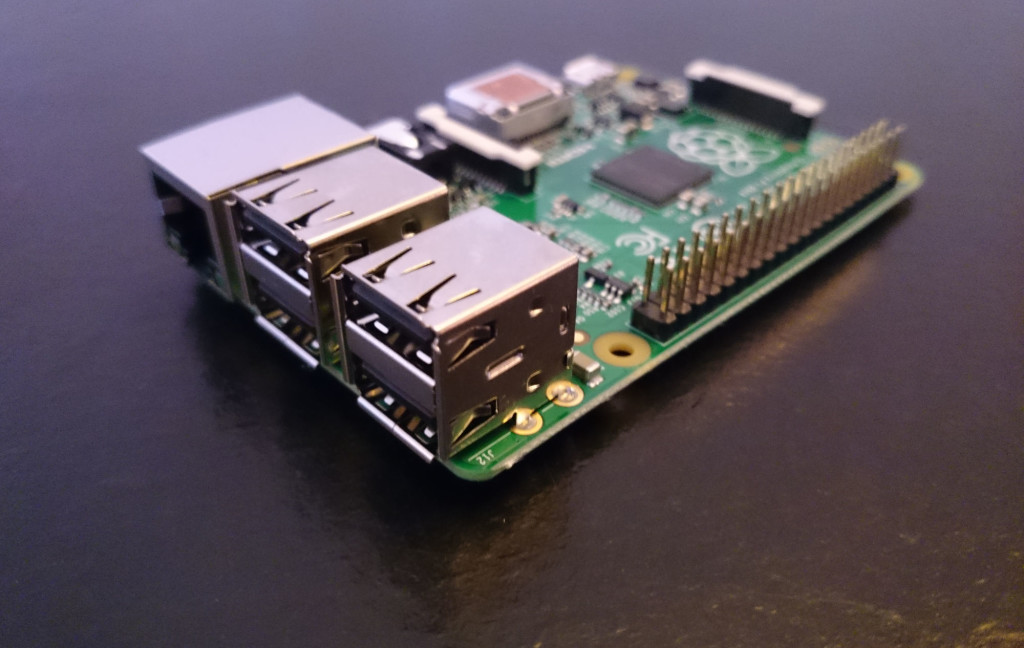
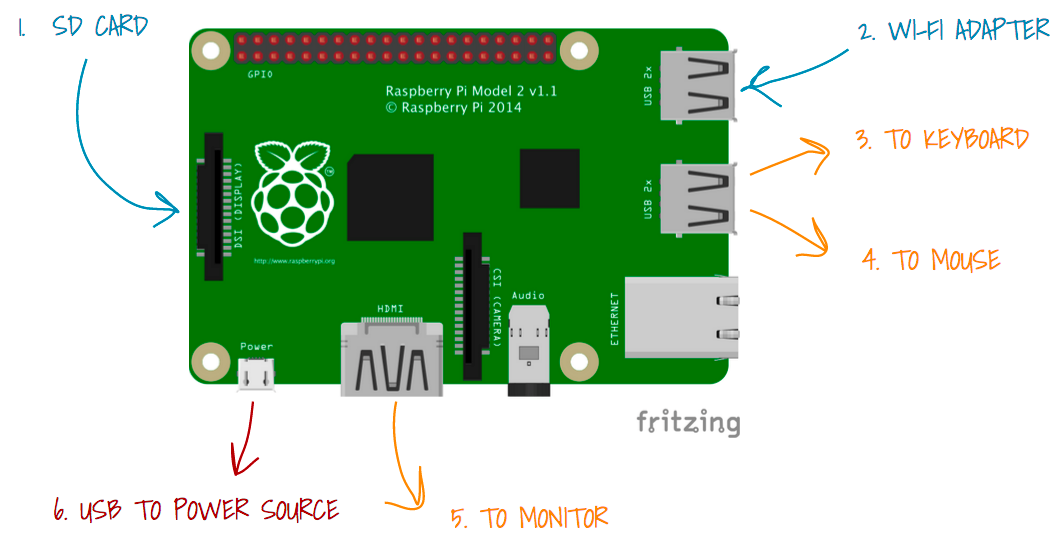
- Raspberry Pi 3 or Raspberry Pi 2 with a Wifi Dongle
- HDMI monitor
- USB keyboard
- USB mouse
- USB power supply
- Micro SD 8GB
- Micro SD card reader
- Raspbian OS
- Etcher
Setting It Up
Choosing An Operating System
One of the first things we need to do is to install an OS. When purchased, the Raspberry Pi doesn’t come with an OS, so the end user is responsible to sort this out and one primary reason for this is because it doesn’t contain an onboard storage as seen in conventional computers. The OS and user files will be stored on a microSD card that is inserted under the board.
Several OS works on the Raspberry Pi, but some are more tailored for some particular purpose. For example, the OSMC (Open Source Media Center) is an operating system that turns your Pi into a full-featured media center, so if your interest is in media, then OSMC might be your best bet. But in this guide, we will go for the most commonly used OS – Raspbian. To download this operating system, visit the Raspberry Pi download page or get the direct ZIP file.
Get The SD-Card Ready
Get a minimum 8GB class 10 or class 4 (class 10 recommended) SD card with a card reader. Insert that card into the card reader and plug that into the USB port of your PC. If you have an SD Card adapter port, you can use that instead of the USB card reader option.
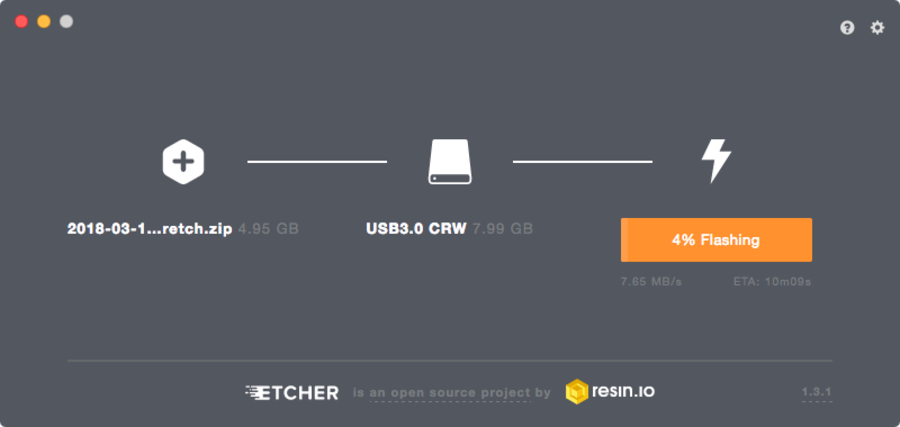
Etcher OS Transfer
Once the file has been downloaded and the sd-card is ready, you will need to extract the .img file and get Etcher. Etcher is a tool that allows you to flash OS images to SD cards & USB drives, safely and easily.
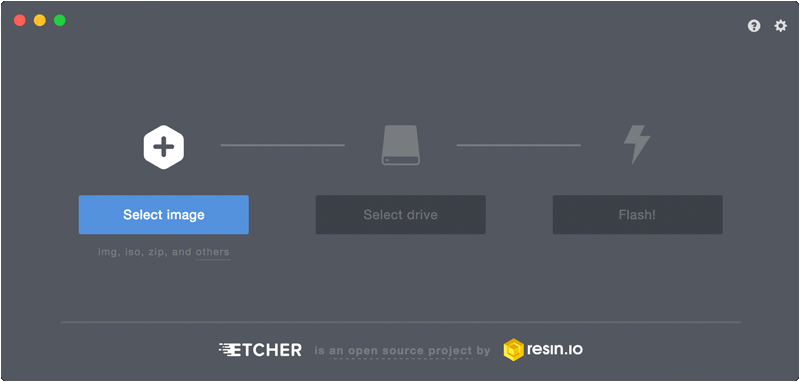
Another alternative to Etcher is using Win32DiskImager. Go to etcher.io and download the exact version for your computer. After opening Etcher, select the Raspbian disk image, your SD card, and click Flash. After Etcher finishes running, you’re good to go!
Once the image has been written to the micro SD card, you need to plug it into the Raspberry Pi. Plug in an HDMI monitor, keyboard, mouse, and a micro USB cable for power as well. Once powered, the Pi should boot off the SD card. One of the loveliest features of the Raspbian OS is that there is no need for installation!
A Quick Look at the Pi OS
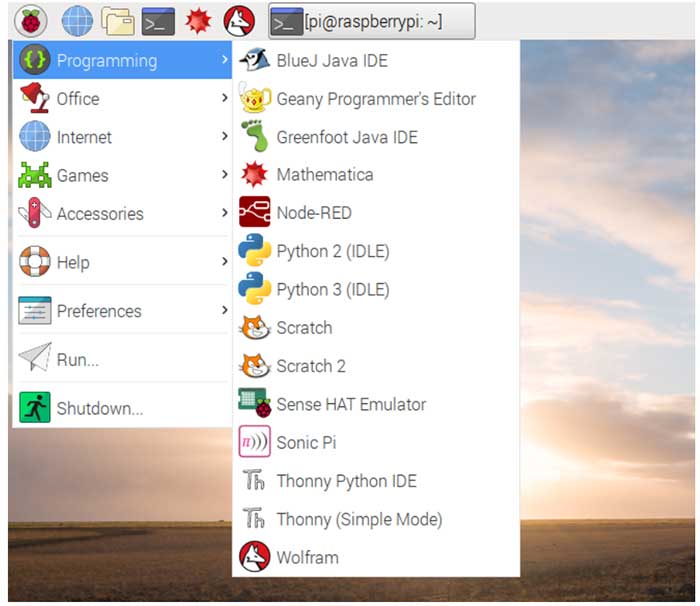
Once Raspbian has booted, you should be presented with the desktop, which includes a menu bar at the top. The first icon, the Raspberry, contains your main programs and system options, such as preferences, etc. While Raspbian includes office programs, such as LibreOffice and an internet browser, it also comes with many programming environments for Python, C, C++, and Java.
The next icon (a globe) is a web browser and can be used for accessing websites, etc.

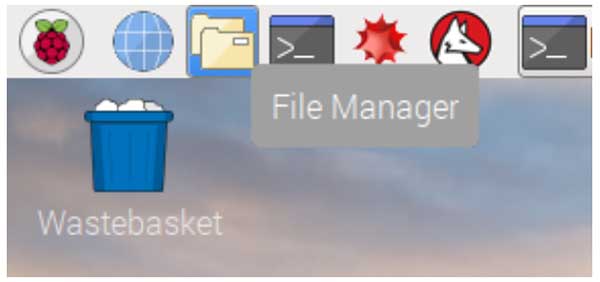
The third icon (the folder icon) brings up the File Manager, which is used to navigate the files on the SD card.
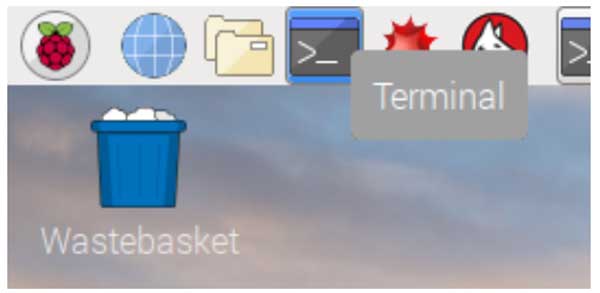
The last icon of interest is the Terminal prompt icon, which brings up a terminal window that is useful for command-related operations. The terminal window is one of the most important tools of the Linux-based Raspbian OS. You can execute several commands from it and do much more.
In Conclusion
So, at this point, we now have a working Raspberry Pi installed with one of the widely used operating systems that can be programmed to do just about anything you can imagine, like building a smart alert system, a notification system that checks if a particular email comes in and then activate a lighting system. You could create an intelligent IoT device that could control your home using your phone. The possibility is limitless.


