DIY UPDI USB Programmer is Low-Cost Alternative to Ready-Made Programmers
A UPDI USB programmer (Unified Program and Debug Interface) is basically an Atmel / Microchip proprietary programming interface used for some AVR microcontrollers like the ATtiny series. AVR is an 8-bit RISC architecture microcontroller that is developed by Atmel.

A UPDI USB programmer (Unified Program and Debug Interface) is basically an Atmel / Microchip proprietary programming interface used for some AVR microcontrollers like the ATtiny series. AVR is an 8-bit RISC architecture microcontroller that is developed by Atmel. With the newer generations of technology, Microchip started releasing a new series of ATtiny chips called the ATtiny 1-series, followed by a lower cost range called the ATtiny 0-series. As their name suggests they are mainly used for small applications. They can make use of the new Arduino core called megaTinyCore.
These AVR microcontrollers can be programmed in two ways either using a serial peripheral interface (SPI) or UPDI. The Serial Peripheral Interface is a full-duplex master-slave-based interfacing technique. In this technique, the programming is done by the rising or falling edge of the clock applied. One disadvantage of the SPI interface technique is that the speed of synchronization depends on the target clock. Additionally, it uses four pins for the interface.
On the other hand, the UPDI method of programming is the latest interface developed by Microchip. It is used for almost all the new AVR microcontrollers like tinyAVR, megaAVR, and AVR-Dx. The UPDI UBS Programmer is based on the PDI two-wire physical interface. It combines Debug-Wire and PDI and has a single one-wire interface. It provides a bidirectional half-duplex asynchronous communication with the microcontroller device to perform the programming and debugging of the device. It is a small and compact programmer and with the help of the USB, it can be directly plugged into a computer for easy and efficient communication.
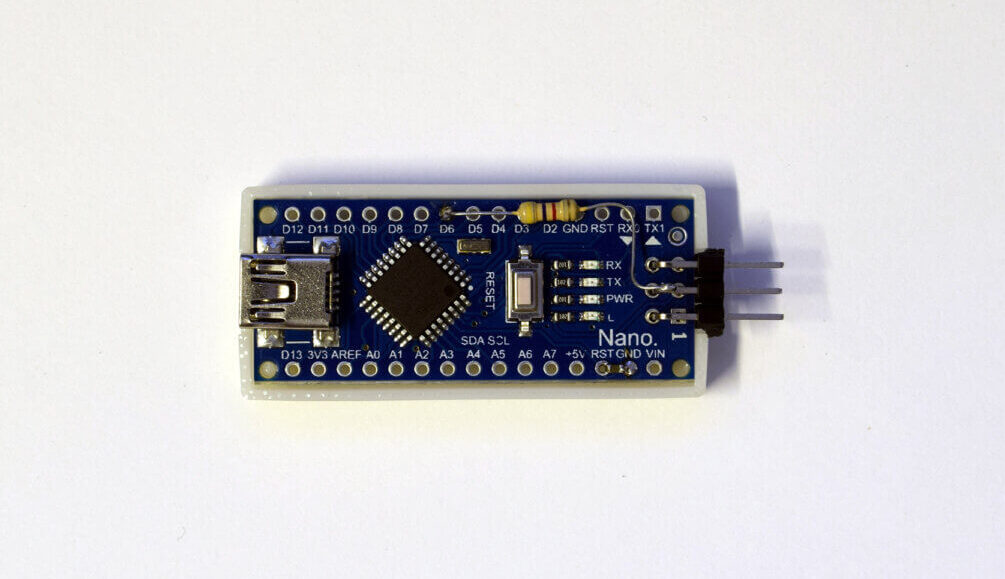
The original UPDI USB Programmer is sold at a high price hence some enthusiasts have made their own DIY UPDI programmer using cheaper hardware that is more commonly available. This DIY programmer can be made by modifying just a few hardware components and uploading the firmware on it. It uses the following components: An Arduino Nano board or any other compatible board, a resistor, a capacitor, and 6 pins angled header. These components can be directly soldered to the Arduino board making it manageable and enabling the programming of UPDI devices over a USB connection. The microcontroller board can then be used as-is or encompassed in a 3D printed enclosure to make it more robust. As for the software, a GitHub repository demonstrates how to make a UPDI USB programmer by installing the ElTangas’s jtag2updi firmware on an Arduino Uno, or any other ATmega328-based Arduino board.
Working with the UPDI USB Programmer
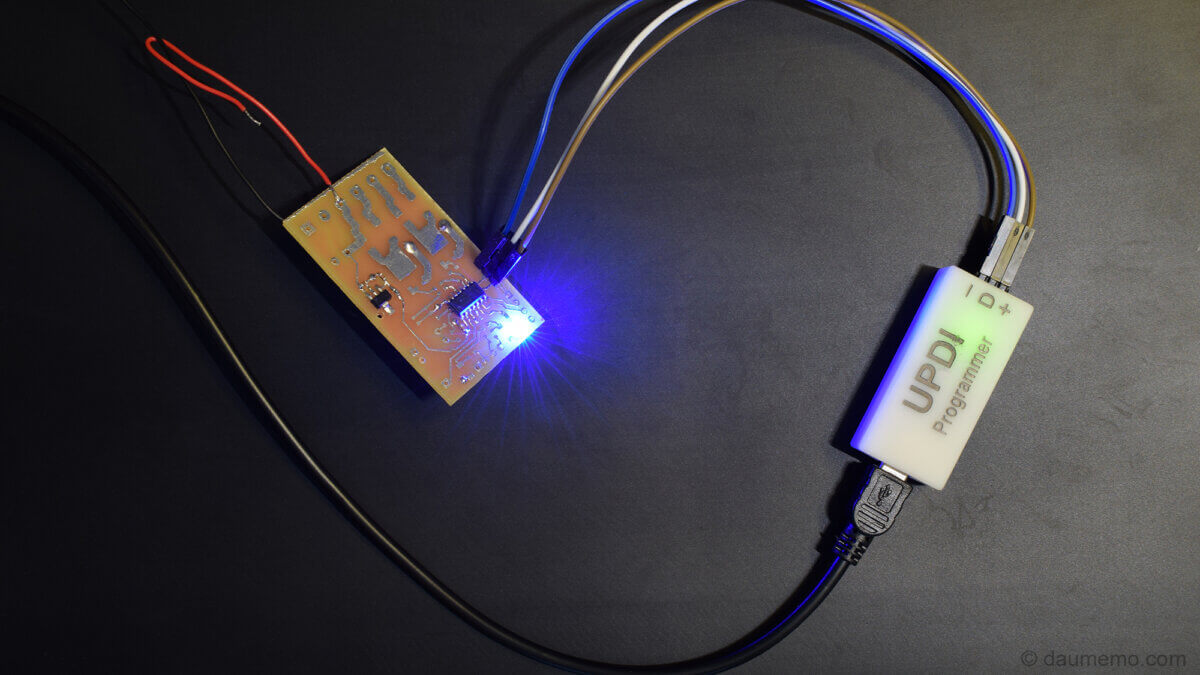
This DIY UPDI USB programmer successfully works in both Microchip Studio with AVRDUDE or PlatformIO and provides a much needed cheaper alternative that can be easily made by just following a few steps. You can watch the below youtube video for detailed steps with more information. You can also visit Daumemo’s blog for a detailed explanation.


