Translating “Dah” and “Dit” Speech Into Morse Code with an CWVox using Arduino
image: CWvox Prototype connected to the radio (Source: Kevin Loughin) These days, it seems like every speech-detection-related project is based on some kind of advanced algorithm, such as machine learning, pattern matching, or spectrum analysis. But Kevin Loughin (AKA KB9RLW), an amateur radio operator, built CWvox, a voice-activated keyer that uses the analog-to-digital converter (ADC) on an Arduino Nano to translate spoken dits and dahs into morse code.
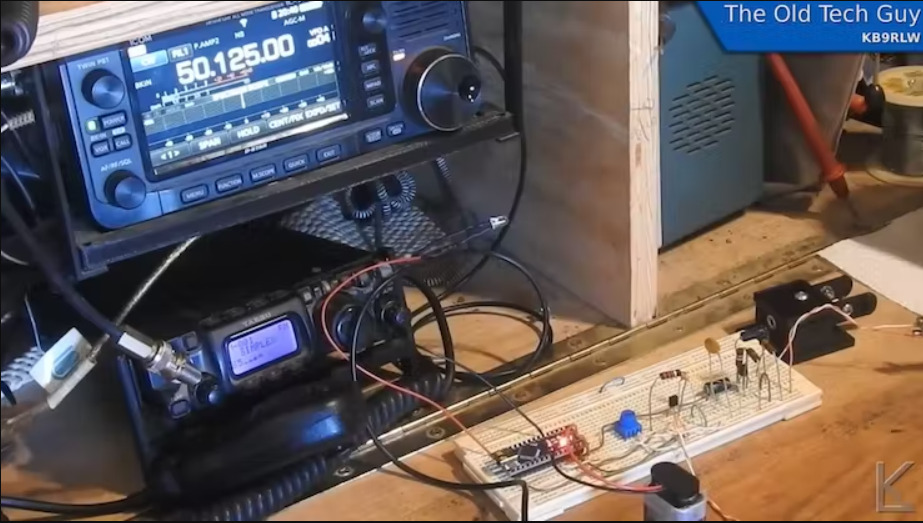
image: CWvox Prototype connected to the radio (Source: Kevin Loughin)
These days, it seems like every speech-detection-related project is based on some kind of advanced algorithm, such as machine learning, pattern matching, or spectrum analysis. But Kevin Loughin (AKA KB9RLW), an amateur radio operator, built CWvox, a voice-activated keyer that uses the analog-to-digital converter (ADC) on an Arduino Nano to translate spoken dits and dahs into morse code. Morse code, also known as “CW,” is a system of secret symbols (or words) based on alternating short and long tones. To represent the short burst in writing, a dot is used, while the long burst is represented by a dash.
Most people’s mental image of Morse code involves the short and long tones produced by a device called a keyer. The majority of these gadgets feature paddles that are activated with the user’s thumbs and forefingers. So, what do you do if you lose the ability to use your fingers and thus a keyer? CWvox is necessary due to this snag.
Those who work with radios will recognize these tones as “Dit” (short) and “Dah” (long) in Morse code. It turns out that there is a tiny difference in the amount of time it takes to say each of these words, and that difference is enough for effective and straightforward word detection. At least when your focus is limited to a single phrase!
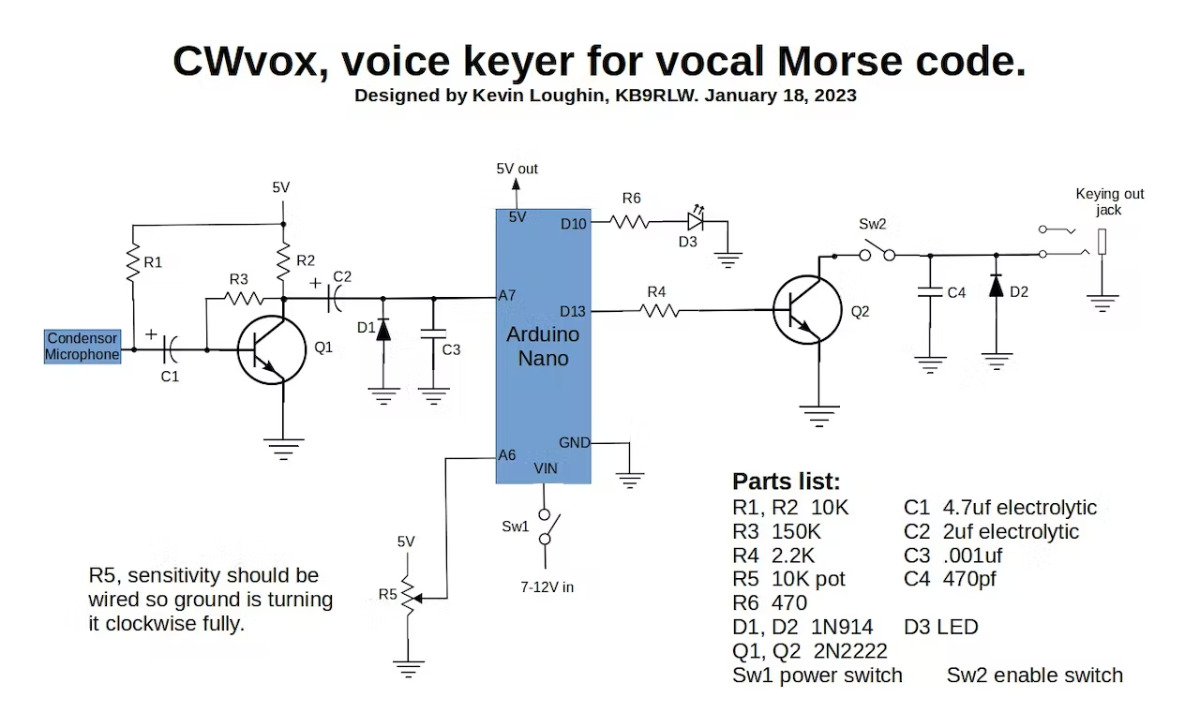
CWvox Schematic (Source: kb9rlw.blogspot.com)
The heart of CWvox is an Arduino Nano. The Nano microcontroller is a basic eight-bit design without DSP capabilities. To translate verbal morse code into electronic tones, you only need that board, a few transistors, and a few passive parts. For the Nano’s positive-only ADC, the discrete parts on the input side amplify, bias, and filter the signal. A BJT buffers the signal on the output side before it enters the radio’s keying input.
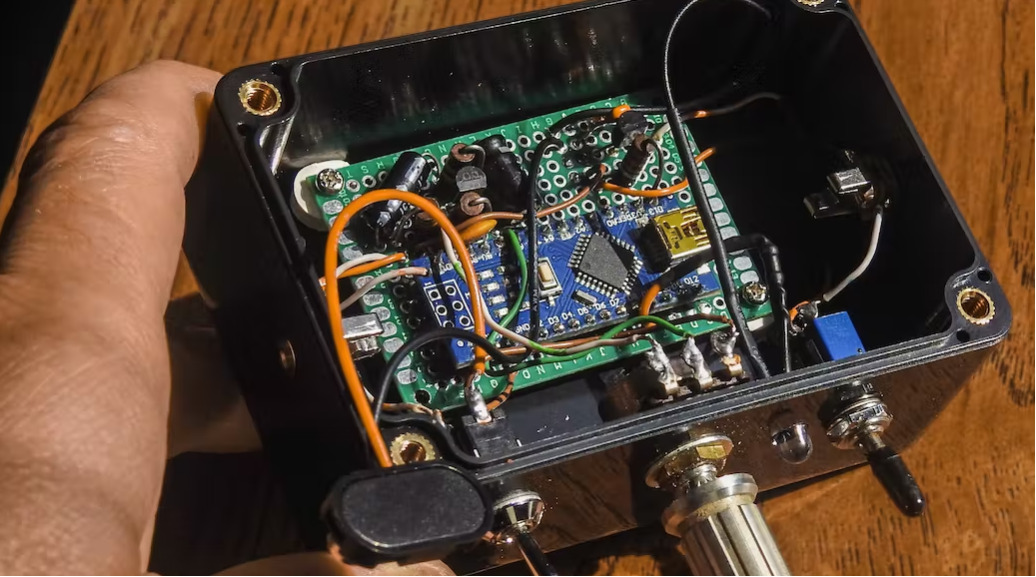
The CWvox voice-operated keyer for versal morse code (Source: Kevin Loughin, Youtube)
In the above video, at 09:45, KB9RLW gives a live demonstration of CWvox in use. And it’s amazing to watch and listen to! To view a detailed explanation of the overall circuit, fast forward to 13:15 in the same video.
The complete CWvox article is available here. For the Arduino Nano code, you can also look at this GitHub repository. You should also look at the code to see how elegantly straightforward this design is!


