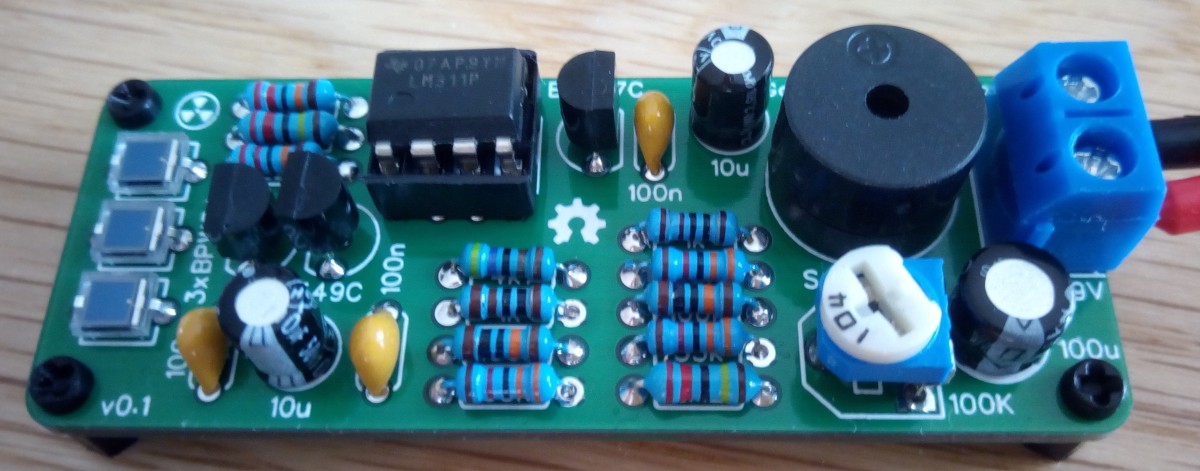
BPW34 Gamma Ray Detector
The usual approach to radiation detection is the use of a Geiger-Müller tube and its high voltage circuit requirements, but during a quick surf through the internet today, I came across this portable and "accurate looking" solution developed by Stefan Wagner, on EasyEDA. Rather than the Geiger Muller tube and its complex circuitry, the project uses a miniature Silicon PIN Photodiode, the 3x BPW34 (which were connected in parallel to improve sensitivity), as the primary sensing component.
The usual approach to radiation detection is the use of a Geiger-Müller tube and its high voltage circuit requirements, but during a quick surf through the internet today, I came across this portable and “accurate looking” solution developed by Stefan Wagner, on EasyEDA.
Rather than the Geiger Muller tube and its complex circuitry, the project uses a miniature Silicon PIN Photodiode, the 3x BPW34 (which were connected in parallel to improve sensitivity), as the primary sensing component. The BPW34 is a PIN photodiode with high speed and high radiant sensitivity in miniature, flat, top view, clear plastic package. It is sensitive to visible and near-infrared radiation and has a small sensitive area, which is an advantage in radiation detection, as the background rate due to cosmic rays is very low, and signals from small samples will be easier to detect than when a counter tube is used.
The behavior of the BPW34 PIN photodiode used in the project is similar to that of a low-cost counter tube in the sense that, while alpha particles may be stopped by the enclosure of the device, gamma rays due to their high penetration ability will pass through and create electron-hole pairs in the depletion layer of the diode. This will lead to the charge carriers in the diode being drawn away and a small current pulse being created. The small current pulse can then be amplified and processed to determine radiation levels.
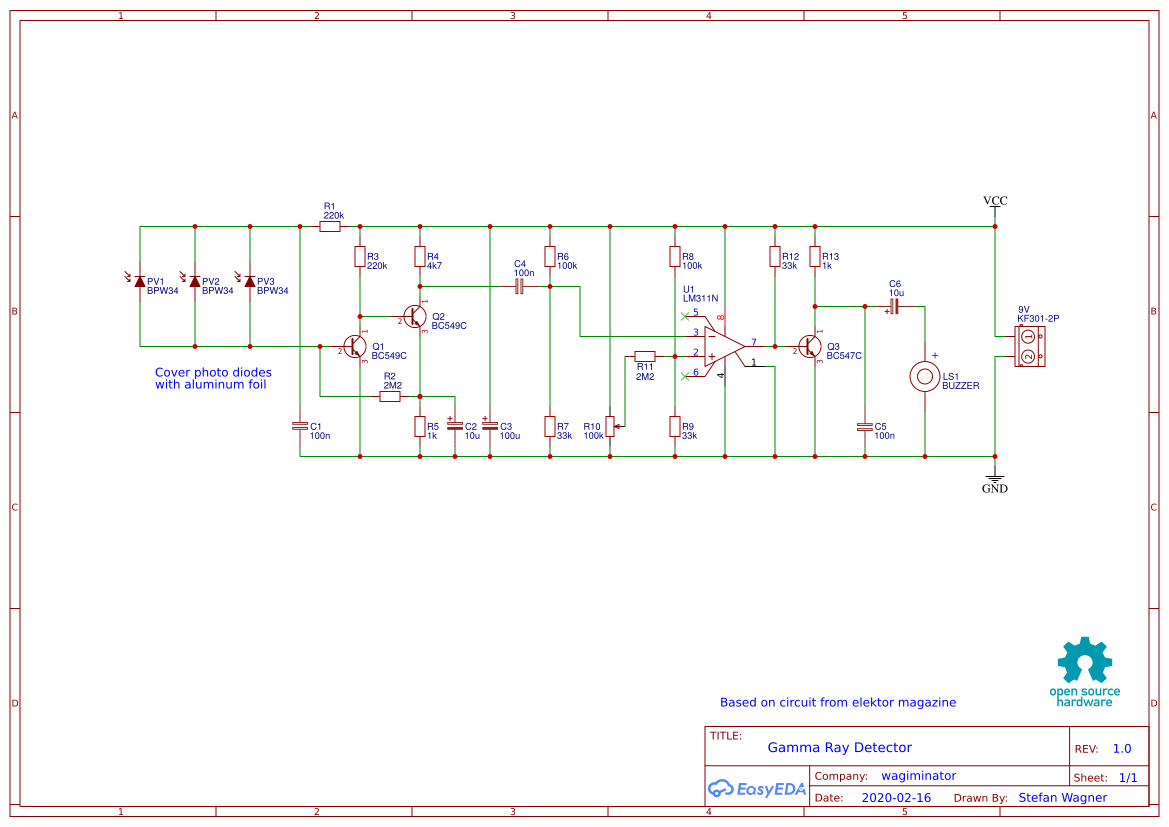
For the amplification, the project featured an instrumentation amplifier and the processing is done with an LM3111 operation amplifier which is used to compare the values and trigger a buzzer when radiation is detected.
With the Geiger-Muller tube becoming hard to find and the high voltage circuitry adding another layer of complexity, this accurate approach by Stefan using relatively, readily available components might be the best way to build your next radiation detection device.
The project notes the interference of light during measurement and suggested that the BPW34s be covered with thin aluminium foil.
The project is entirely open source and the schematics, PCB design file, BOM, and other files are available on the project’s page on EasyEDA.


Thanks for this info. I’m an electrician expert and I’ve learned a lot with this article. Great! Thanks for sharing.
it is possible to adapt to arduino?
Yes, you can get the output and feed it to an Arduino for further processing.
Thanks, I thought about removing the BUZZER and connecting to the arduino, does it work? can you say?
You can try to take the signal from the Collector of output transistor and drive the Arduino input.
I had made this circuit but it output a lot of noise of electromagnetic noise , can you help me to over come noise?
It probably needs better shielding. The schematics says “Cover photo diodes with aluminium foil”, but I think it needs a proper Faraday cage. There is very high amplification at the base of Q1, it works like an antenna. Try put the whole device in a metal box, if it works you can progressively reduce the box to cover just the diodes and Q1.
I had made too that circuit exactly the same but I can’t get any sound. I used 9V battery. What could be the problem? Is there anyone have an idea?