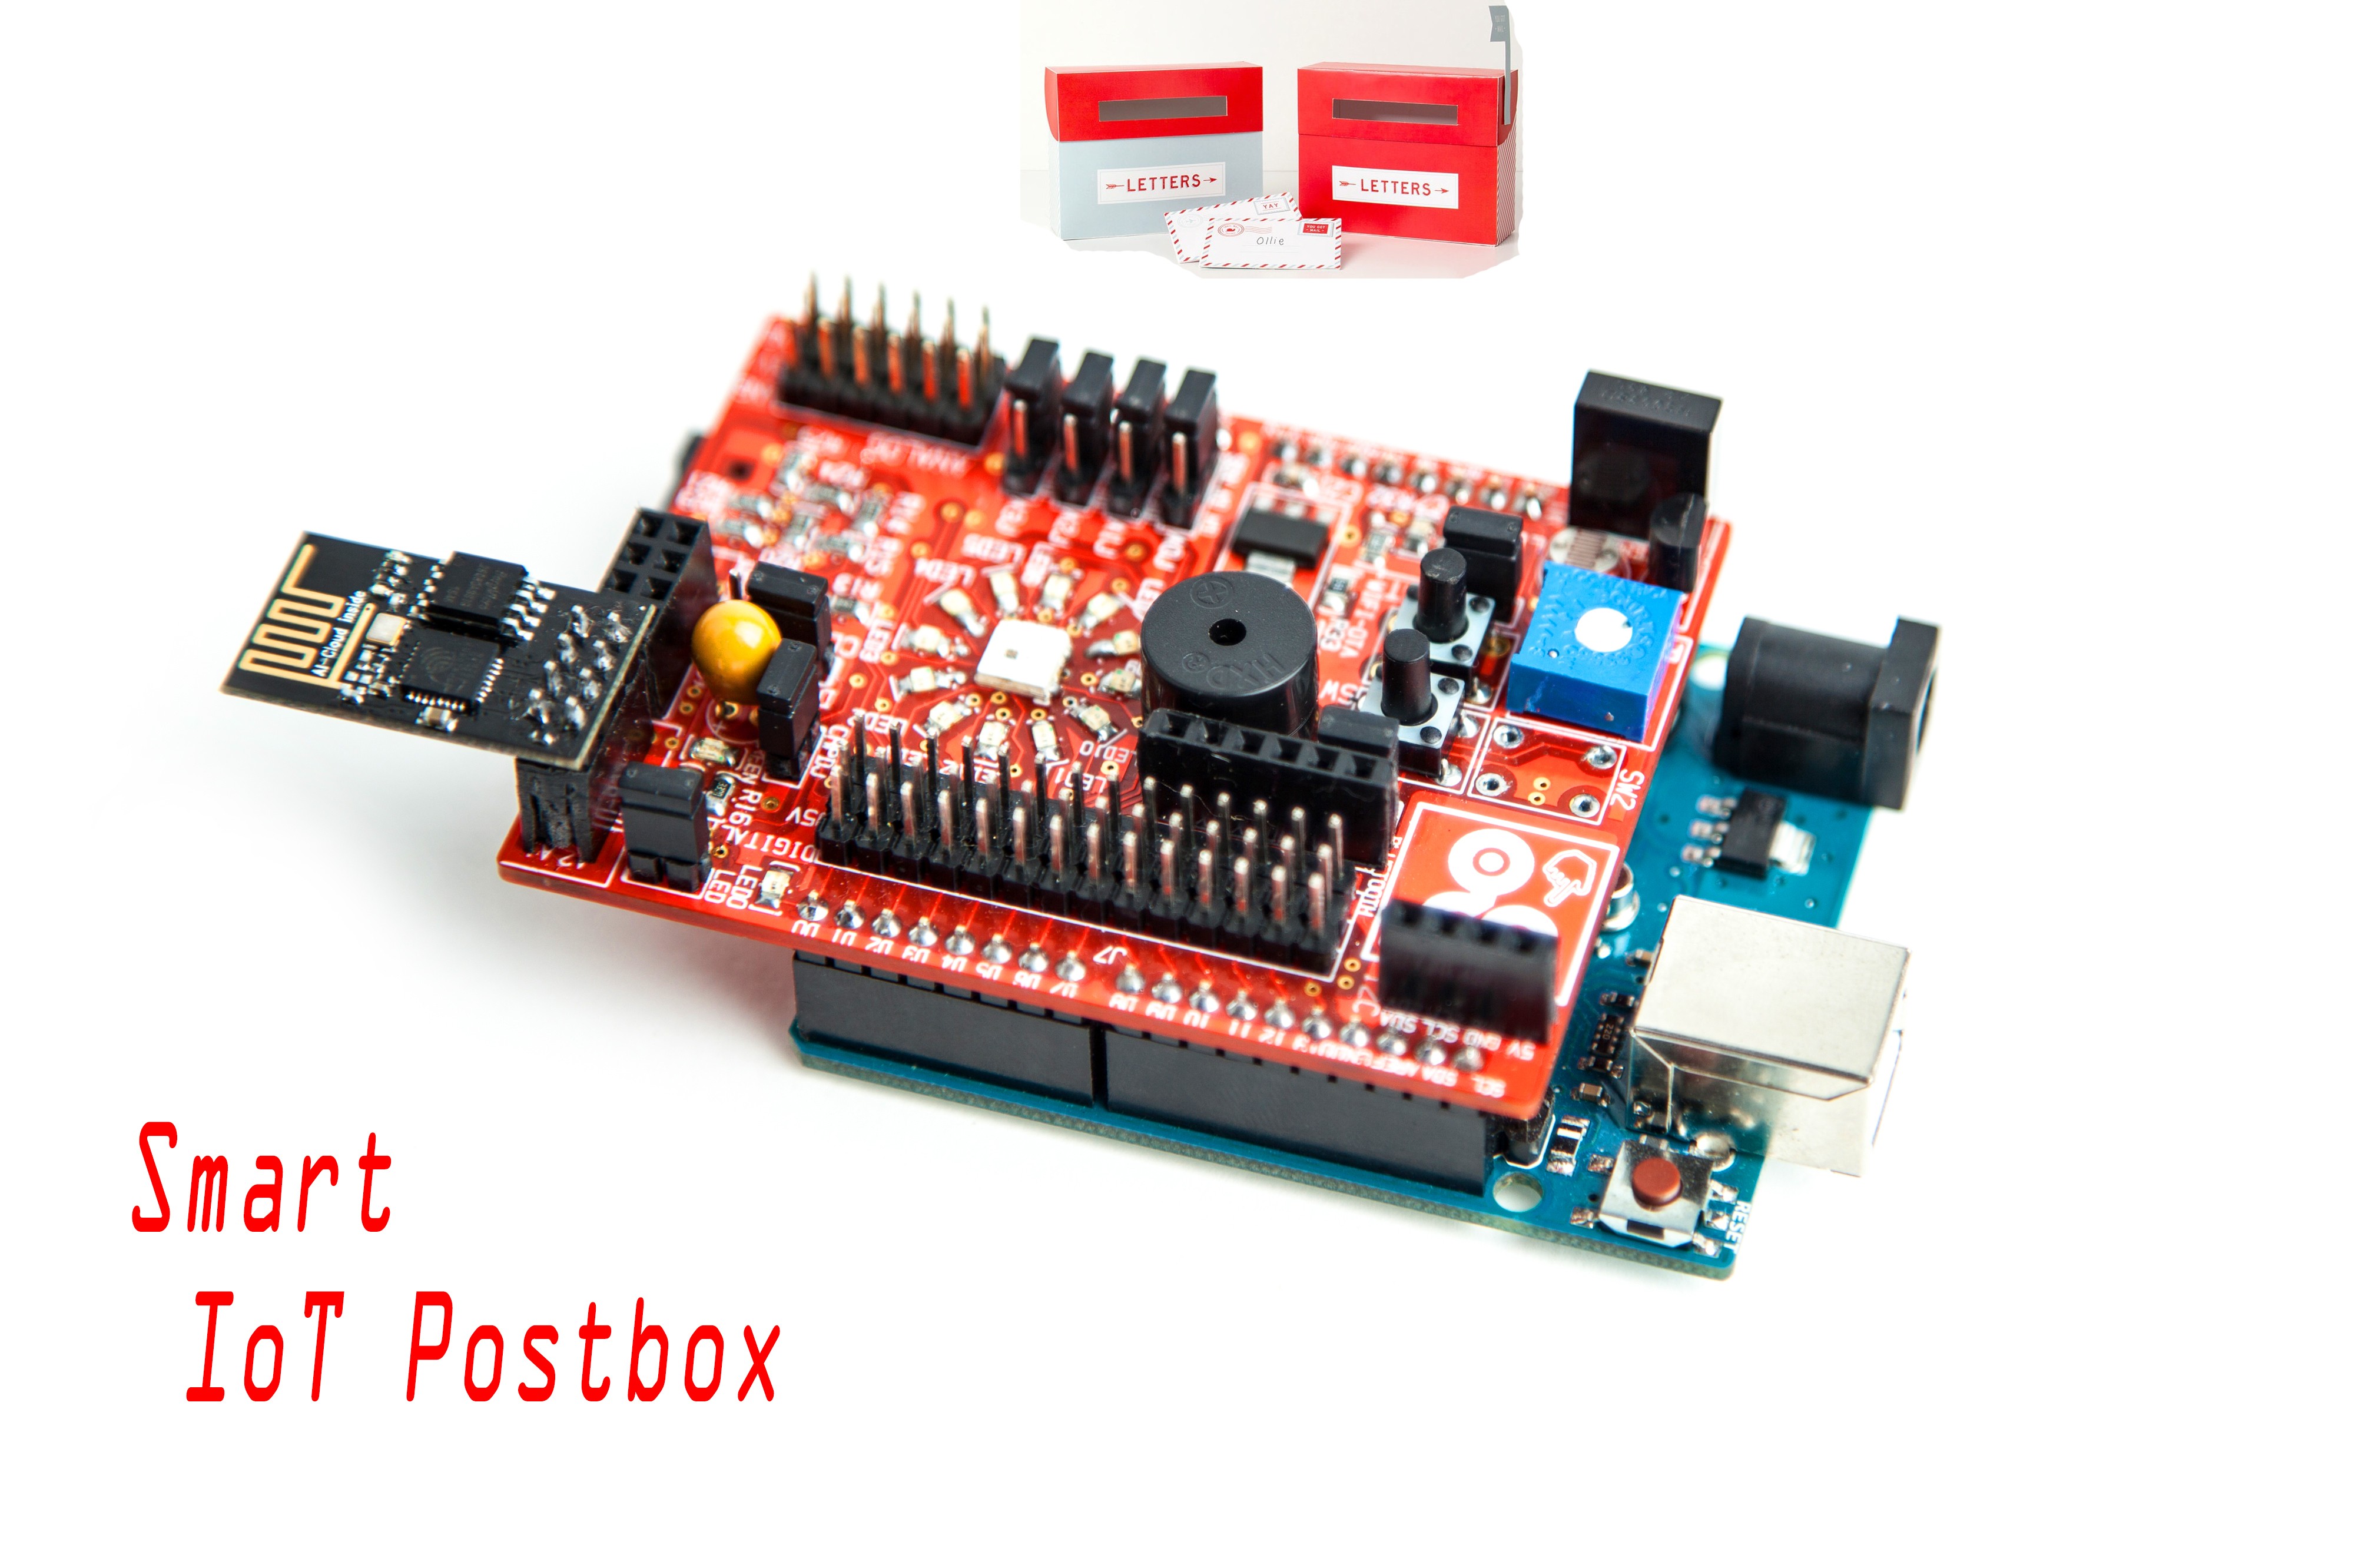
Smart IoT Postbox with Arduino, ESP-01, and idIoTware Shield
When you are waiting for a very important letter to come, it's really bothersome to go and check the post box again and again. The problem gets worse when you are not at home and anxiously thinking if the letter arrived or not.
When you are waiting for a very important letter to come, it’s really bothersome to go and check the post box again and again. The problem gets worse when you are not at home and anxiously thinking if the letter arrived or not. Well, now IoT or Internet Of Things is your savior.
Following this project by CuriosityGym, you can make your own smart IoT post box that sends you an email as soon as a letter is dropped into it.
Requirements :
- Arduino UNO
- idIoTware shield
- USB cable (A to B)
- Esp 8266 – 01 programmed with ESP-link firmware
- One jumper
- One Postbox (You can make it yourself)
- External 9v 1A Power adapter
- Double sided sticky tape
- Arduino UNO code (Download it)
Description :
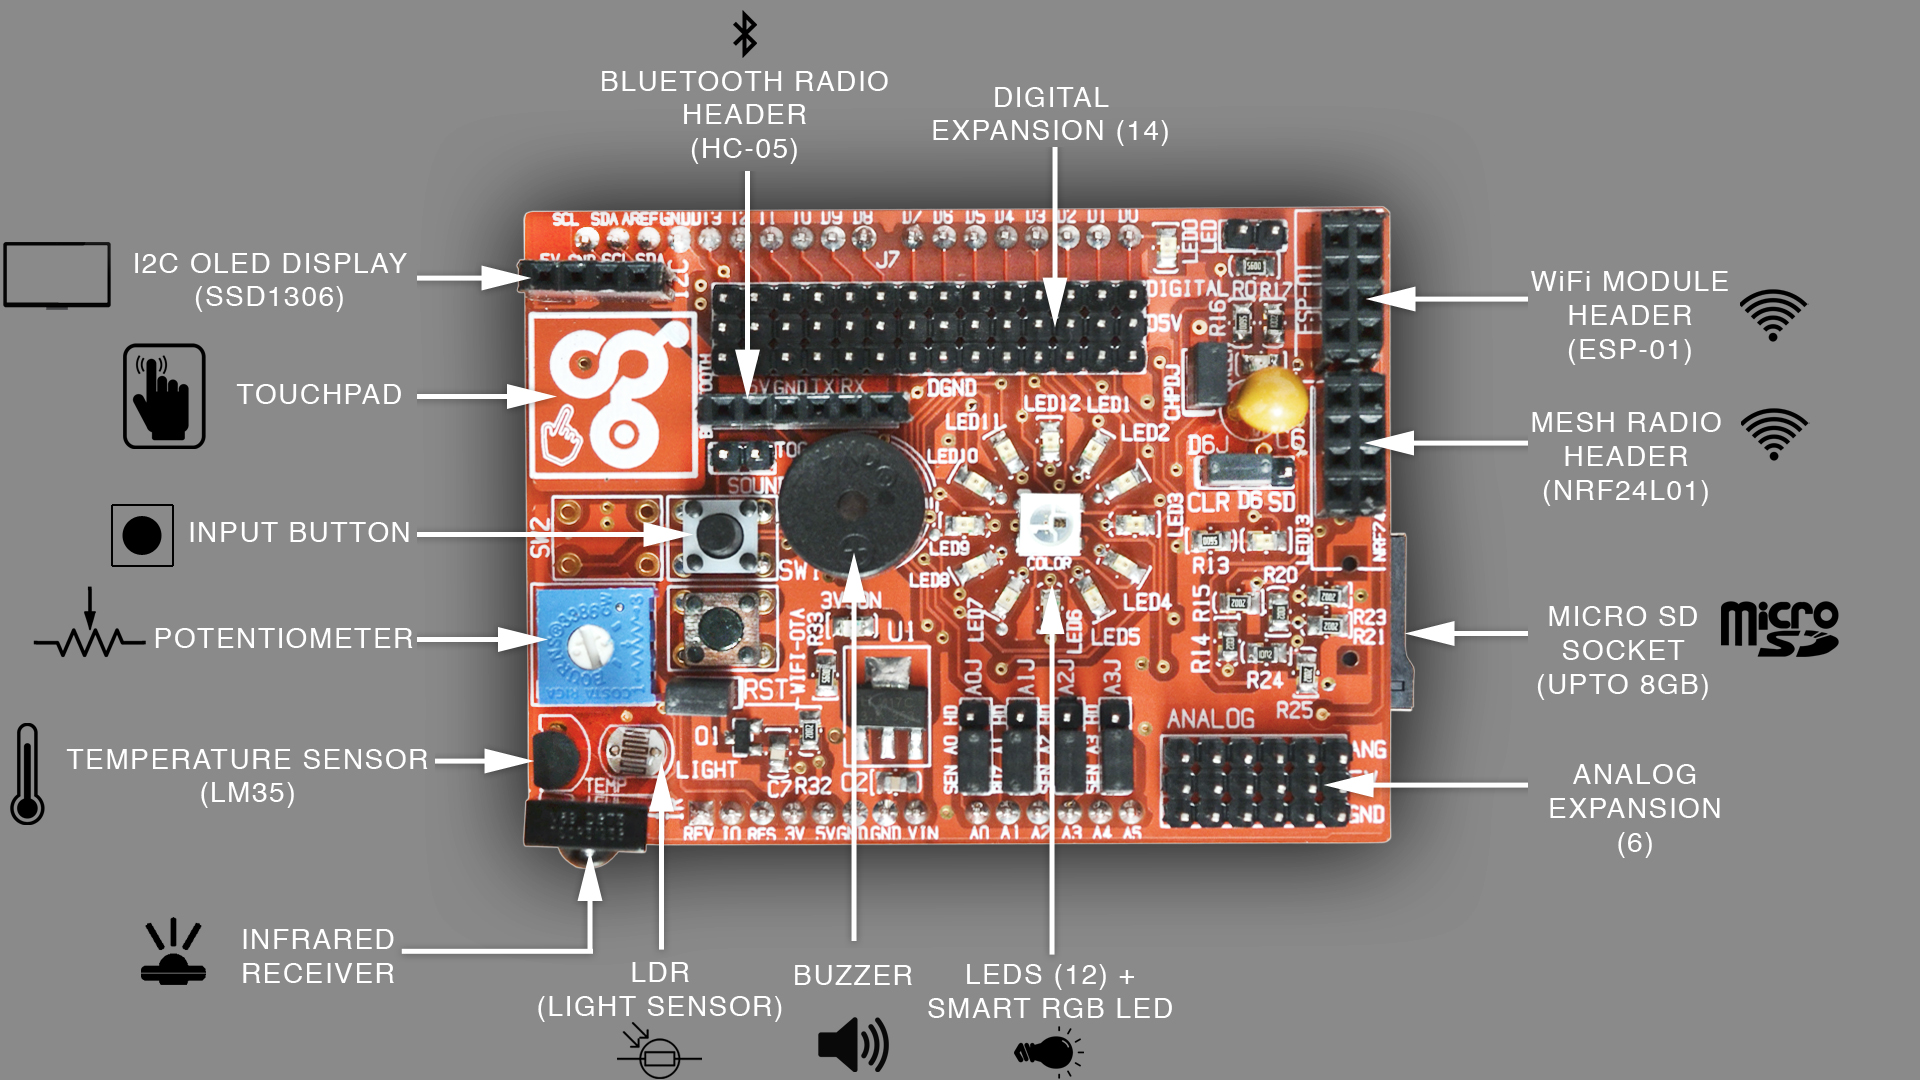
The concept is not complicated at all. The idIoTware Shield has a set of RGB LED and an LDR. The RGB LED always emits white light and it’s received by the LDR. As soon as a letter is dropped, there is an interruption in light. The change in light intensity is sensed by LDR and processed by Arduino. Finally, ESP 8266 connects to IFTTT network and sends an email to a saved email ID.
IFTTT: IFTTT is a free web-based service that allows users to create chains of simple conditional statements, called “applets”, which are triggered based on changes to other web services such as Gmail, Facebook, Instagram, and Pinterest. IFTTT is an abbreviation of “If This Then That”.
This can be explained using a simple analogy: “If the battery is empty then charge it”.
Watch this video for more information on IFTTT.
Procedure :
Simply place the idIoTware shield on Arduino UNO and Connect the esp8266(01) module to the ESP-01 header on the top right, such that the antenna is facing outside (See the image given below). It’s important to connect a jumper to CH_PD pin on the shield.
To make an IFTTT applet, go to IFTTT.com and make an account. Then, you need to make an applet as “If Maker then Gmail“. So, select Maker by searching and add your Maker channel (in URL field). Now, search for Gmail and select it. Define whom to and what to mail. Finish your applet, and you are all set.
Finally, upload the code to Arduino UNO. Once the code is uploaded, place the Arduino with double sided sticky tape inside the post box. Don’t forget to insulate the Arduino from metallic body of the postbox.
Testing :
Power the Arduino from a 9V adapter and connect it to a serial monitor. Now post a letter in the postbox and you will see the message “New Letter!!” in the serial monitor. When you check your email you will find a mail saying the same.
For a better understanding, watch the video:


I made this IFTTT applet google custom search engine https://cse.google.com/cse/publicurl?cx=000501358716561852263:xzfiqchwcj8
I noticed Google Plus isn’t listed as a service and therefore you can’t find applets on the IFTTT website, but they come up if you search for Google Plus or Google+ on this search engine. Thought it might come in handy.
What is this about?