AutoSteri: Small and Compact Automatic UV Sterilization System from David Bershadsky
The probability of having microorganisms survive on a surface or item subjected to treatment is very low; decontaminating an object or material makes it safe to handle. While there are many techniques capable of effectively disinfecting surfaces, not many can be used independently without personnel, thus making the whole process of monitoring and cleaning tiresome.
The probability of having microorganisms survive on a surface or item subjected to treatment is very low; decontaminating an object or material makes it safe to handle. While there are many techniques capable of effectively disinfecting surfaces, not many can be used independently without personnel, thus making the whole process of monitoring and cleaning tiresome.
The new AutoSteri from maker David Bershadsky was designed to handle and take the stress of sterilization off you. The AutoSteri simply detects the presence of a person in a particular place and disinfects the area after the person leaves the place. Such an interesting and highly useful you would agree, particularly during this time of the Covid-19 pandemic where regard to hygiene and sterilization cannot be over-emphasized. The AutoSteri can be used to sterilize almost everything, hallways, offices, elevators, delivery packages, and many more.
Some of the key components to be used for this project include :
- A breadboard-friendly Arduino Nano R3 board
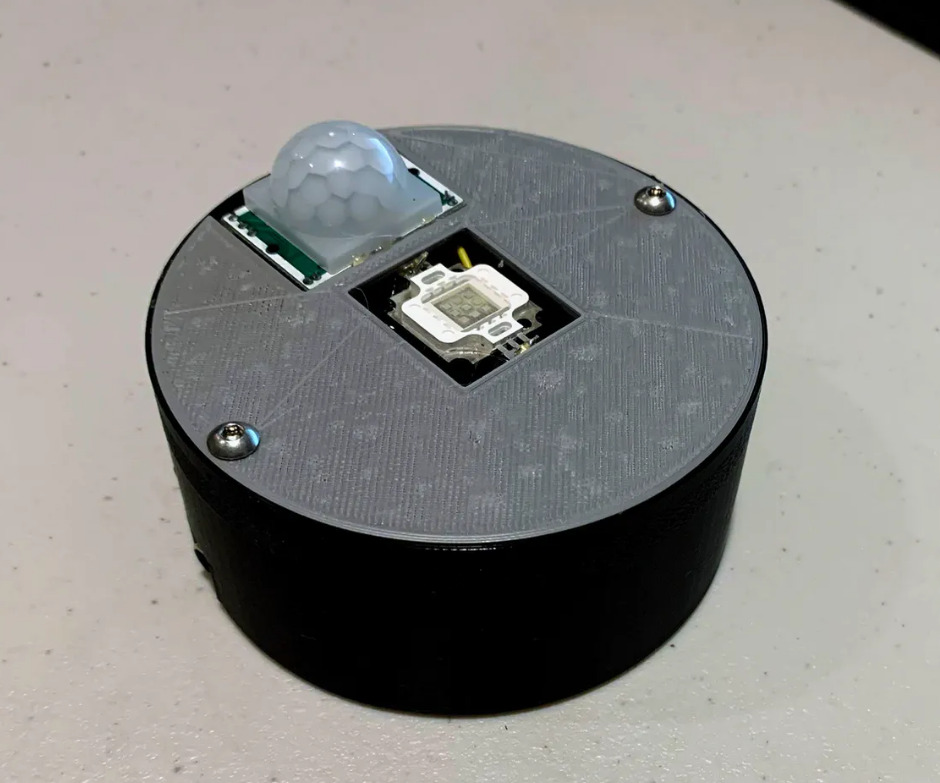
- 1x generic PIR motion sensor
- A high power UV LED
- 1x 100 Ohms resistor
- One general-purpose NPN transistor, which could be replaced with a motor driver or relay.
- Breadboard or custom PCB
- Jumper wires and
- Through-hole 5.5 mm power jack
- Software Apps: Supports Arduino IDE
The PIR sensor is used to detect the person’s presence and the UVc LED, in turn, cleans the area for about 15 minutes when the person is gone. Depending on how powerful the LED you are using is, and how much light is being emitted, the AutoSteri can cover a maximum range of about 10 m and conveniently detect anyone within that space.
Speaking about the electronics build of the AutoSteri, David explained that the system can either be built with a PCB or without any.
“With the PCB the build will be exactly the same but simply solder all of your components on board in their indicated locations. For the PCB one needs to use an Arduino NANO, 1-4x 3535 SMD LED, or connect to the 2 pins for other LEDs, an NPN transistor that can handle the current of your led, a generic PIR sensor, and a through-hole 5.5 mm power jack”.
More on the AutoSteri system including schematics, PCB design, and documentation can be found on the project’s tutorial page.


