Building A Tiny Portable Time-lapse Camera
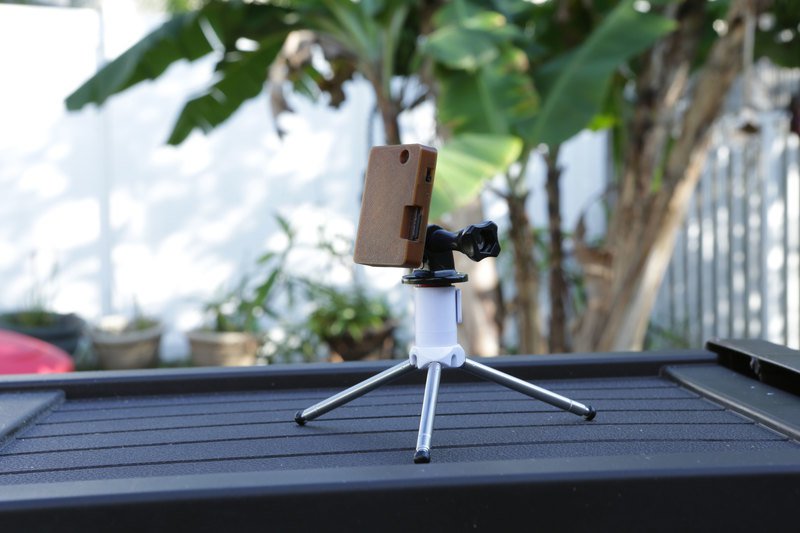
Using a mini spy camera module, Ruiz Brothers had built a tiny portable camera that is used to take time-lapse videos and for all sorts of photo based projects. This project consists of these parts with an estimated cost of $39: Mini Spy Camera Module ($12.50) Adafruit Trinket (3V or 5V MicroUSB Version!) ($6.95) 100mAh lithium polymer battery ($5.95) Slide switch ($0.95) Trinket Lipo Backpack ($4.95) MicroSD memory card ($7.95) The mini spy camera module has an integrated driver and is easy to use without an Arduino or Raspberry Pi.
Using a mini spy camera module, Ruiz Brothers had built a tiny portable camera that is used to take time-lapse videos and for all sorts of photo based projects.
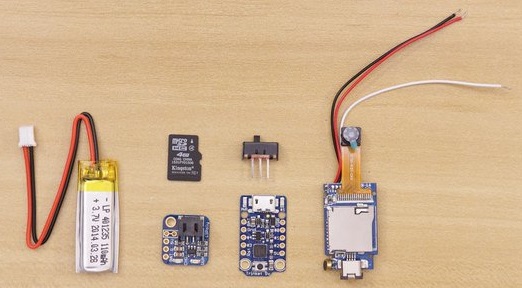
This project consists of these parts with an estimated cost of $39:
- Mini Spy Camera Module ($12.50)
- Adafruit Trinket (3V or 5V MicroUSB Version!) ($6.95)
- 100mAh lithium polymer battery ($5.95)
- Slide switch ($0.95)
- Trinket Lipo Backpack ($4.95)
- MicroSD memory card ($7.95)
The mini spy camera module has an integrated driver and is easy to use without an Arduino or Raspberry Pi. The camera sensor can take 1280×960 photos and captures video at 480p. The module uses a microSD card to store data and it has a maximum support of 32GB. For a higher image quality and adjustable settings, you can use other camera modules such as the Wearable Raspberry Pi Zero Camera.
To take a time-lapse, an intervalometer remote control is needed to trigger the camera for capturing a photo within a constant interval. The Adafruit Trinket microcontroller is used here, and you can also make your own following this guide.
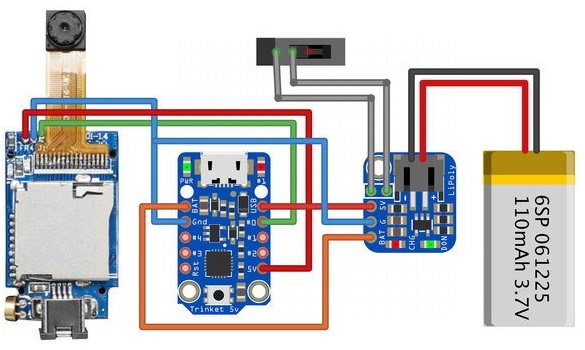
The circuit will be powered by a 3.7V 100mAh Lithium Ion battery via JST connection. The battery plugs directly into the Trinket Backpack, which allows the recharging over the microUSB port on the Trinket.
The circuit is connected as shown in the diagram; the slide switch to Lipoly backpack, VCC from camera to 5V on Trinket, GND from camera to GND on Trinket, BAT from Lipo backpack to BAT on Trinket, G from Lipo backpack to GND on Trinket, and 5V from Lipo backpack to USB.
The code is very simple and can be uploaded to the controller using the Arduino IDE. The setup loop will initialize the pins, and the loop will turn on and off the trigger with a chosen delay.
int trig = 0;
int led = 1;

void setup() {
  // initialize the digital pins as output.
  pinMode(led, OUTPUT);
  pinMode(trig, OUTPUT);

  digitalWrite(led, HIGH);
  digitalWrite(trig, HIGH);
}

// Hold HIGH and trigger quick (<250ms) LOW to take a photo. Holding LOW and trigger HIGH starts/stops video recording

void loop() {
  digitalWrite(trig, LOW);
  digitalWrite(led, HIGH);

  delay(50);

  digitalWrite(trig, HIGH);
  digitalWrite(led, LOW);

  delay(5000);
}
The case in 3d printed, the design with a detailed description and the full making guide is available here. This video is showing how to make this tiny camera and how it works.


