Getting Started with Espressif’s ESP32-C3-DevKITM-1 on Arduino IDE
Espressif Systems ESP32-C3-DevKit M-1 is an extremely powerful board for your IoT applications. Driven by the ESP32-C3FN4 chip, this low-power, low-cost, Wifi-Bluetooth-enabled board has its own unique place in the ESP32 board line-up.
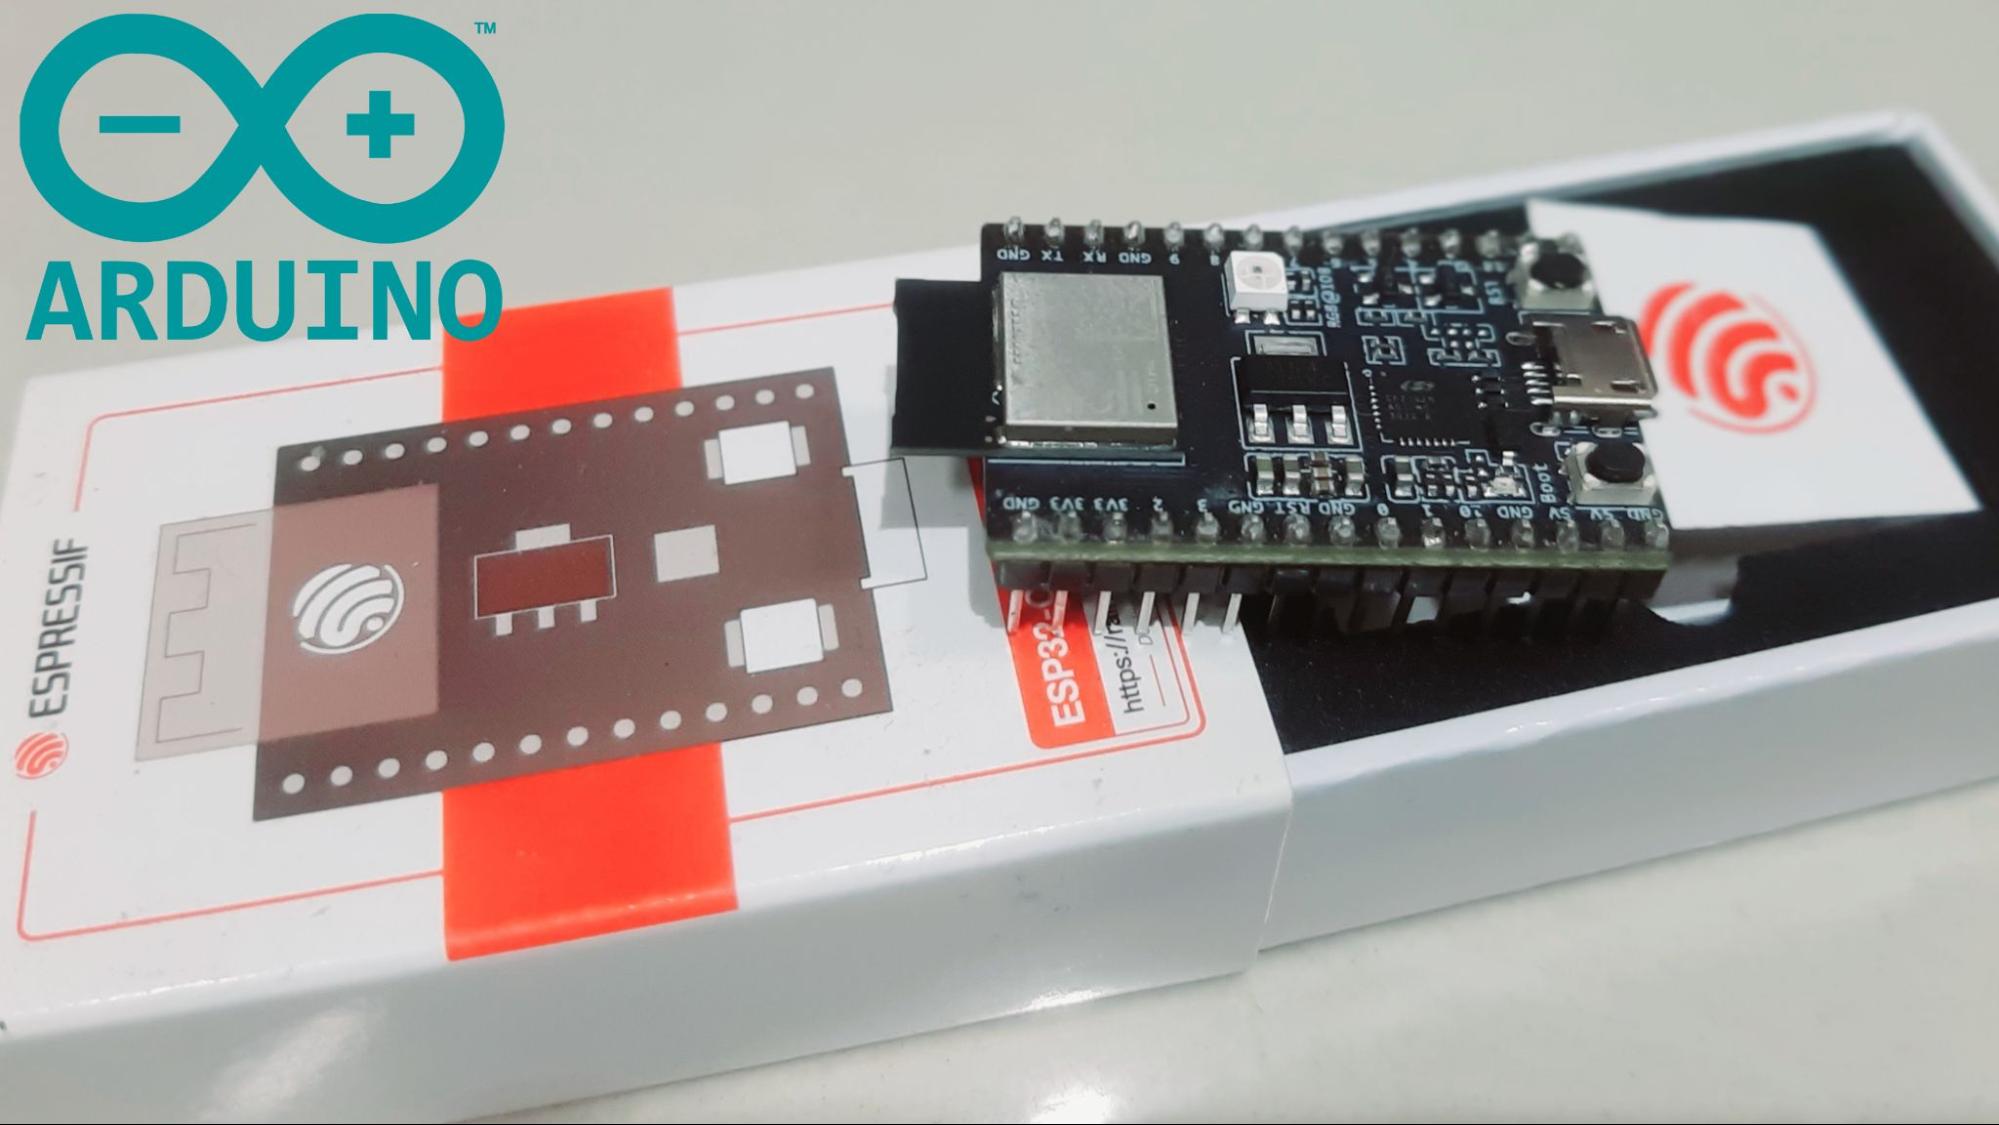
Espressif Systems ESP32-C3-DevKit M-1 is an extremely powerful board for your IoT applications. Driven by the ESP32-C3FN4 chip, this low-power, low-cost, Wifi-Bluetooth-enabled board has its own unique place in the ESP32 board line-up.
You can program your ESP32-C3-DevKITM-1 module in four ways:
- ESP-IDF
- Arduino IDE
- Eclipse Plugin
- VS Code Extension
Interfacing the ESP32-C3-DevKITM-1 on Arduino IDE provides us with the flexibility, compatibility, and reliability of a much simpler and easy-to-use UI also boosting the programming speed. In this article, we focus on the programming of ESP32-C3 with Arduino IDE.
Getting Started with Arduino IDE
Arduino IDE being highly popular and convenient to most programmers also has support for ESP boards. For that, you need to add the board’s Github repository to the IDE which can be found here.
For the ESP32-C3-DevKITM-1 board, you need to use the development release link:
https://raw.githubusercontent.com/espressif/arduino-esp32/gh-pages/package_esp32_dev_index.json
First, make sure that you have the latest version of the Arduino IDE installed on your computer. Here are the steps to interface ESP32-C3-DevKITM-1 on Arduino IDE.
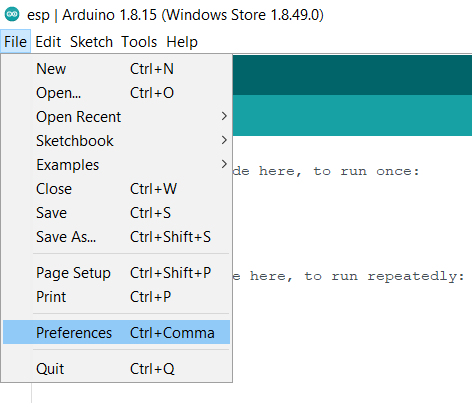
Step1: In your Arduino IDE window, go to File menu -> Preferences
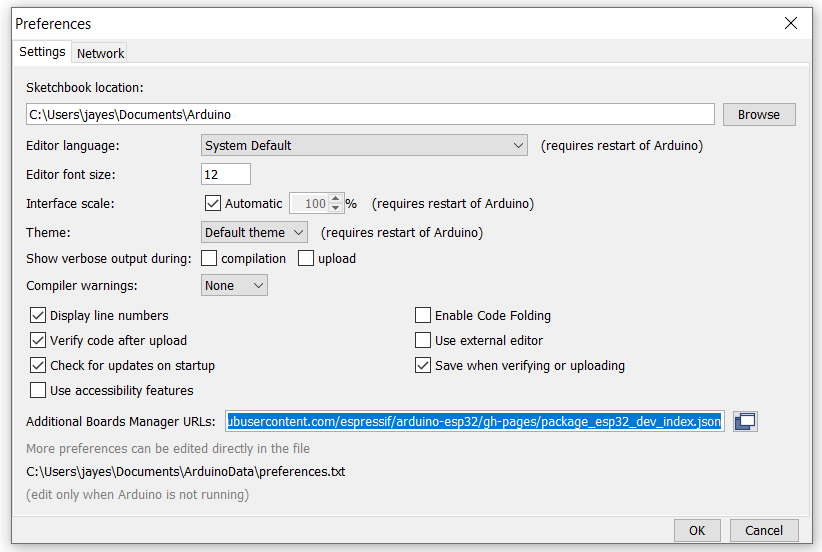
Step2: Once the preferences menu is open, Enter https://raw.githubusercontent.com/espressif/arduino-esp32/gh-pages/package_esp32_dev_index.json in the Additional Boards Manager URLs field and hit OK.
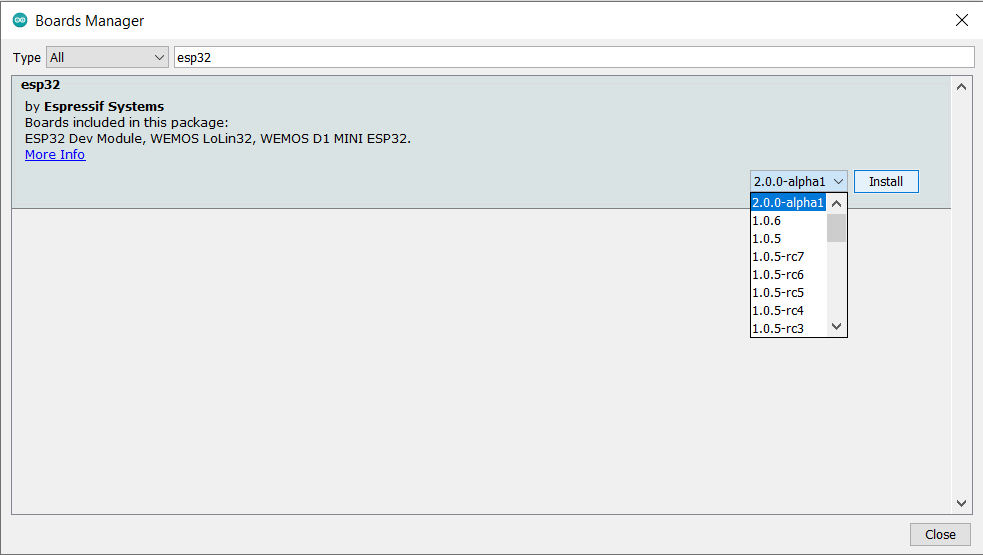
Step3: Now go to the Boards Manager from the Tools menu.
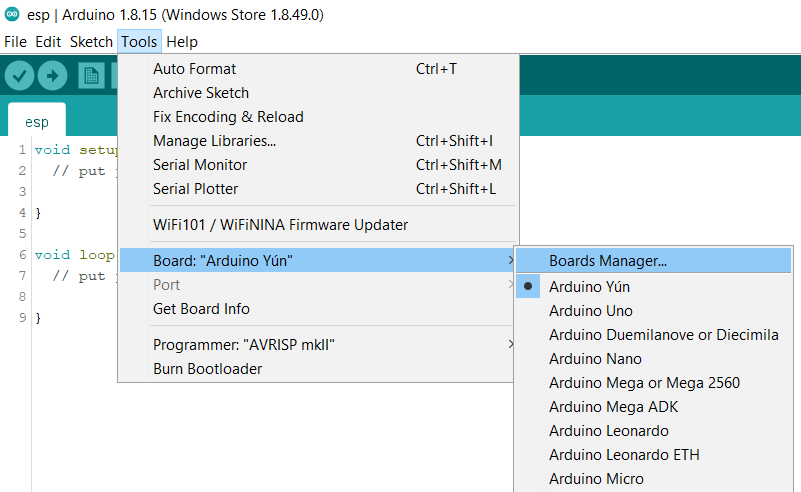
Step4: In the Boards Manager, search esp32 by Espressif Systems. Install the latest 2.0.0 version.
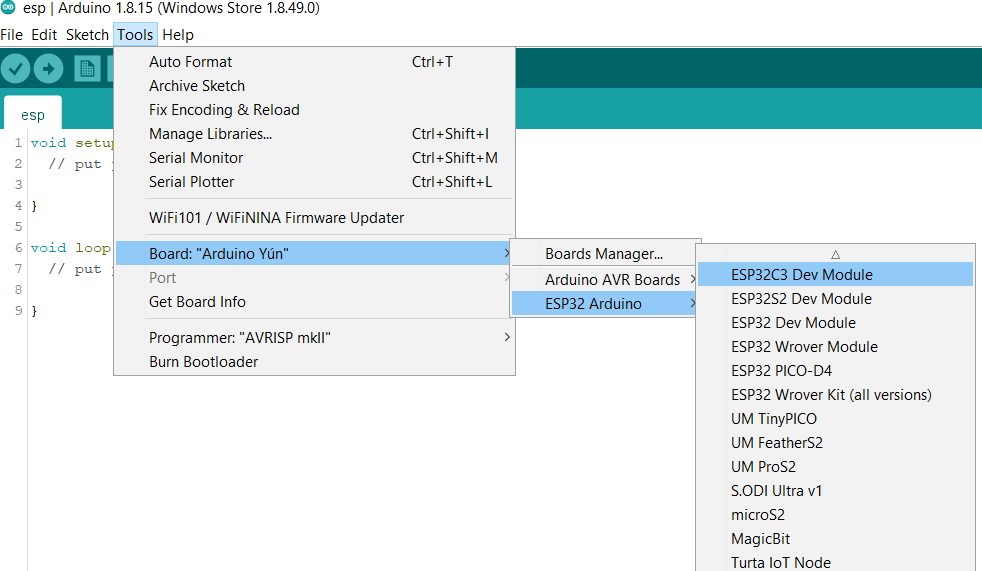
Now, once the installation is complete, you can see the ESP32C3 Dev Module in the boards’ section of the Tools menu. Select it.
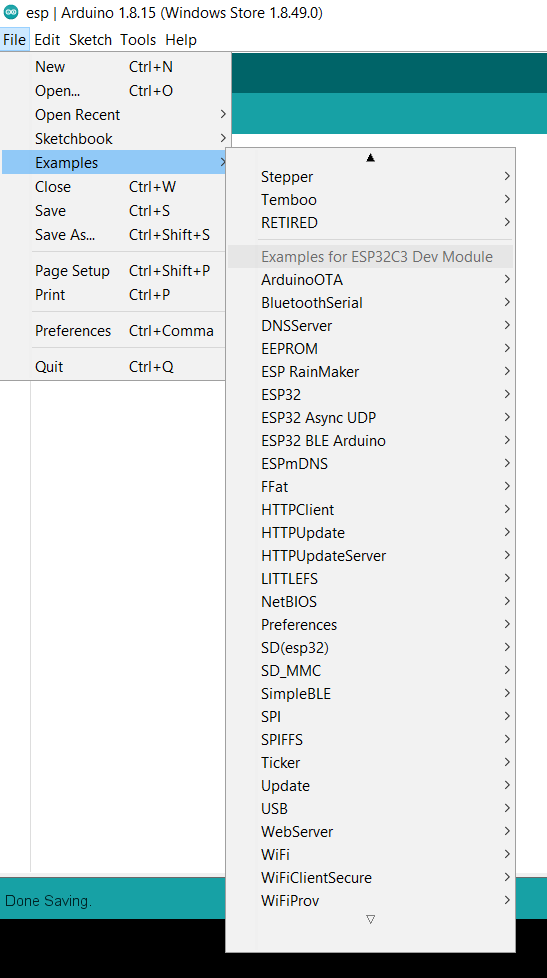
Now, under the File menu, in the examples section, you can see some inbuilt examples.
Select a proper port for your board with preferred settings. The port number of the board can be found using Device Manager on your PC.
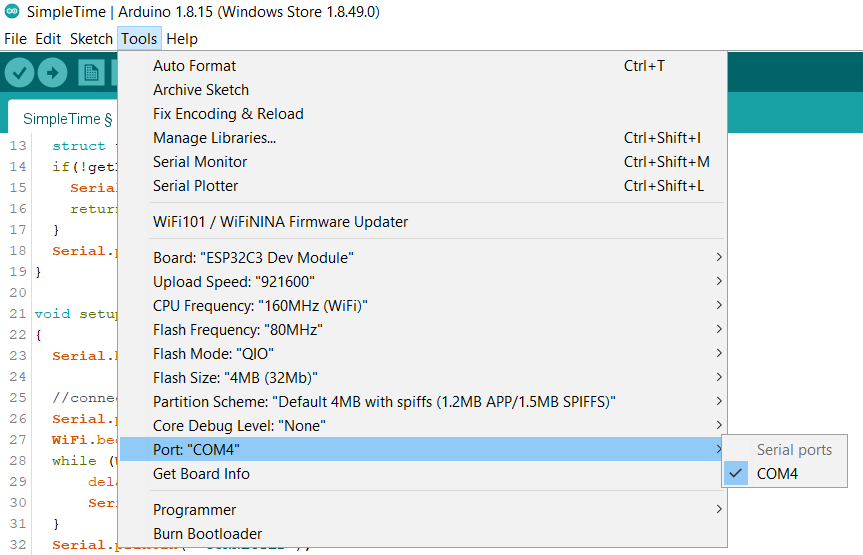
Here, we executed an ESP32-> Time-> SimpleTime example which connects your board to a WiFi network to obtain and display the current date and time on the serial monitor. Enter your network’s SSID and password in the code. Just compile the sketch and then upload it to the board. Also, open the Arduino IDE’s Serial Monitor at a baud rate of 115200 to view the result.
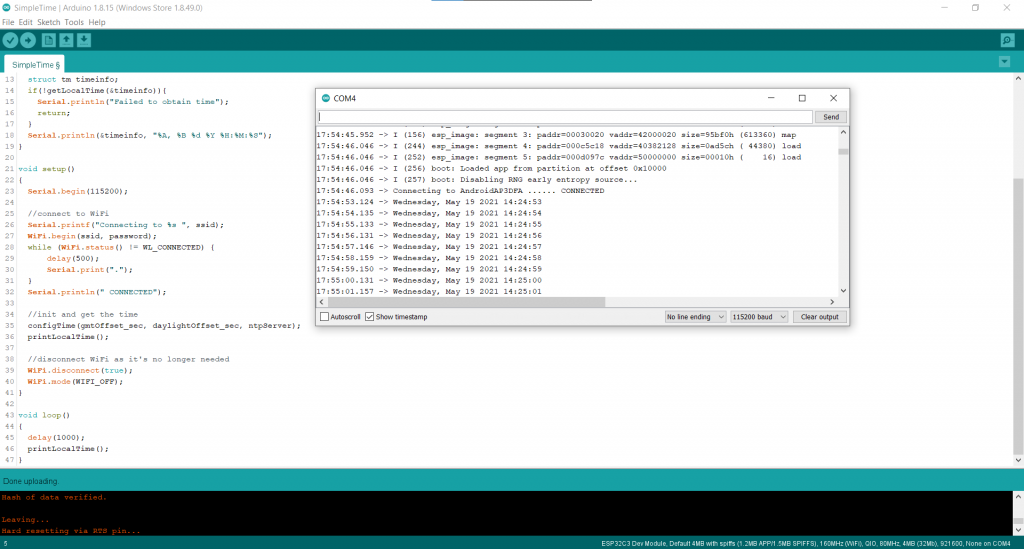
Before uploading, put the ESP32C3 board in programming mode by long-pressing the boot button and simultaneously pressing the reset button once, and then releasing the boot button.
You can now build your own ESP32 C3 projects on Arduino IDE.


ESP32 is a very popular wireless MCU and so many companies and designers are incorporating it into their design.
One of the challenges I see is the availability of a good programmer who can easily handle reset and boot pins along with RX, TX, and the kind of circuit available on the dev kit.
In the future ESP32 chips can start providing an easy 2-pin debugging mechanism with step-through integration in IDEs, which will help developers a lot.