Meet the COMGO Z1 – A Powerful, Top of the Line, Low-Cost Laser Engraver Review
Introduction Laser engravers/cutters like 3D printers are bringing small-scale manufacturing closer to makers and hobbyists. As the technology advances, the competition between companies making them is getting stiffer, leading to the market being flooded with different types and makes, making it difficult for the average maker/hobbyist to select one.
Introduction
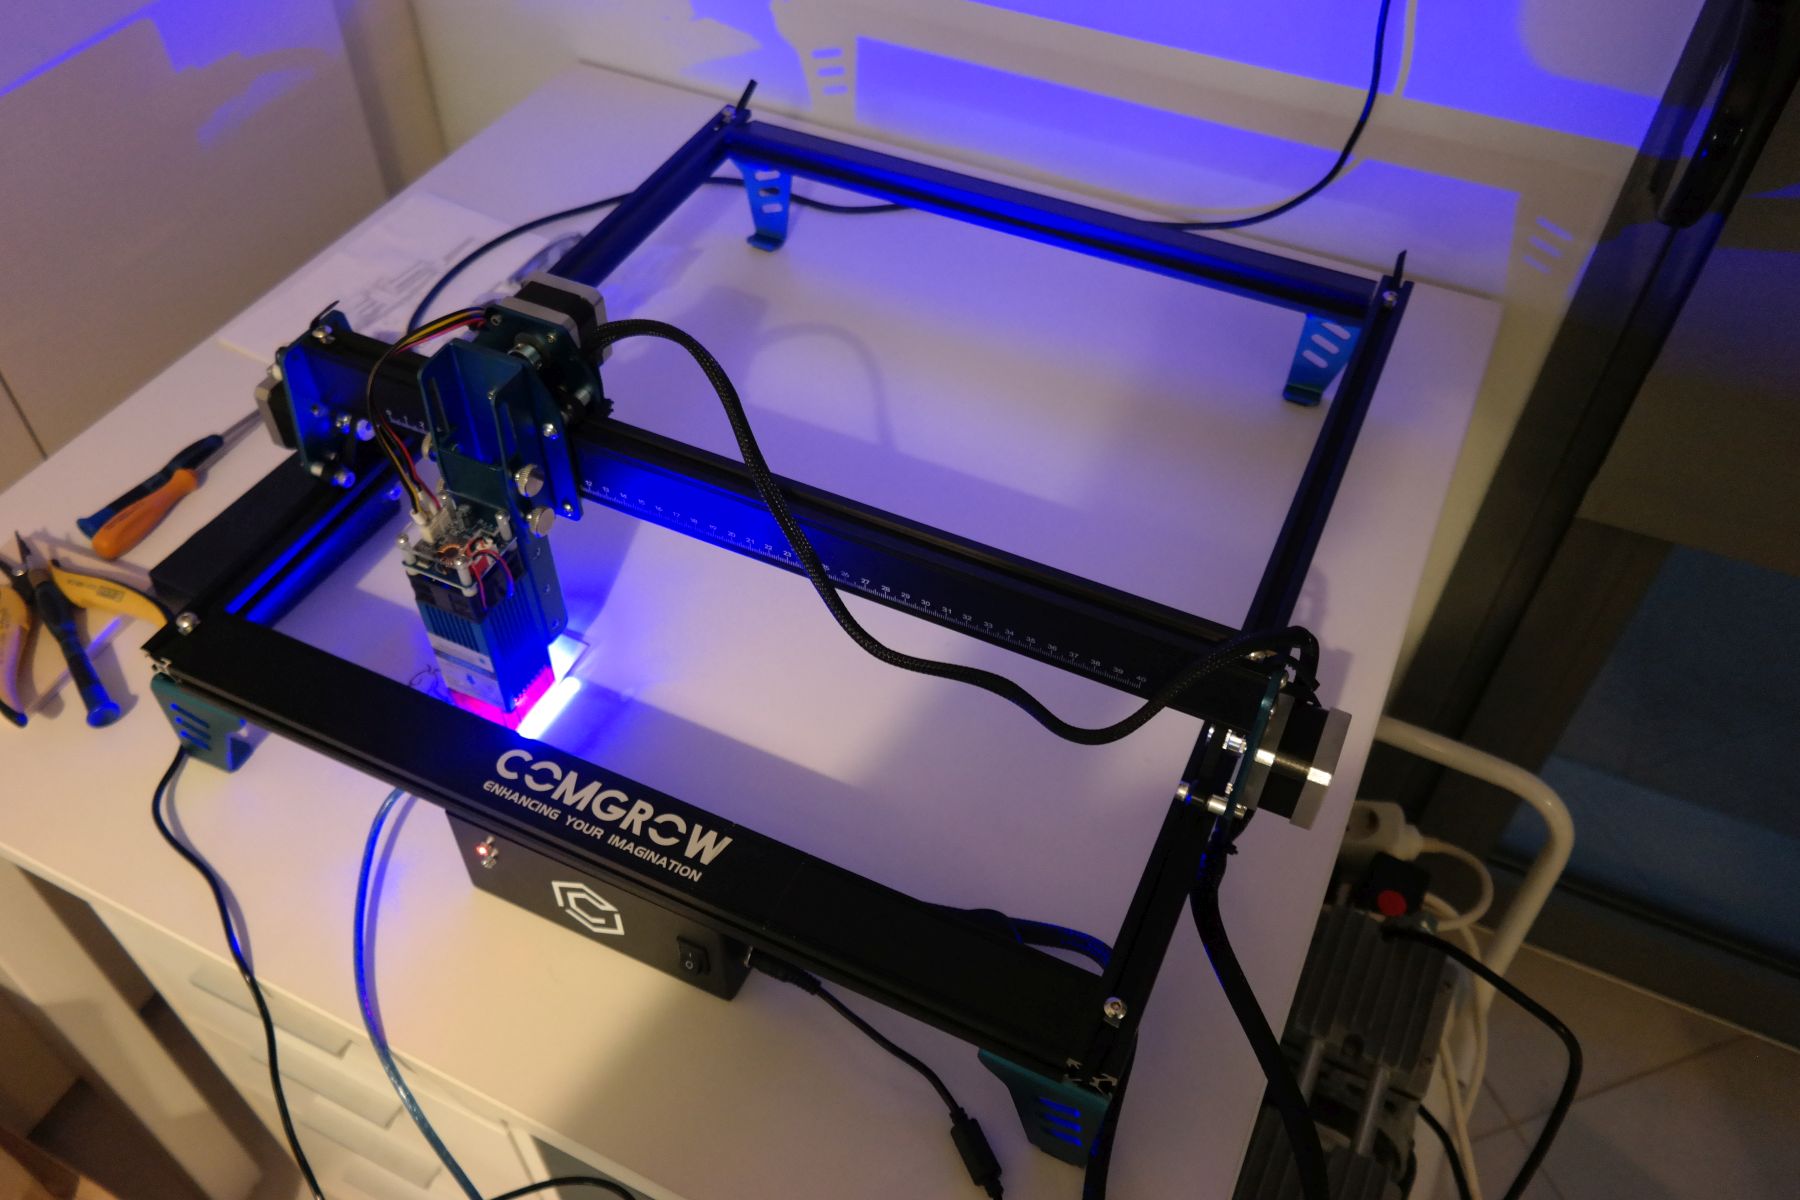
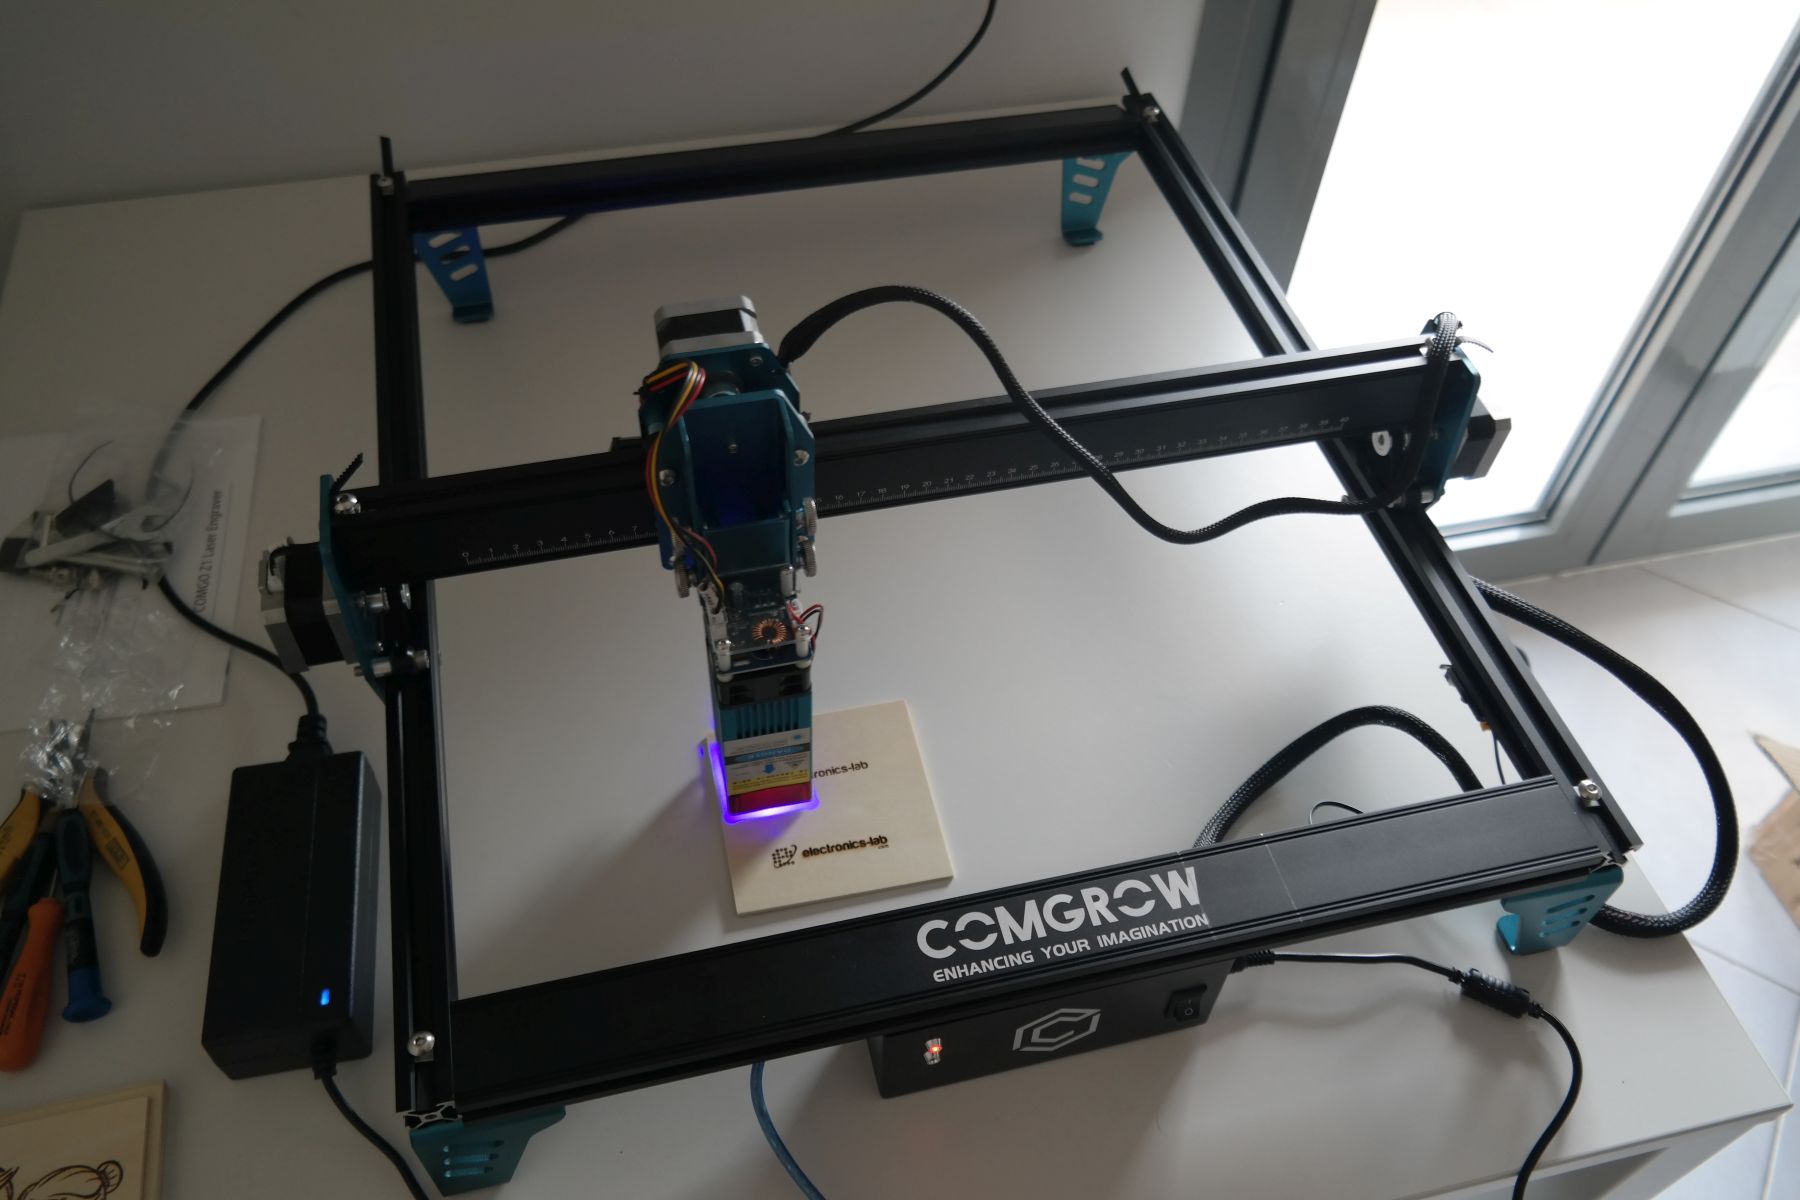
Laser engravers/cutters like 3D printers are bringing small-scale manufacturing closer to makers and hobbyists. As the technology advances, the competition between companies making them is getting stiffer, leading to the market being flooded with different types and makes, making it difficult for the average maker/hobbyist to select one. To simplify decision-making for readers, our review articles help spotlight top-of-the-line products/tools that we have enjoyed using, and for this article, in the spirit of laser engravers, we will be reviewing the COMGO Z1 desktop diode laser engraving machine from additive manufacturing solutions expert COMGROW. This is a China-made laser engraver with a simple design approach, consisting of 4 x aluminum bars and 4 x legs, a pre-assembled Y-axis with the two motors, a 5W laser module, and the USB control unit.
Intro Video
Unboxing
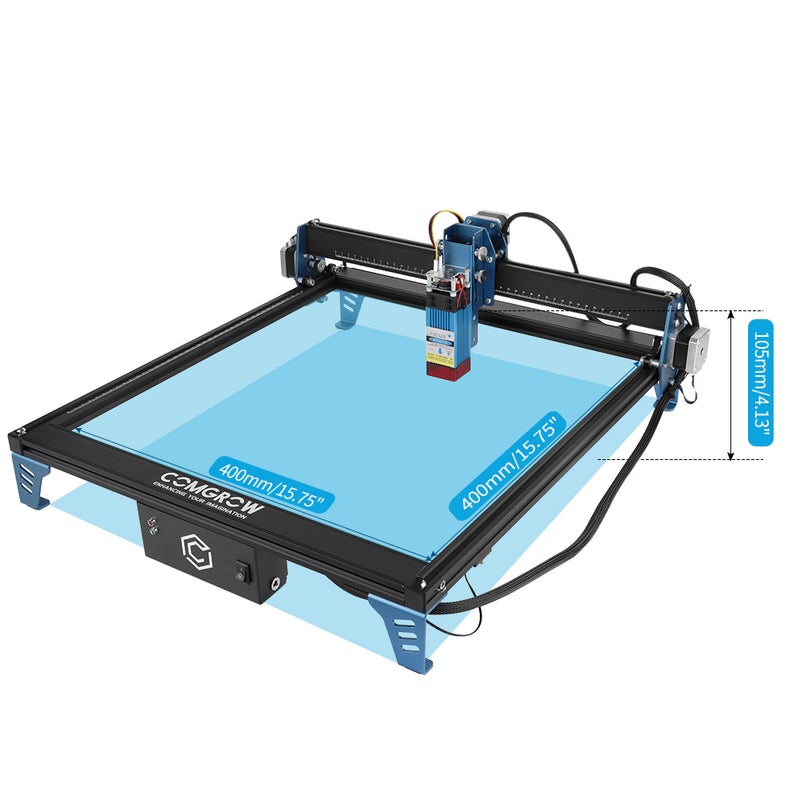
Packaged as a pre-assembled kit comprising of four profiles which when put together gives a 400 x 400mm working area, the COMGO Z1 is a quick setup laser engraver designed to provide hobbyists, makers, and DIY enthusiasts with a pocket-friendly Laser engraver with top of the line performance and features.
Package Contents:
- 4 x aluminum frame bars with screws
- Y-axis pre-assembled
- 5W laser module with FAN and control PCB
- 4 x aluminum stands/legs
- USB Control Unit supporting LaserGRBL Software
- USB cable
- Power Supply with power cord
- Safety Glasses
- SD Card – preloaded with reading material and software
- SD Card – USB adaptor
- Sample Wood Pieces (10×10 cm)
- 2 x Silicon Belts
- Misc Small accessories and screws
- Manual – Click to download the latest PDF manual
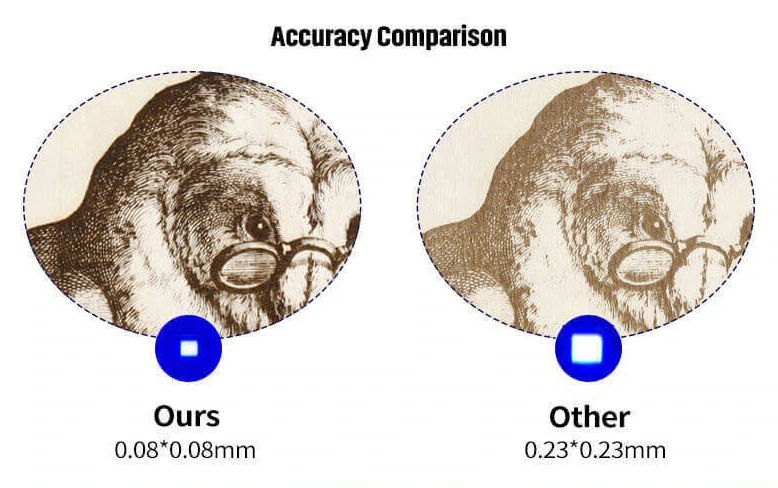
Featuring an LD+FAC-based diode laser, it’s a big contributor to the standout features and performance of the COMGO Z1 is its laser head. The Z1 uses a 5W (upgradeable to 10W) high-power compression laser head, with an incredibly accurate, 80 um (0.08 x 0.08mm) laser spot diameter which creates room for a wide range of tint and burns, altogether making it possible to accurately cut and engrave a wide range of materials such as aluminum (like 7075-T6), plywood, kraft paper, leather, plastic, cardboard, wood, non-woven fabric, bamboo, acrylic, film-coated glass, and many more, at a great speed and accuracy.
Assembly
The assembly process took us about 30-45 minutes to complete following the draft instructions on the small manual that came in the box. First, you need to attach the 4x aluminum bars together forming a large rectangle, and secure them with the available screws. At first, you will find yourself questioning which side goes up and which is back or forth as these details are not clear on the manual photos. This is important to note the company’s logo should face up and be to the front, the scale should be face to top and be on the left side and the limit switch should be placed on the right side and close to the front section (the one with the logo). After some trials and errors, we managed to assemble the frame successfully. Then we took out the pre-assembled Y-axis and rolled it from back to front so that it locks between the bars and be able to freely move. The next step was to place the 2 x silicon belts in the cavity of the left/right bars and secure them with some screws. Then we passed the belts on the stepper motors and tested the movement of the Y-axis to be smooth. Be careful to connect the stepper motor cables to each of the motors as these come disconnected. Next, was time to attach the laser module. This was easy enough using 2 x screws and securing on the Z-axis. Some attention must be taken to attach the cables on the laser module and this is not clearly indicated on the manual and these connectors are polarized. Check the photo below to see how these have to be connected.

UPDATE: A more detailed manual is available as a PDF download.
Features
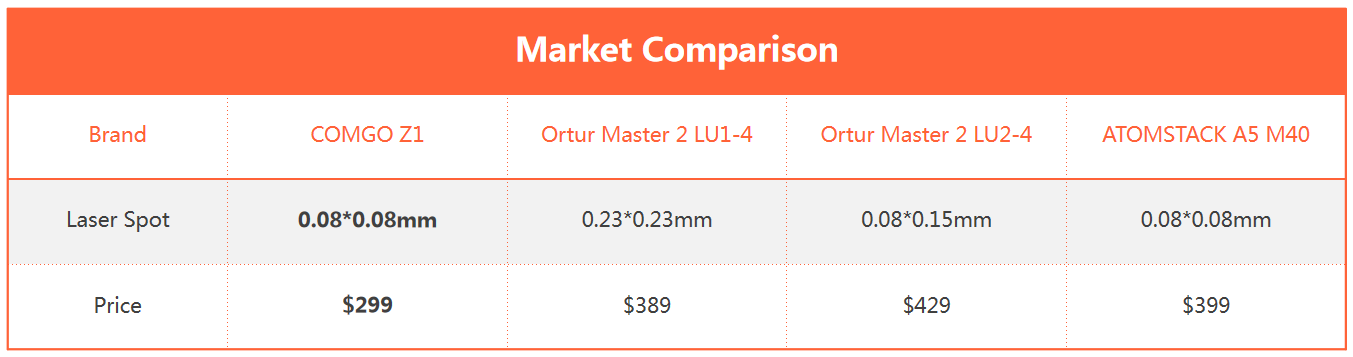
With up to 5000mm/min speed and accuracy of the COMGO Z1 is further enhanced by the use of high-performing dual Y-axis motors which ensure the Y-axis is extremely smooth and mobile, translating to high-speed engraving and increased project stability and accuracy. This great cutting power, accuracy, and support for a broad range of materials place the COMGO Z1 significantly above and beyond other “cheap”, hobbyist engravers (like the Laster Master 2 and AtomStack A5) in its class/price bracket.
The table shows how the COMGO Z1 compares to similar popular laser engravers in terms of speed and price:
Seemingly engineered with the desire to address regular hassles that are experienced when using laser engravers, there are many good things to say about the COMGO Z1. For starters, it features an innovative 20/45mm fixed focus design for setting with an adjustable laser height. The typical unhealthy practice of putting your fingers on the laser to adjust the focus is no longer necessary, as all you need to do is loosen the adjusting screw on the side and place the height block on top of the surface that is going to be engraved. Lower the laser, tighten the screw, and you should be all set. The COMGO Z1 also features a safety anti-tilt system that generates an alarm and interrupts carving/cutting when the bed is not balanced. This helps ensure safety and reduce distortion in cutting or engraving, leading to high-quality outputs. The sensitivity of the sensor can be adjusted to match the requirements/nature of the surface on which the platform is based.
Highlights
- Strong Diode Laser: The COMGO Z1 diode laser uses LD+FAC technology that leads to an 80 um laser spot that gives a wide range of possibilities. More powerful laser units are available as an upgrade
- Upgrade Unit: While the 5W laser may suit the most daily engraving, the optional 10W high-power laser module, provides engraving to more difficult materials like anodized aluminum alloy, mirrored stainless steel, carbon steel, curved moving pictures, glass, and so much more.
- Dual Y-axis Motor: The Y-axis is extremely smooth and accurate thanks to the dual-stepper motor design on both sides.
- Fixed Focus: Focus is 20mm for the 5W module and 46mm for the 10W one. To adjust focus you just have to un-tight the laser module screws and place the module close (20mm) from your material (5W version)
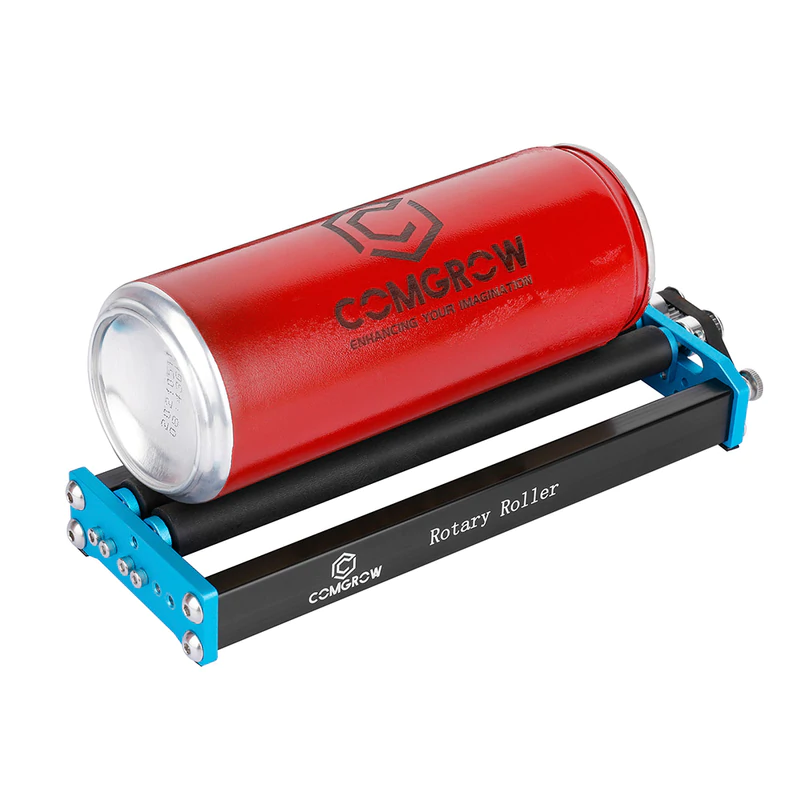
- Support Expansion: The device also allows you to upgrade to a rotary roller which is perfect for engraving tumblers and cylindrical objects! It has a stable design for multiple diameters of objects. Spacing between the two rotary axes ranges from 17mm/6.6″ to 33mm 1.2″.
Software

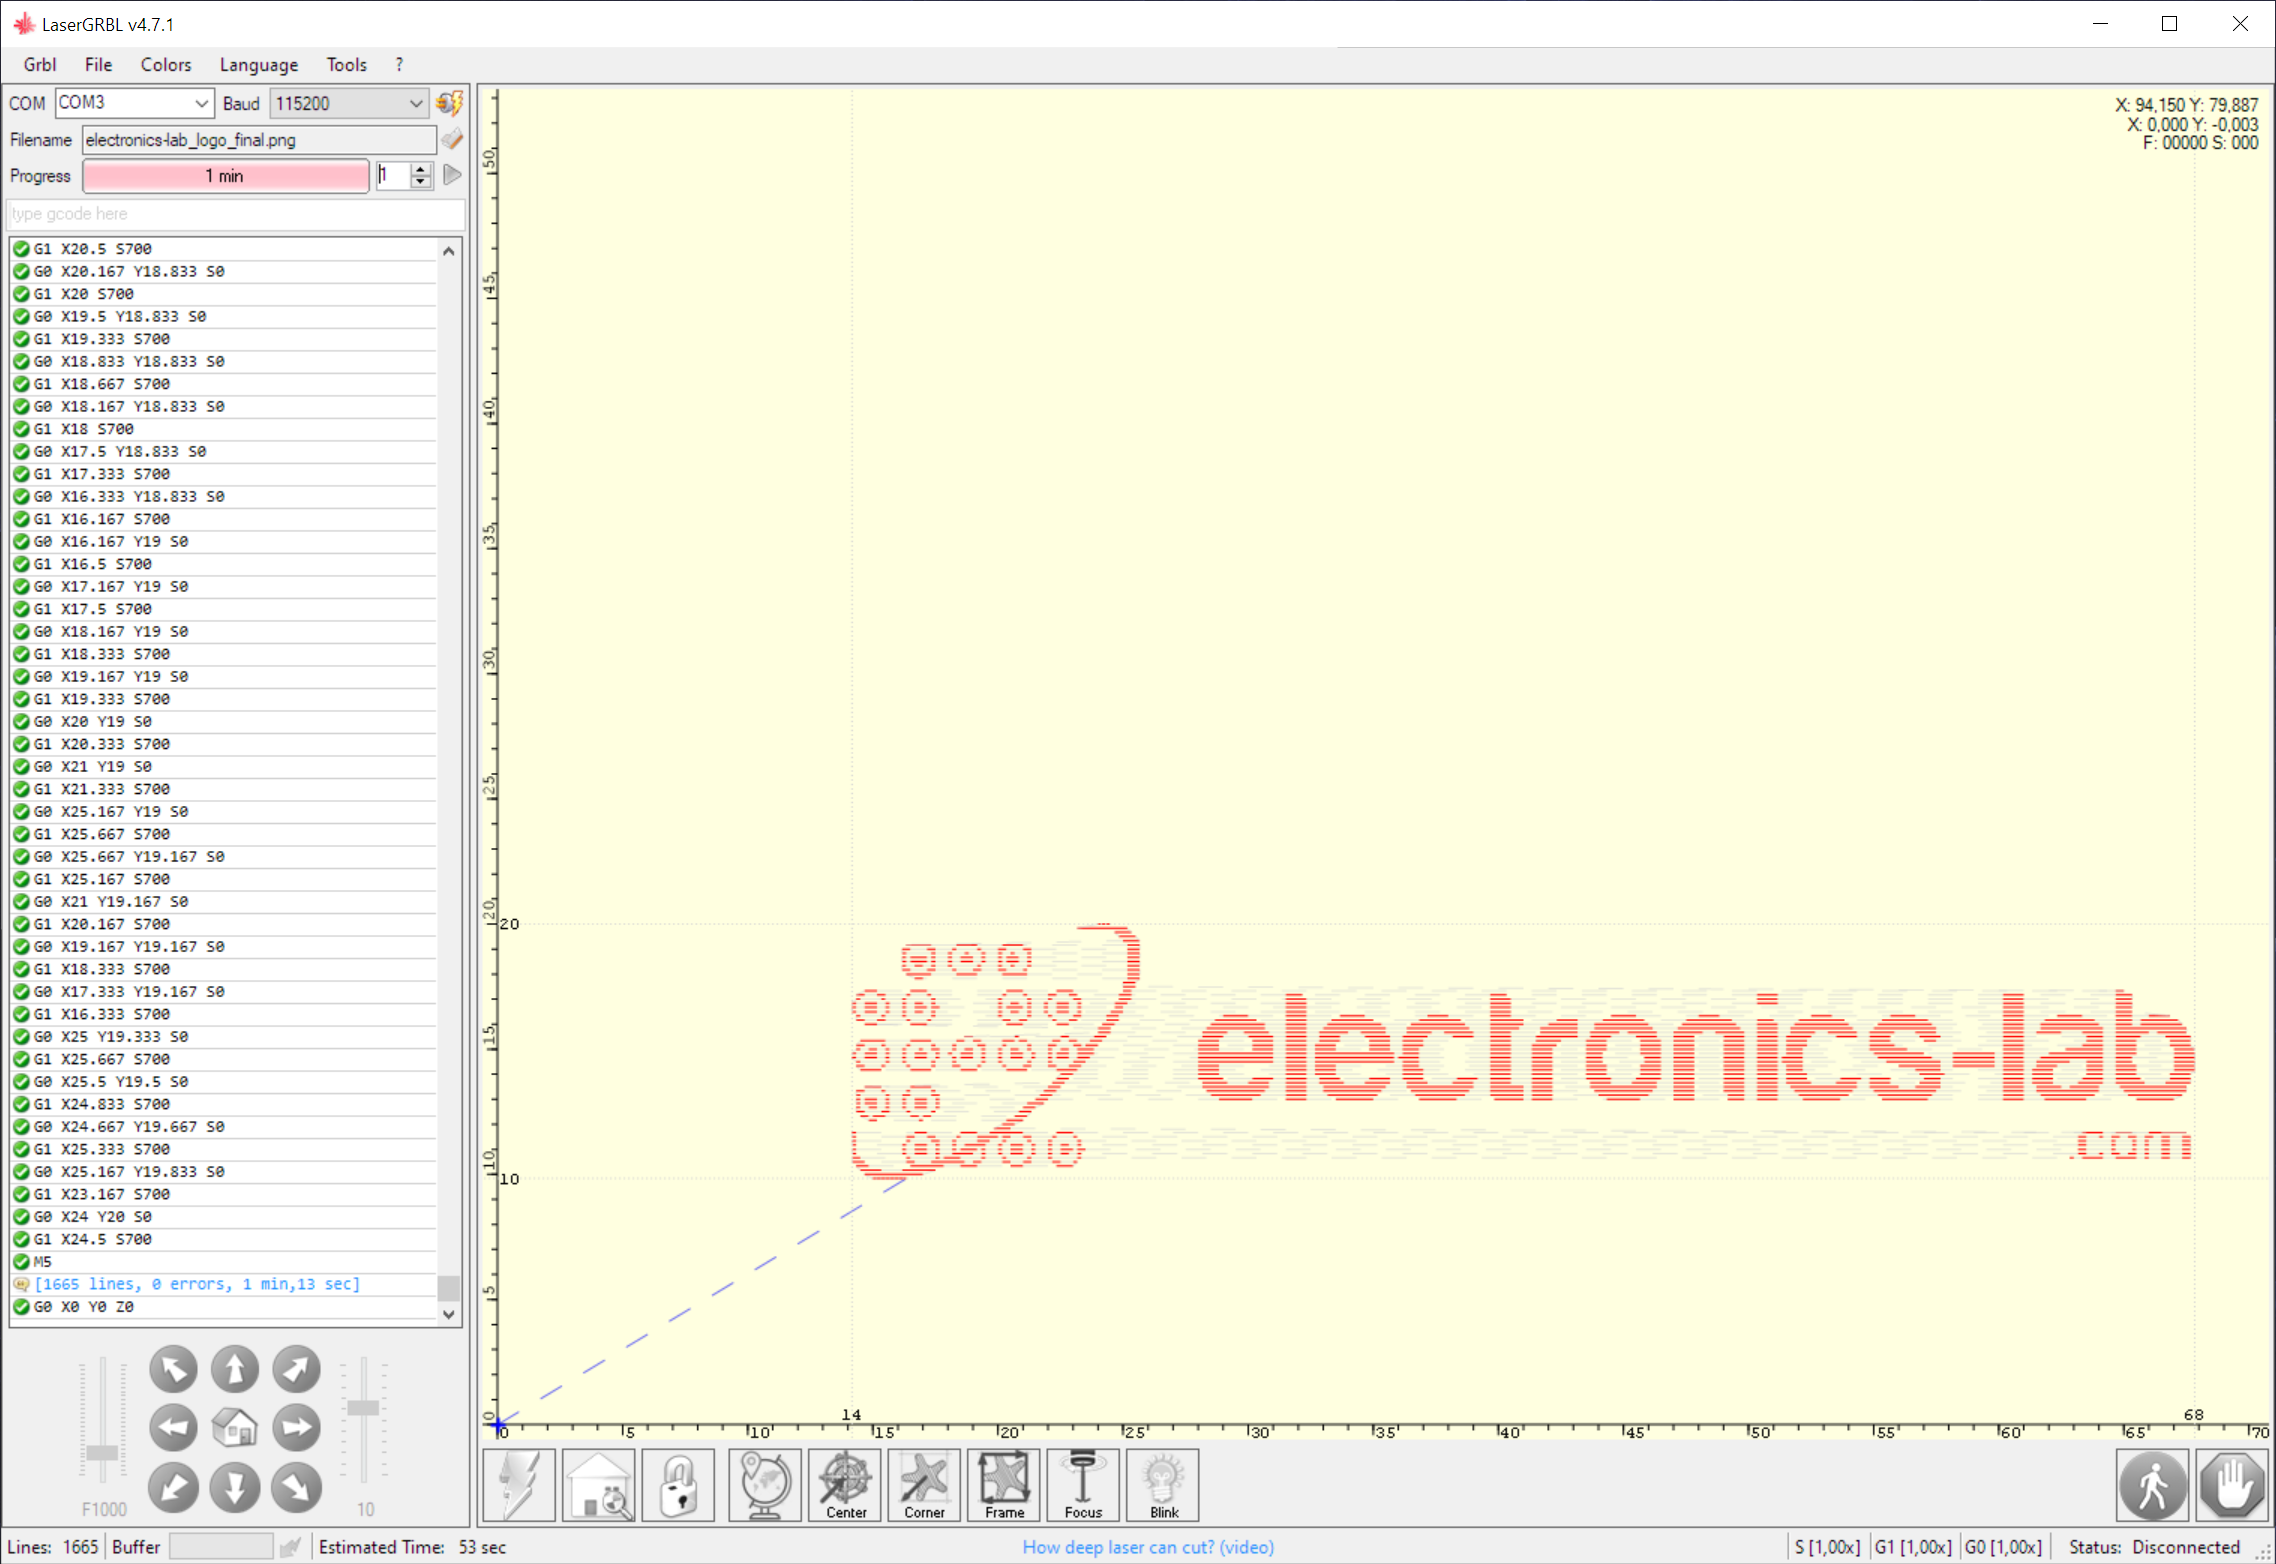
The COMGO Z1 supports both Windows and Mac systems. We will focus on the Windows software proposed in the manual which is the open-source and popular LaserGRBL. This is the basic software that seems to do the job. There are no fancy icons or user interfaces, as you can see on the screenshot above. At the first launch, you will have to go to Tools -> Install CH340 Driver so that the software will be able to communicate with your laser engraver over a USB connection. Then connect the USB cable and power on the device. Please note that in case you have connection issues, it’s advisable to do a firmware update based on the instructions on the attached link. Then click on the connect icon which is located next to the preset Baud Rate of the serial to USB bridge. Baud should be 115200bps.
If everything is fine your engraver should connect to the software and you are ready for your first print. Click the icon below the connect icon and load one of the provided graphics. A popup window will show up with some parameters to set up, then click next and be sure to define the size of the image based on your material to be burned.
You will need to move the laser module to the edge of your material, align the material and click on Define the zero point. Then you are ready to click the Play icon and start the engraving process. You may find yourself that you need to do some tests and trials and errors before you manage to print your first image. It needs some experience to make this work on the first try. Take your time to learn how the software works and be sure you will successfully make your first burn.
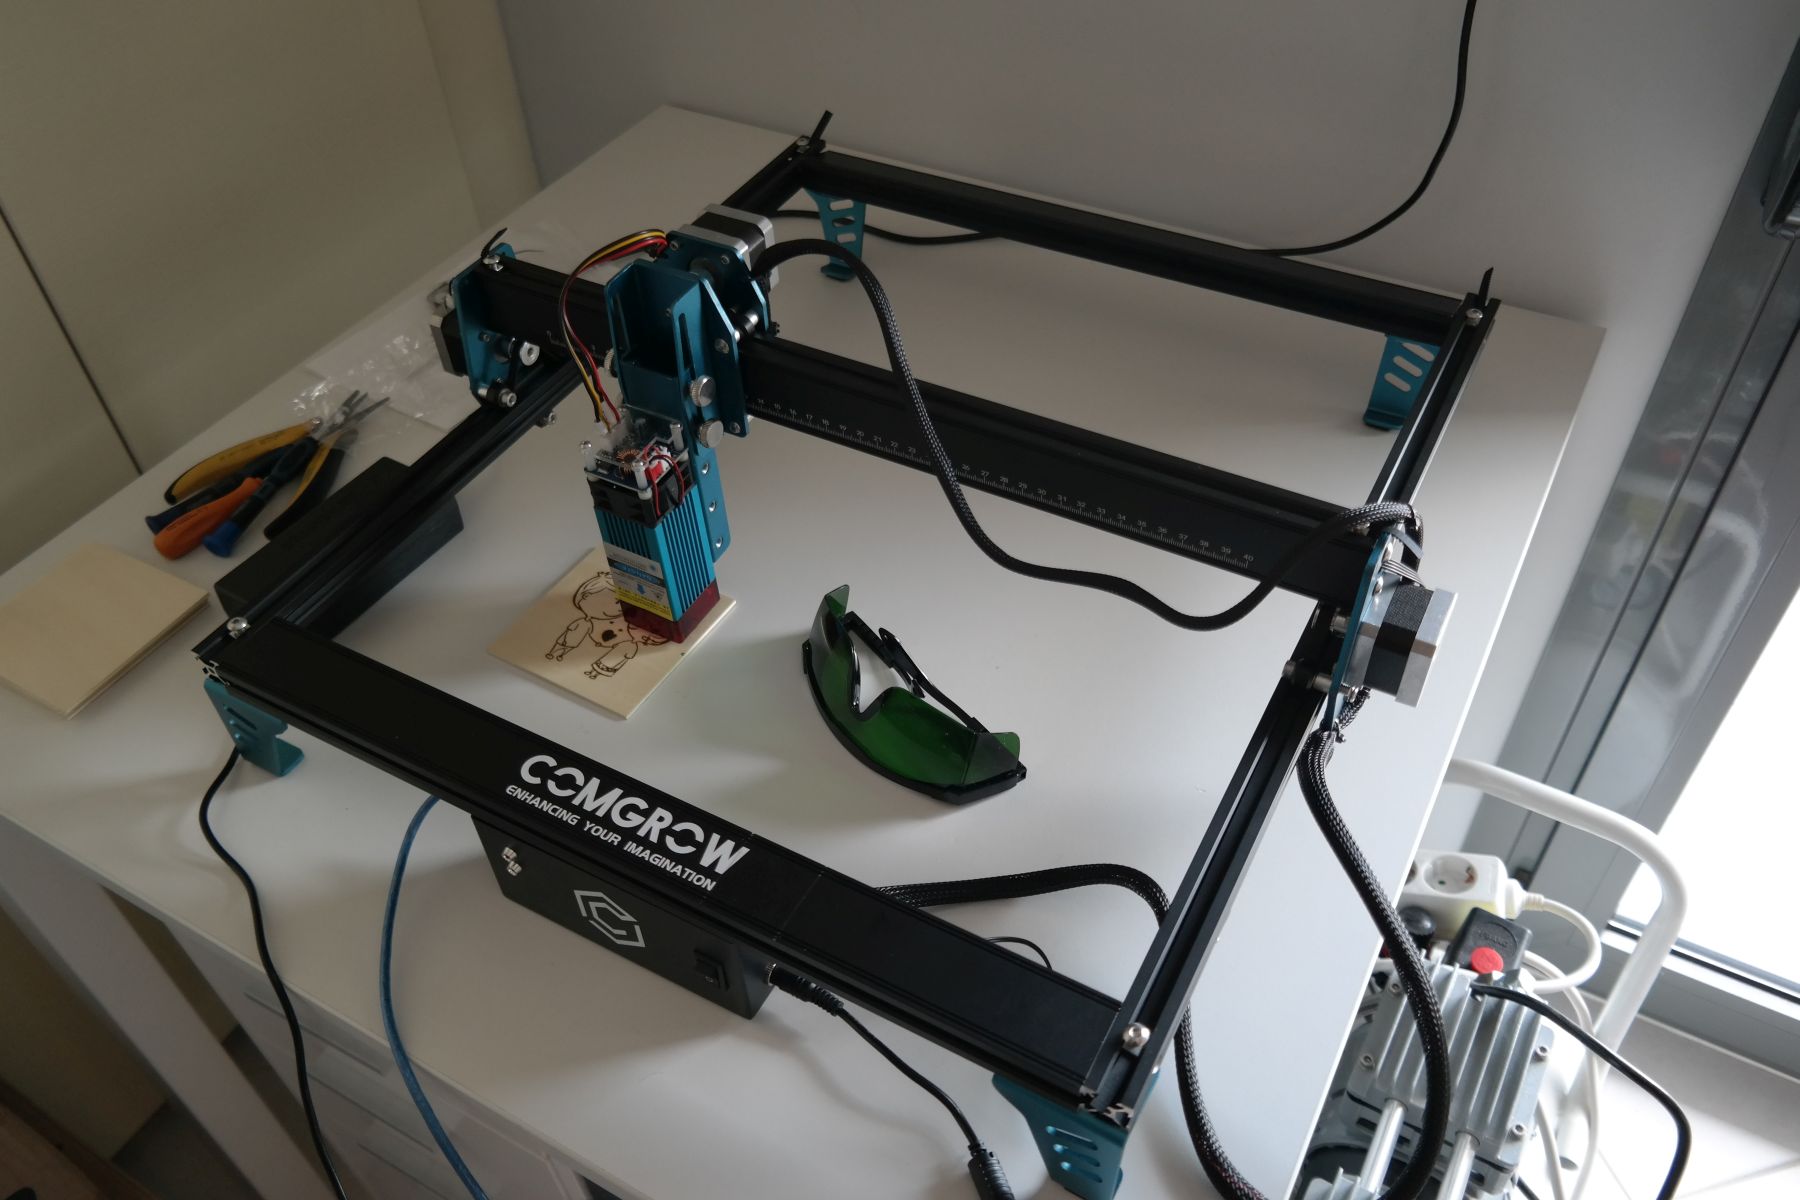
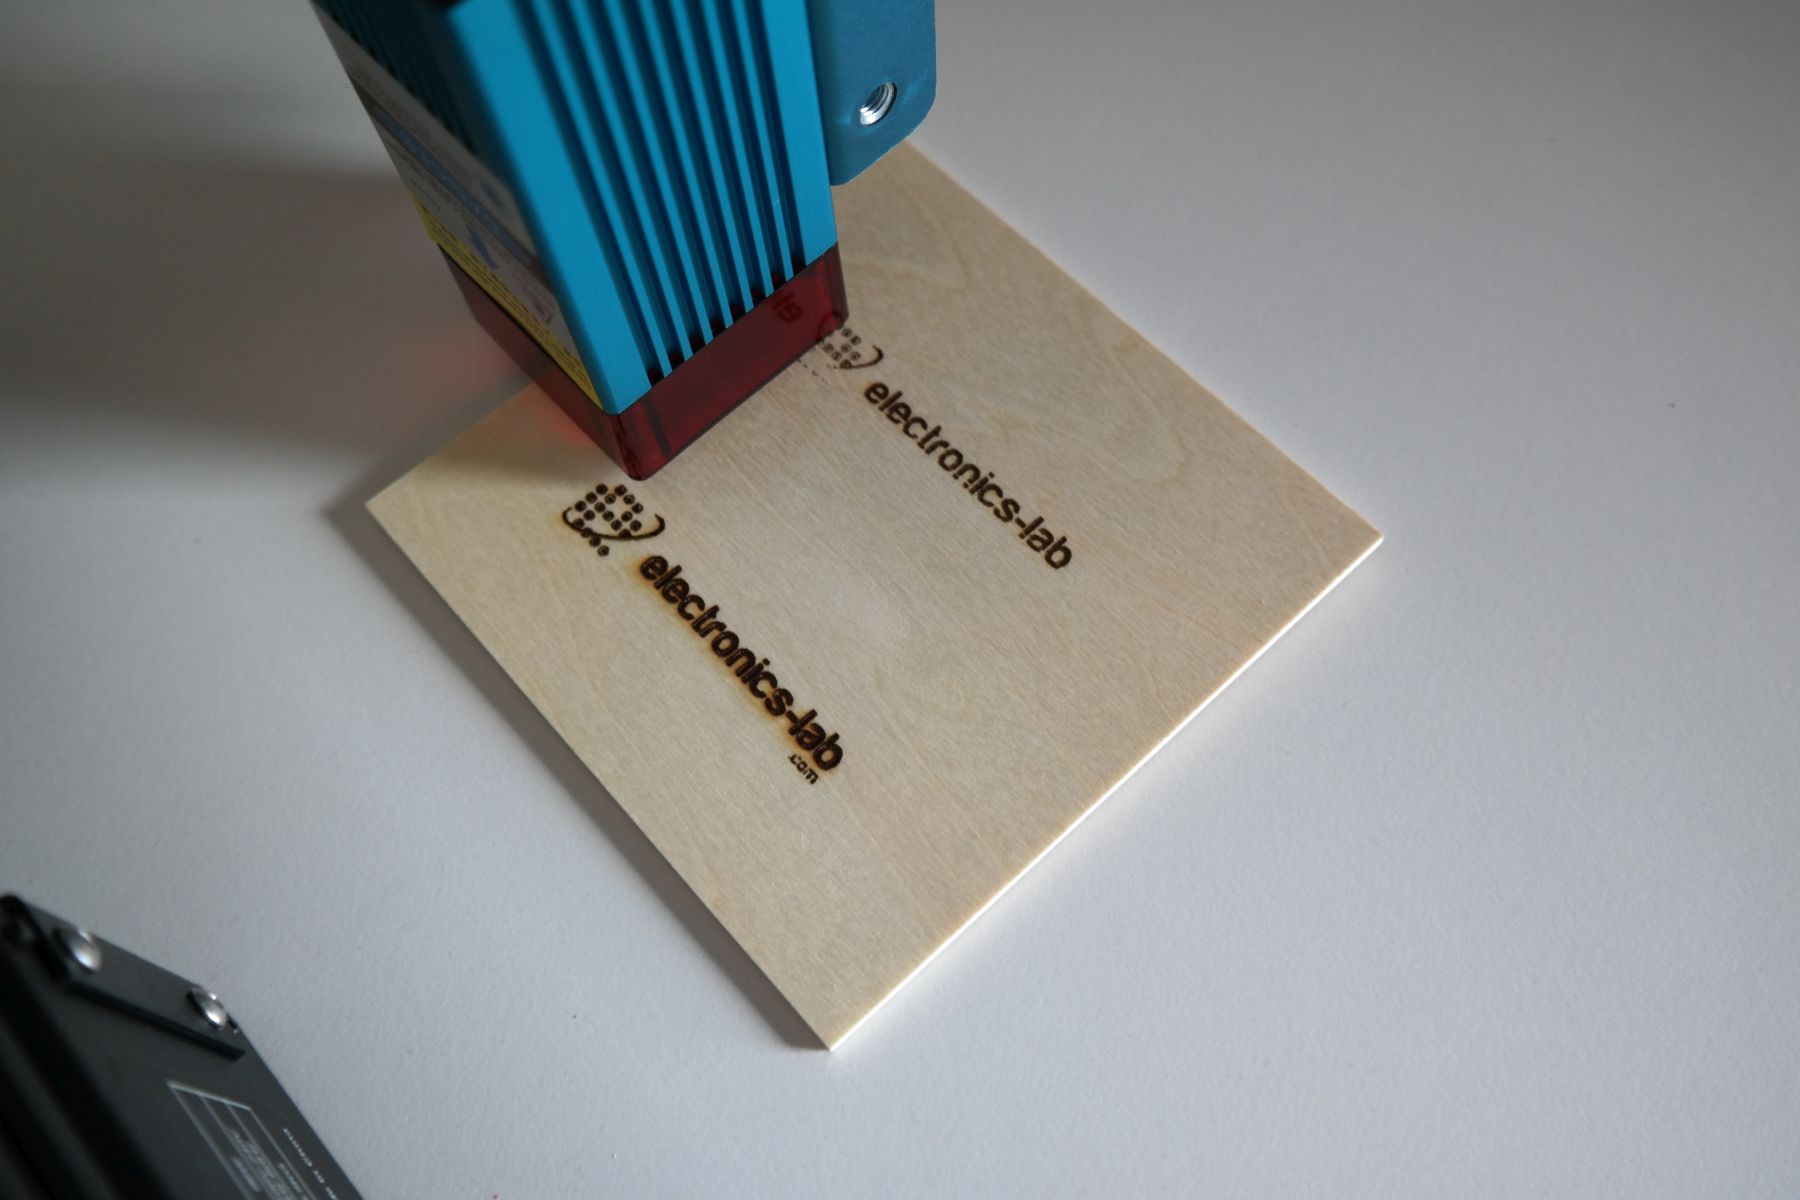
Sample Engraving
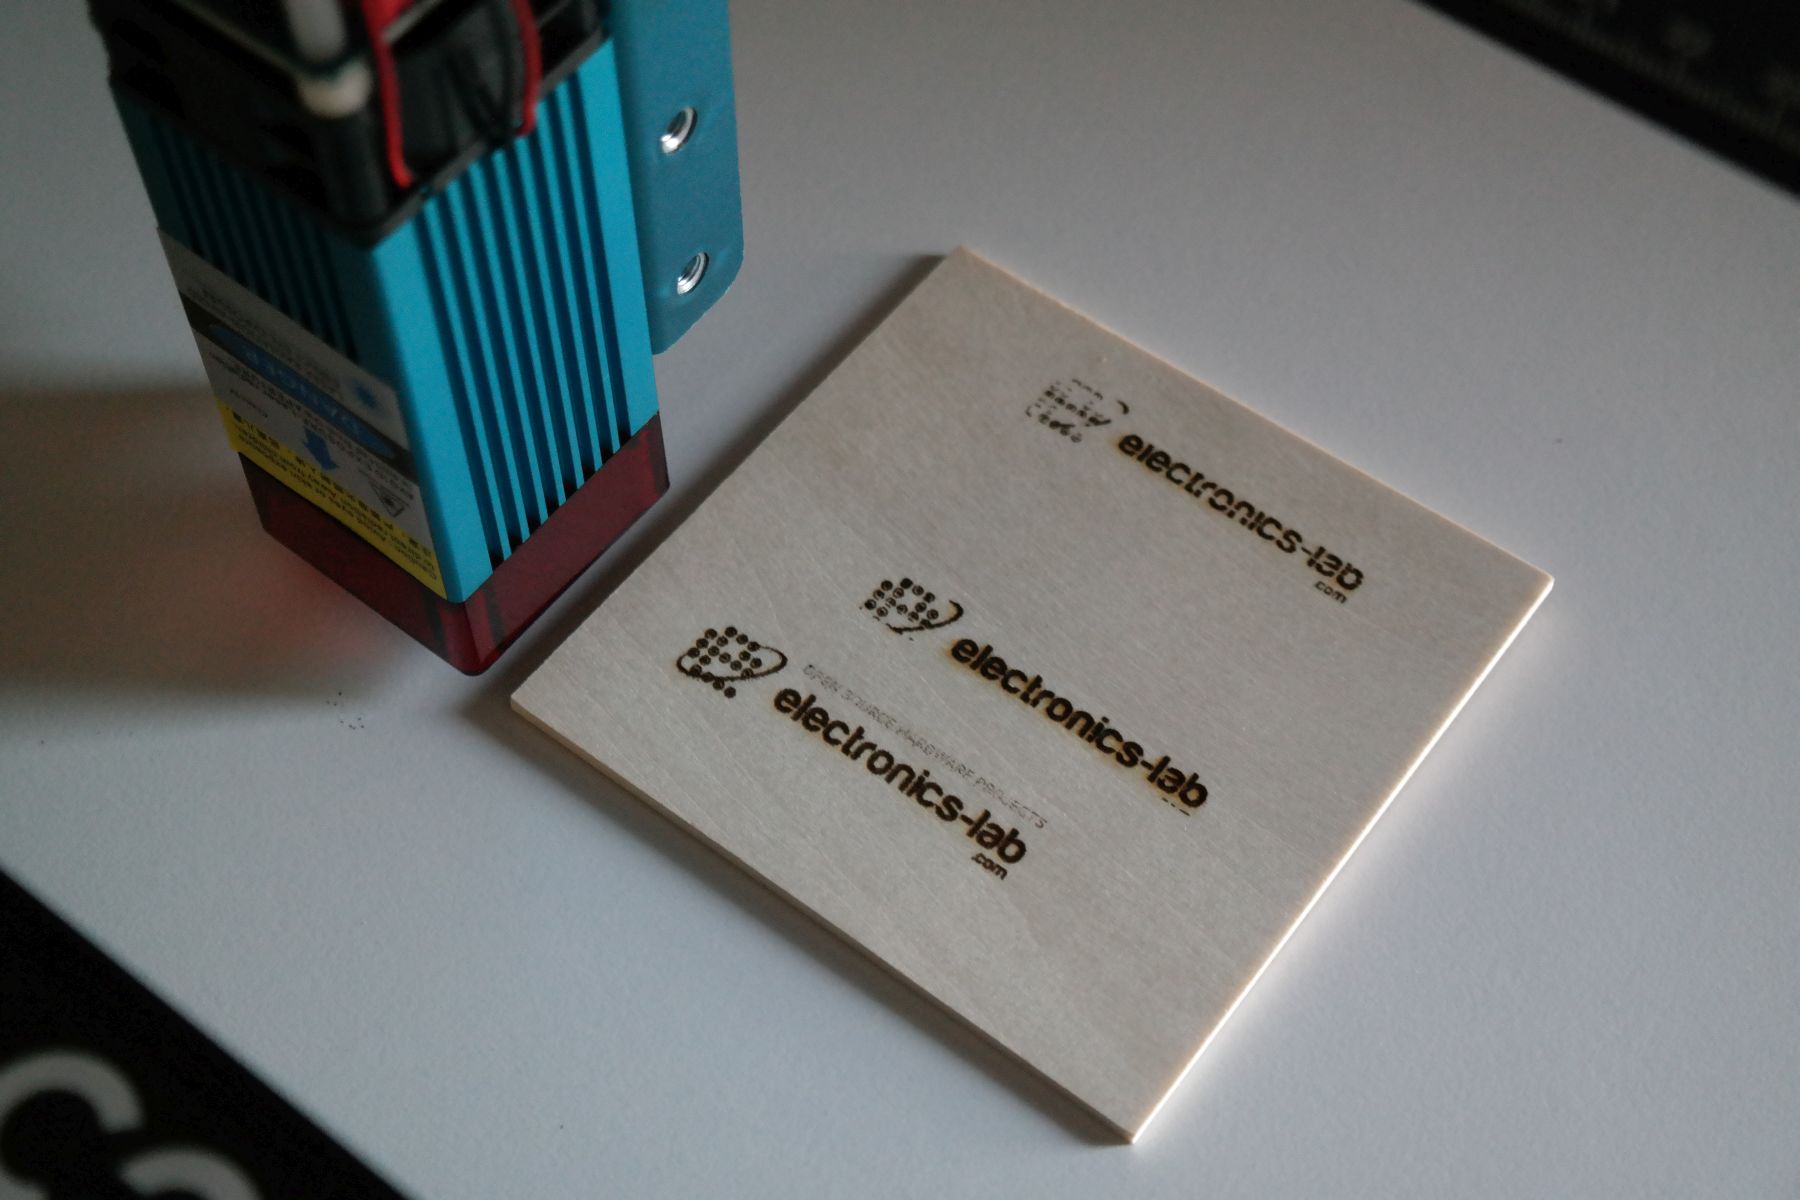
To test the COMGO Z1 Wood Laser Cutter Engraver, we loaded our logo on the LaserGRBL software, set up some parameters on the window opened and then it’s was time to align the material with the zero point. After that, we push the GO button and the engraving started right away. To etch our logo on the small wood piece a few minutes was all that it needed. You will notice that you may need to experiment with the software parameters in order to achieve the best result. One important parameter is laser power. As you can see in the photo below the laser power was to the max and that resulted in an overburn engraving. On the second engraving above we set the laser power to 50% and the letters were etched better but not the logo itself. This means that we need to experiment more with the LaserGRBL software to find the ideal settings.
Video
Upgrades
Another notable thing about the COMGO Z1 is the available upgrades. Thanks to COMGROW’s large ecosystem devices, the capabilities of the Z1 can be further enhanced with a variety of superb upgrades. For example, the 5W laser head can easily be replaced by a 10W version which brings in more cutting and engraving power. Feature upgrades can also be achieved by using add-ons like the COMGROW Laser Rotary Roller Engraving Module which allows users to engrave on/around round and cylindrical objects. as big as the travel size as the Z1.
Conclusion
The COMGO Z1 is a solid machine built from aluminum material and the overall construction is good. The travel speed of the axes is fast enough so you don’t have to wait too much for a task to be accomplished and engraving speed is quite satisfactory considering the overall size of the machine. Regarding the engraving quality, this is strongly dependent on the software parameters your choose. Trial and error are necessary to achieve good results. So take your time to experiment.
Buy
While the standard price is 299USD, the COMGO Z1 is currently available for sale on COMGROW’s website for USD259, at a 13% discount. Shipping is offered from the USA, Europe, and China, so you can select your preferred location.
More
More information on the COMGO Z1 alongside video reviews from other users can be found on the product’s page on COMGROW’s website


Nice explanation. But the price is too much high. Can you please suggest me alternative?