New Arduino-compatible Music Visualizer board based on ATmega328p-au makes music really beautiful
Music and Electronics end up beautifully when they are perfectly combined: if you are looking for a way to synchronize RGB LEDs to music, then you have a new tool in your hands. After releasing a detailed DIY report on how to create a music visualizer with an Arduino Uno and a Sparkfun Spectrum Shield, “justcallmekoko” goes a step further to build an Arduino compatible music visualizer powered by an ATmega328p microcontroller.
Music and Electronics end up beautifully when they are perfectly combined: if you are looking for a way to synchronize RGB LEDs to music, then you have a new tool in your hands.
After releasing a detailed DIY report on how to create a music visualizer with an Arduino Uno and a Sparkfun Spectrum Shield, “justcallmekoko” goes a step further to build an Arduino compatible music visualizer powered by an ATmega328p microcontroller. Courtesy of the 255 RGB LEDs, the new music visualizer makes creating awesome light effects with sound possible; the board generates visual RGB effects on a matrix of WS2812B LED strip.
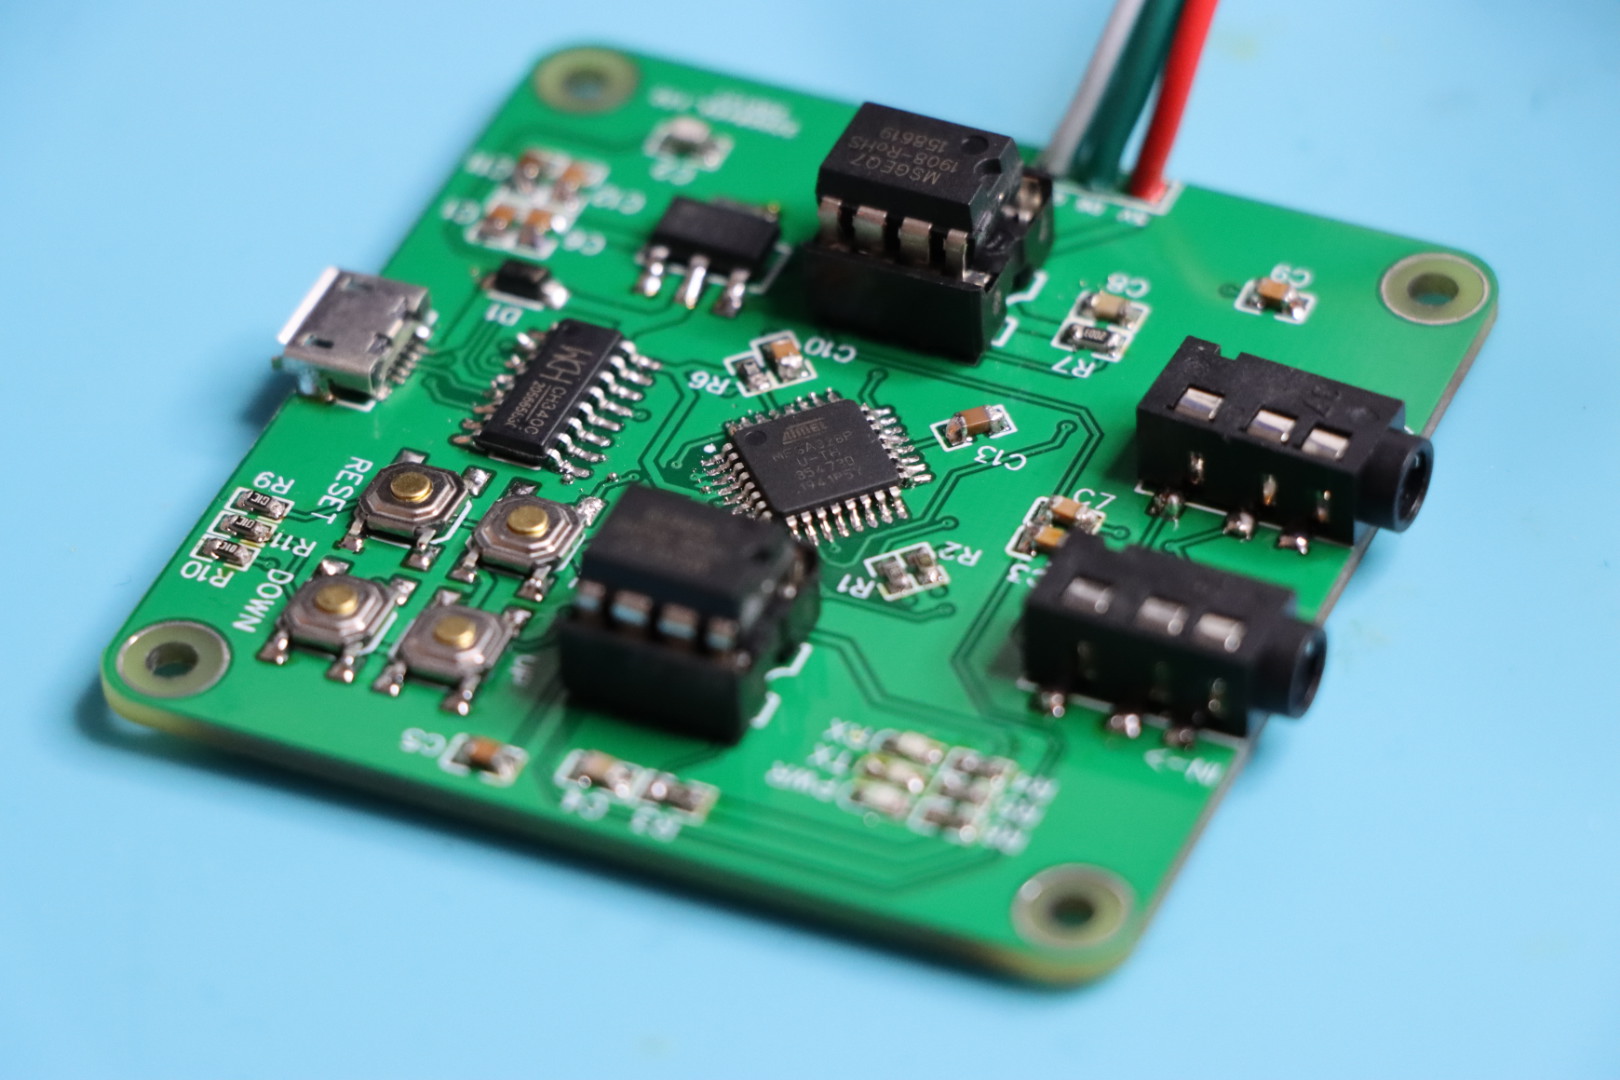
“I love Arduino, but I also love making things as simple and intuitive as possible. For these reasons, I have designed the Arduino compatible Music Visualizer based on the ATmega328p-au. It is the single board version of the original Arduino Music Visualizer from my previous project with a few other changes. Rather than using the FastLED library, I have employed the Adafruit NeoPixel library which made for some more simple code in the end. I have opted for the surface mount version of the ATmega328p for a more compact package. There is no need for any soldering or jumper wires as the connections between the spectrum analyzer, Arduino and RGB strip are already included on the board. Pretty much, this project is as plug and play as possible”, says Koko.
With configurable reaction intensities and small footprint in-line between audio source and speakers, the Arduino compatible music visualizer is described as being “special”.
Key Features of the compact board include:
- MCU : Atmel ATmega328p –au
- 2x MSGEQ7 audio spectrum analyzers for right and left audio
- Hardware Protector: 3D printed enclosure
- Pre-soldered RGB JST connector
- Onboard Cycle Button used to navigate through a variety of pre-programmed visualization patterns
- Reset button
- Micro USB port for power
- 3.5mm audio jack
Meanwhile, this new board from Koko alongside the 3D printed enclosure is already on sale on his Tindle store at $35.
“There are no extra wires needed and no extra boards or shields to add. You simply connect your WS2812B strip to the pre-soldered JST connector, plug in your audio source and speaker to the 3.5mm jacks, and plug in a micro USB cable for power”.
More on the schematics, source codes, design files, and usage are also available on his Github repository.


